Preparations
Before you can assemble the robot it makes sense to prepare some parts.
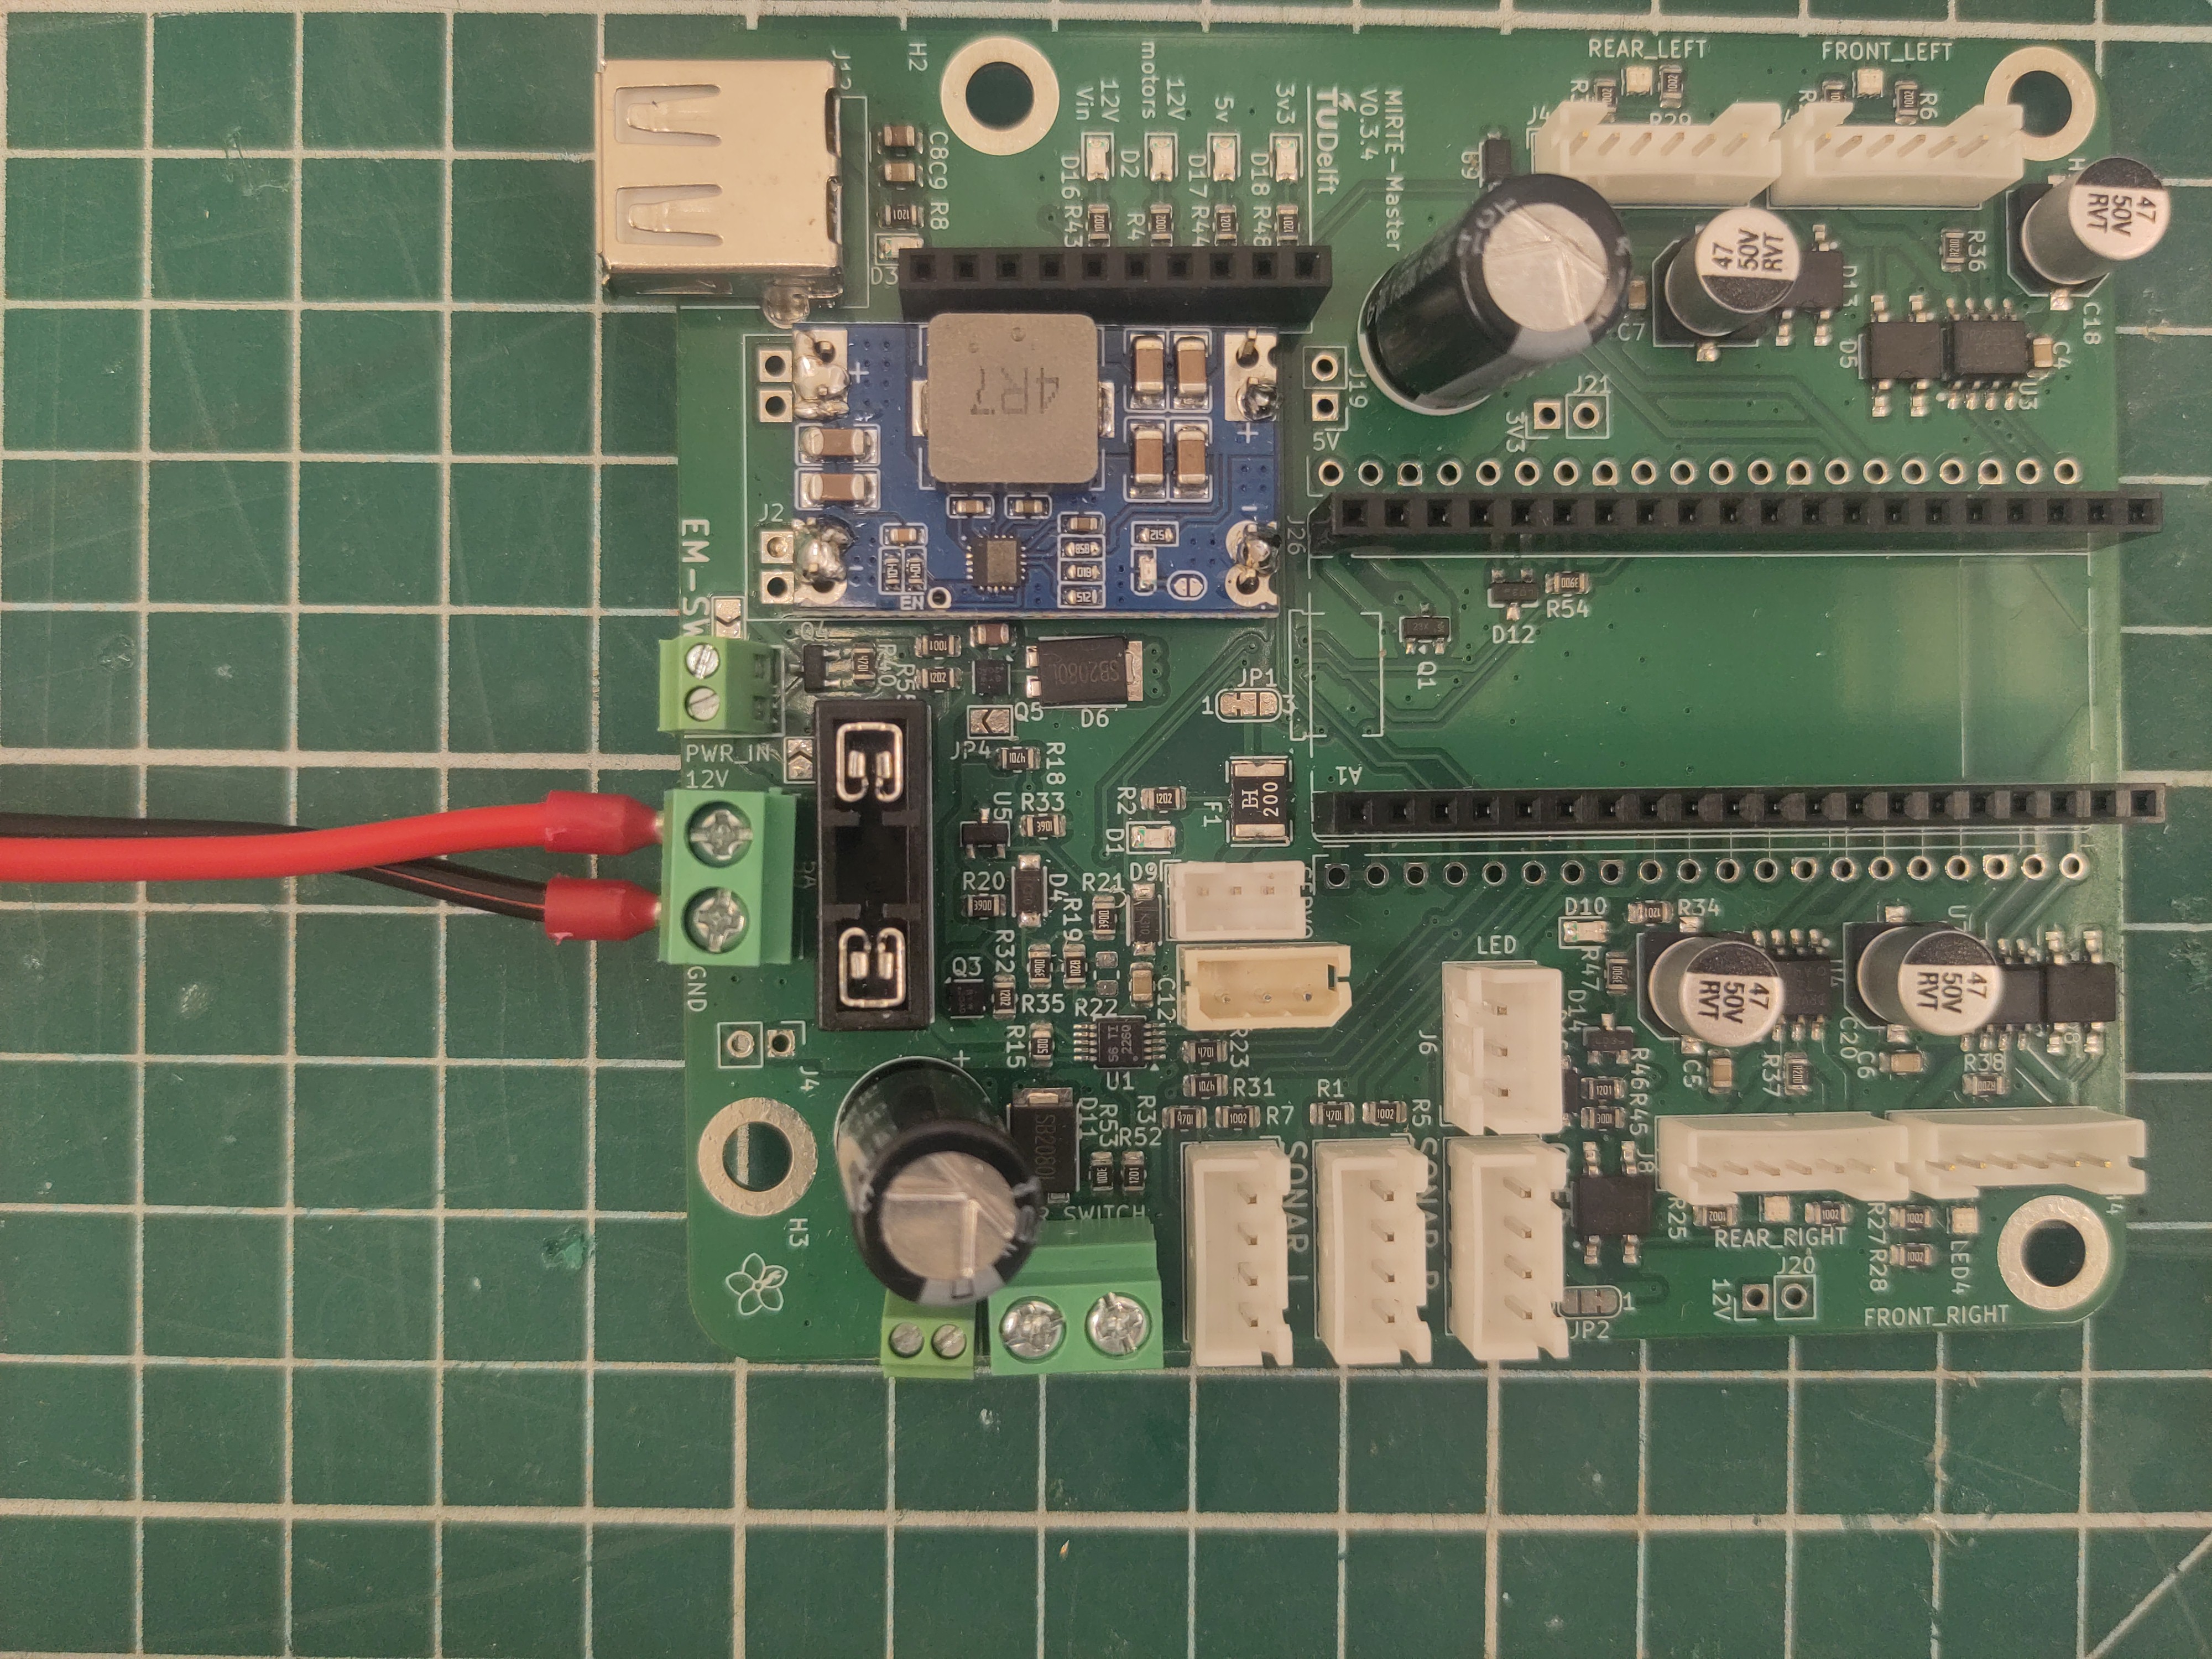
MIRTE PCB
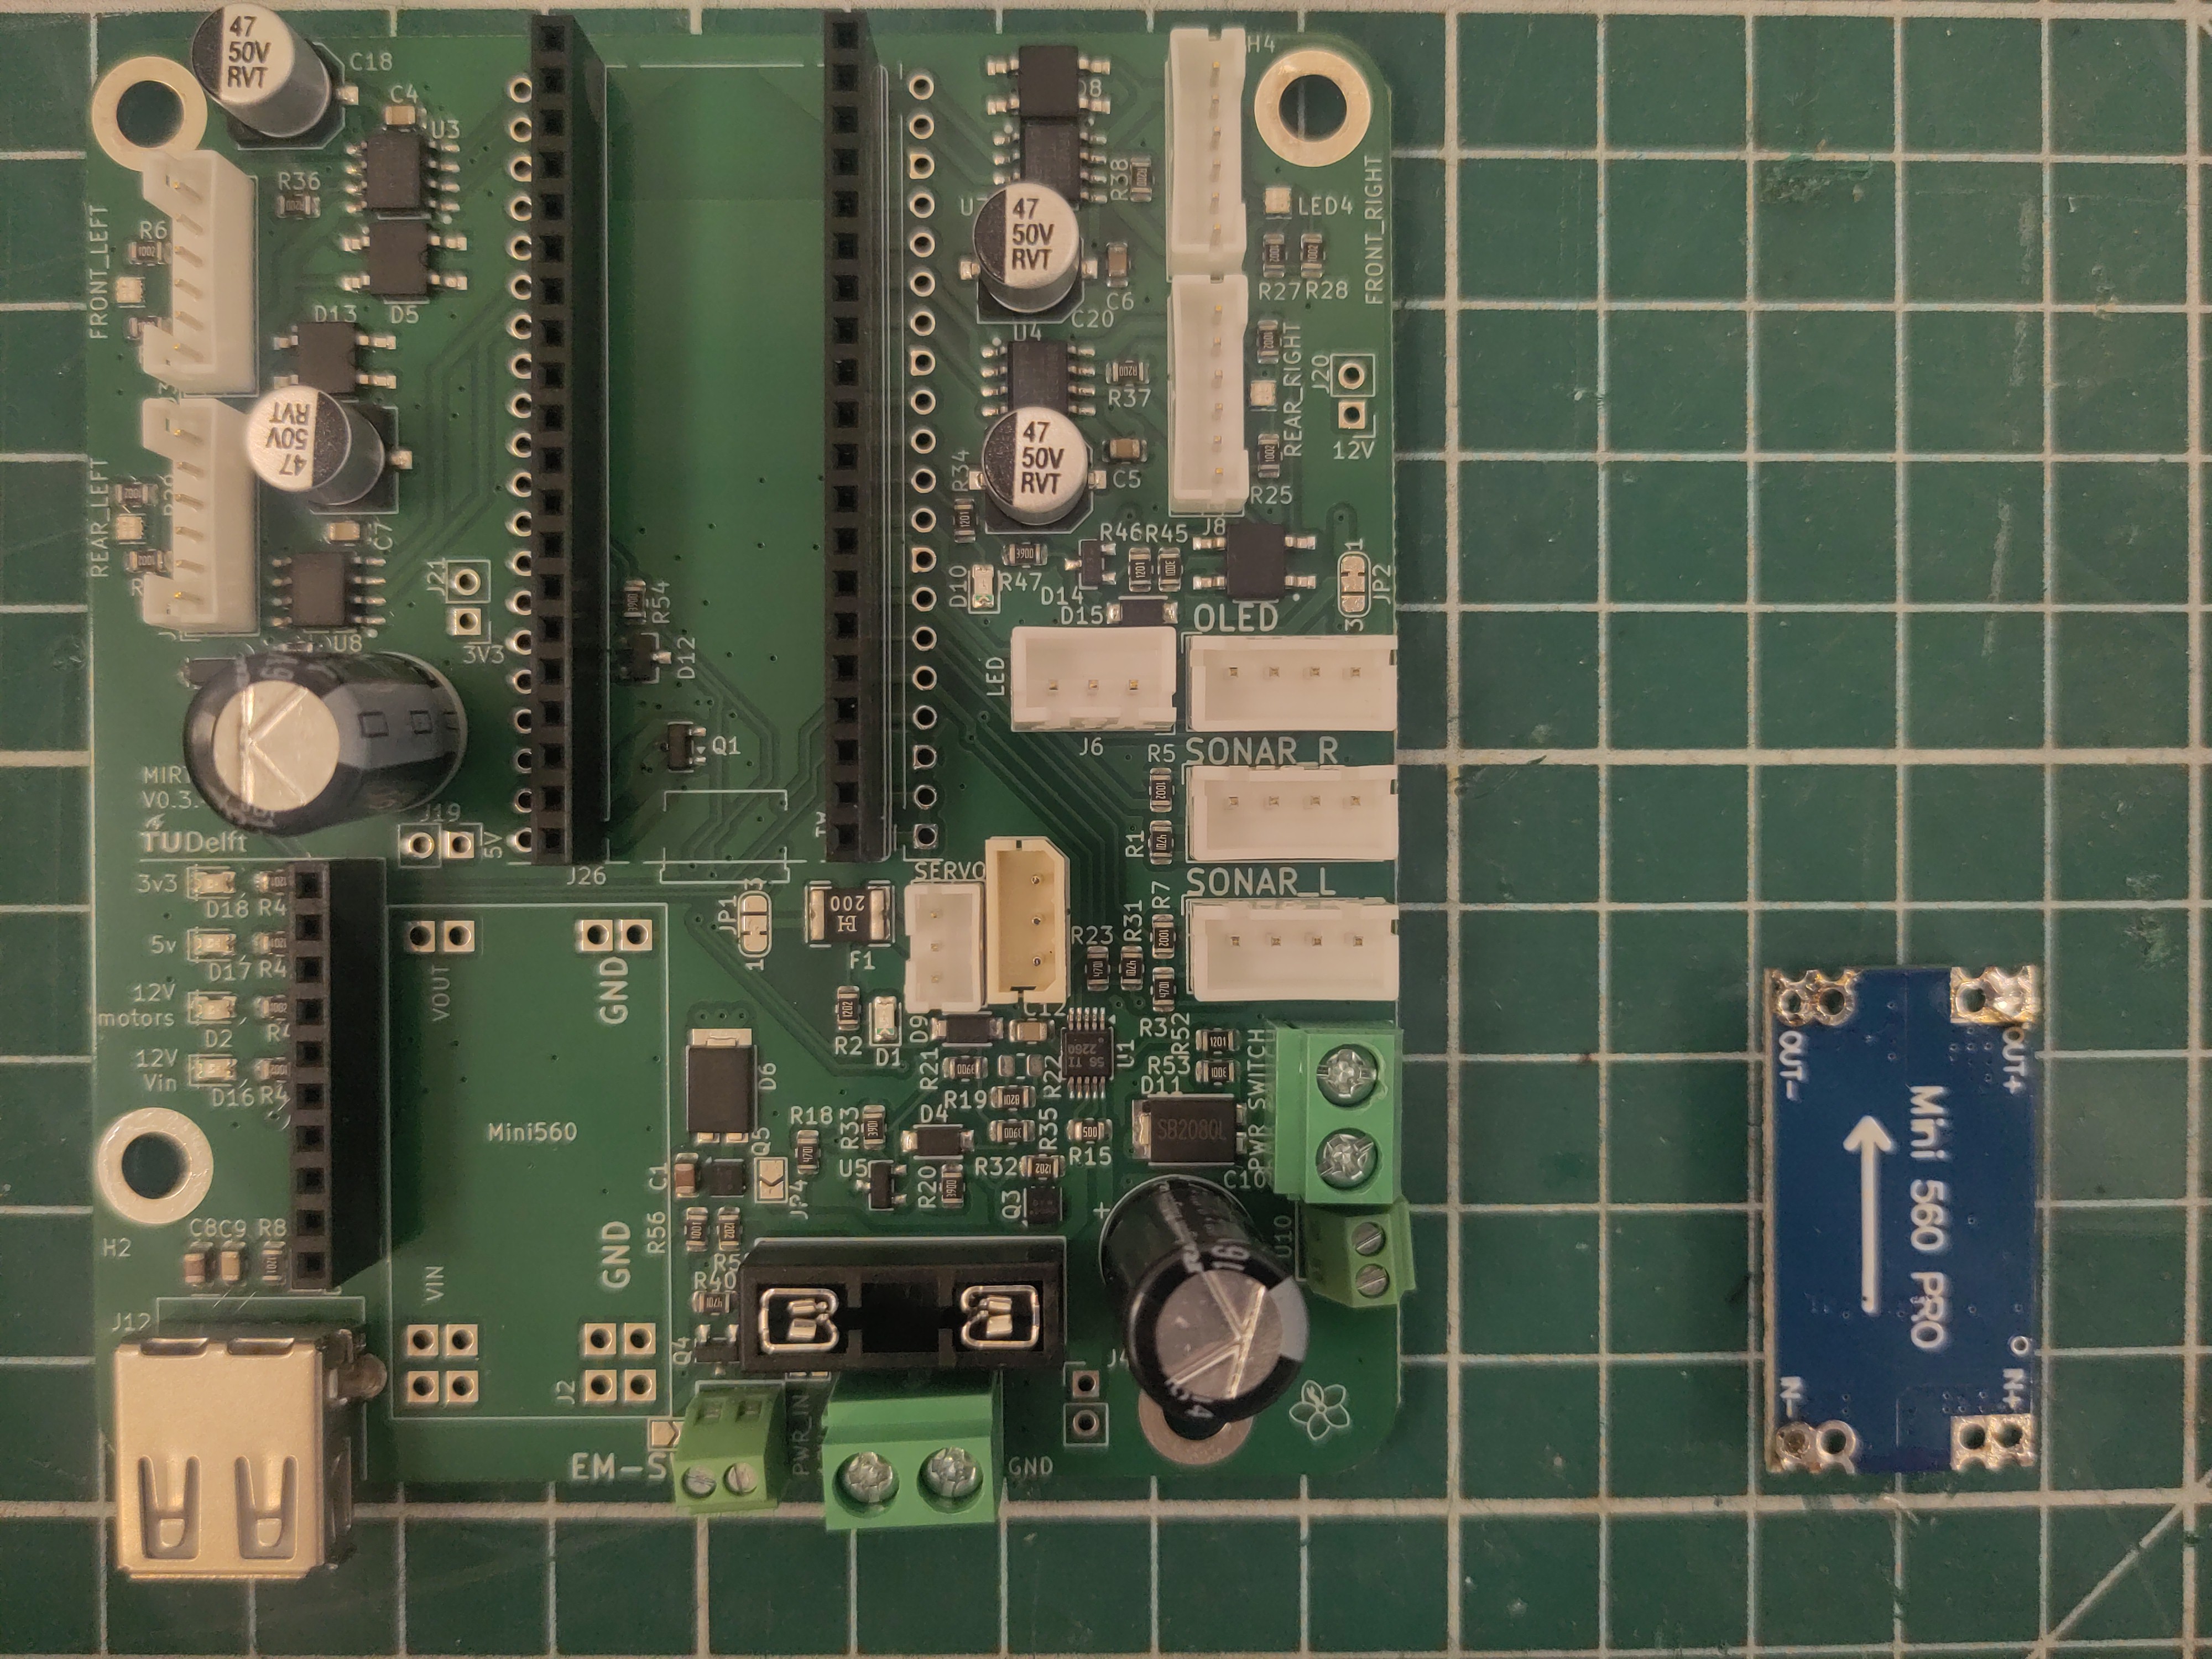
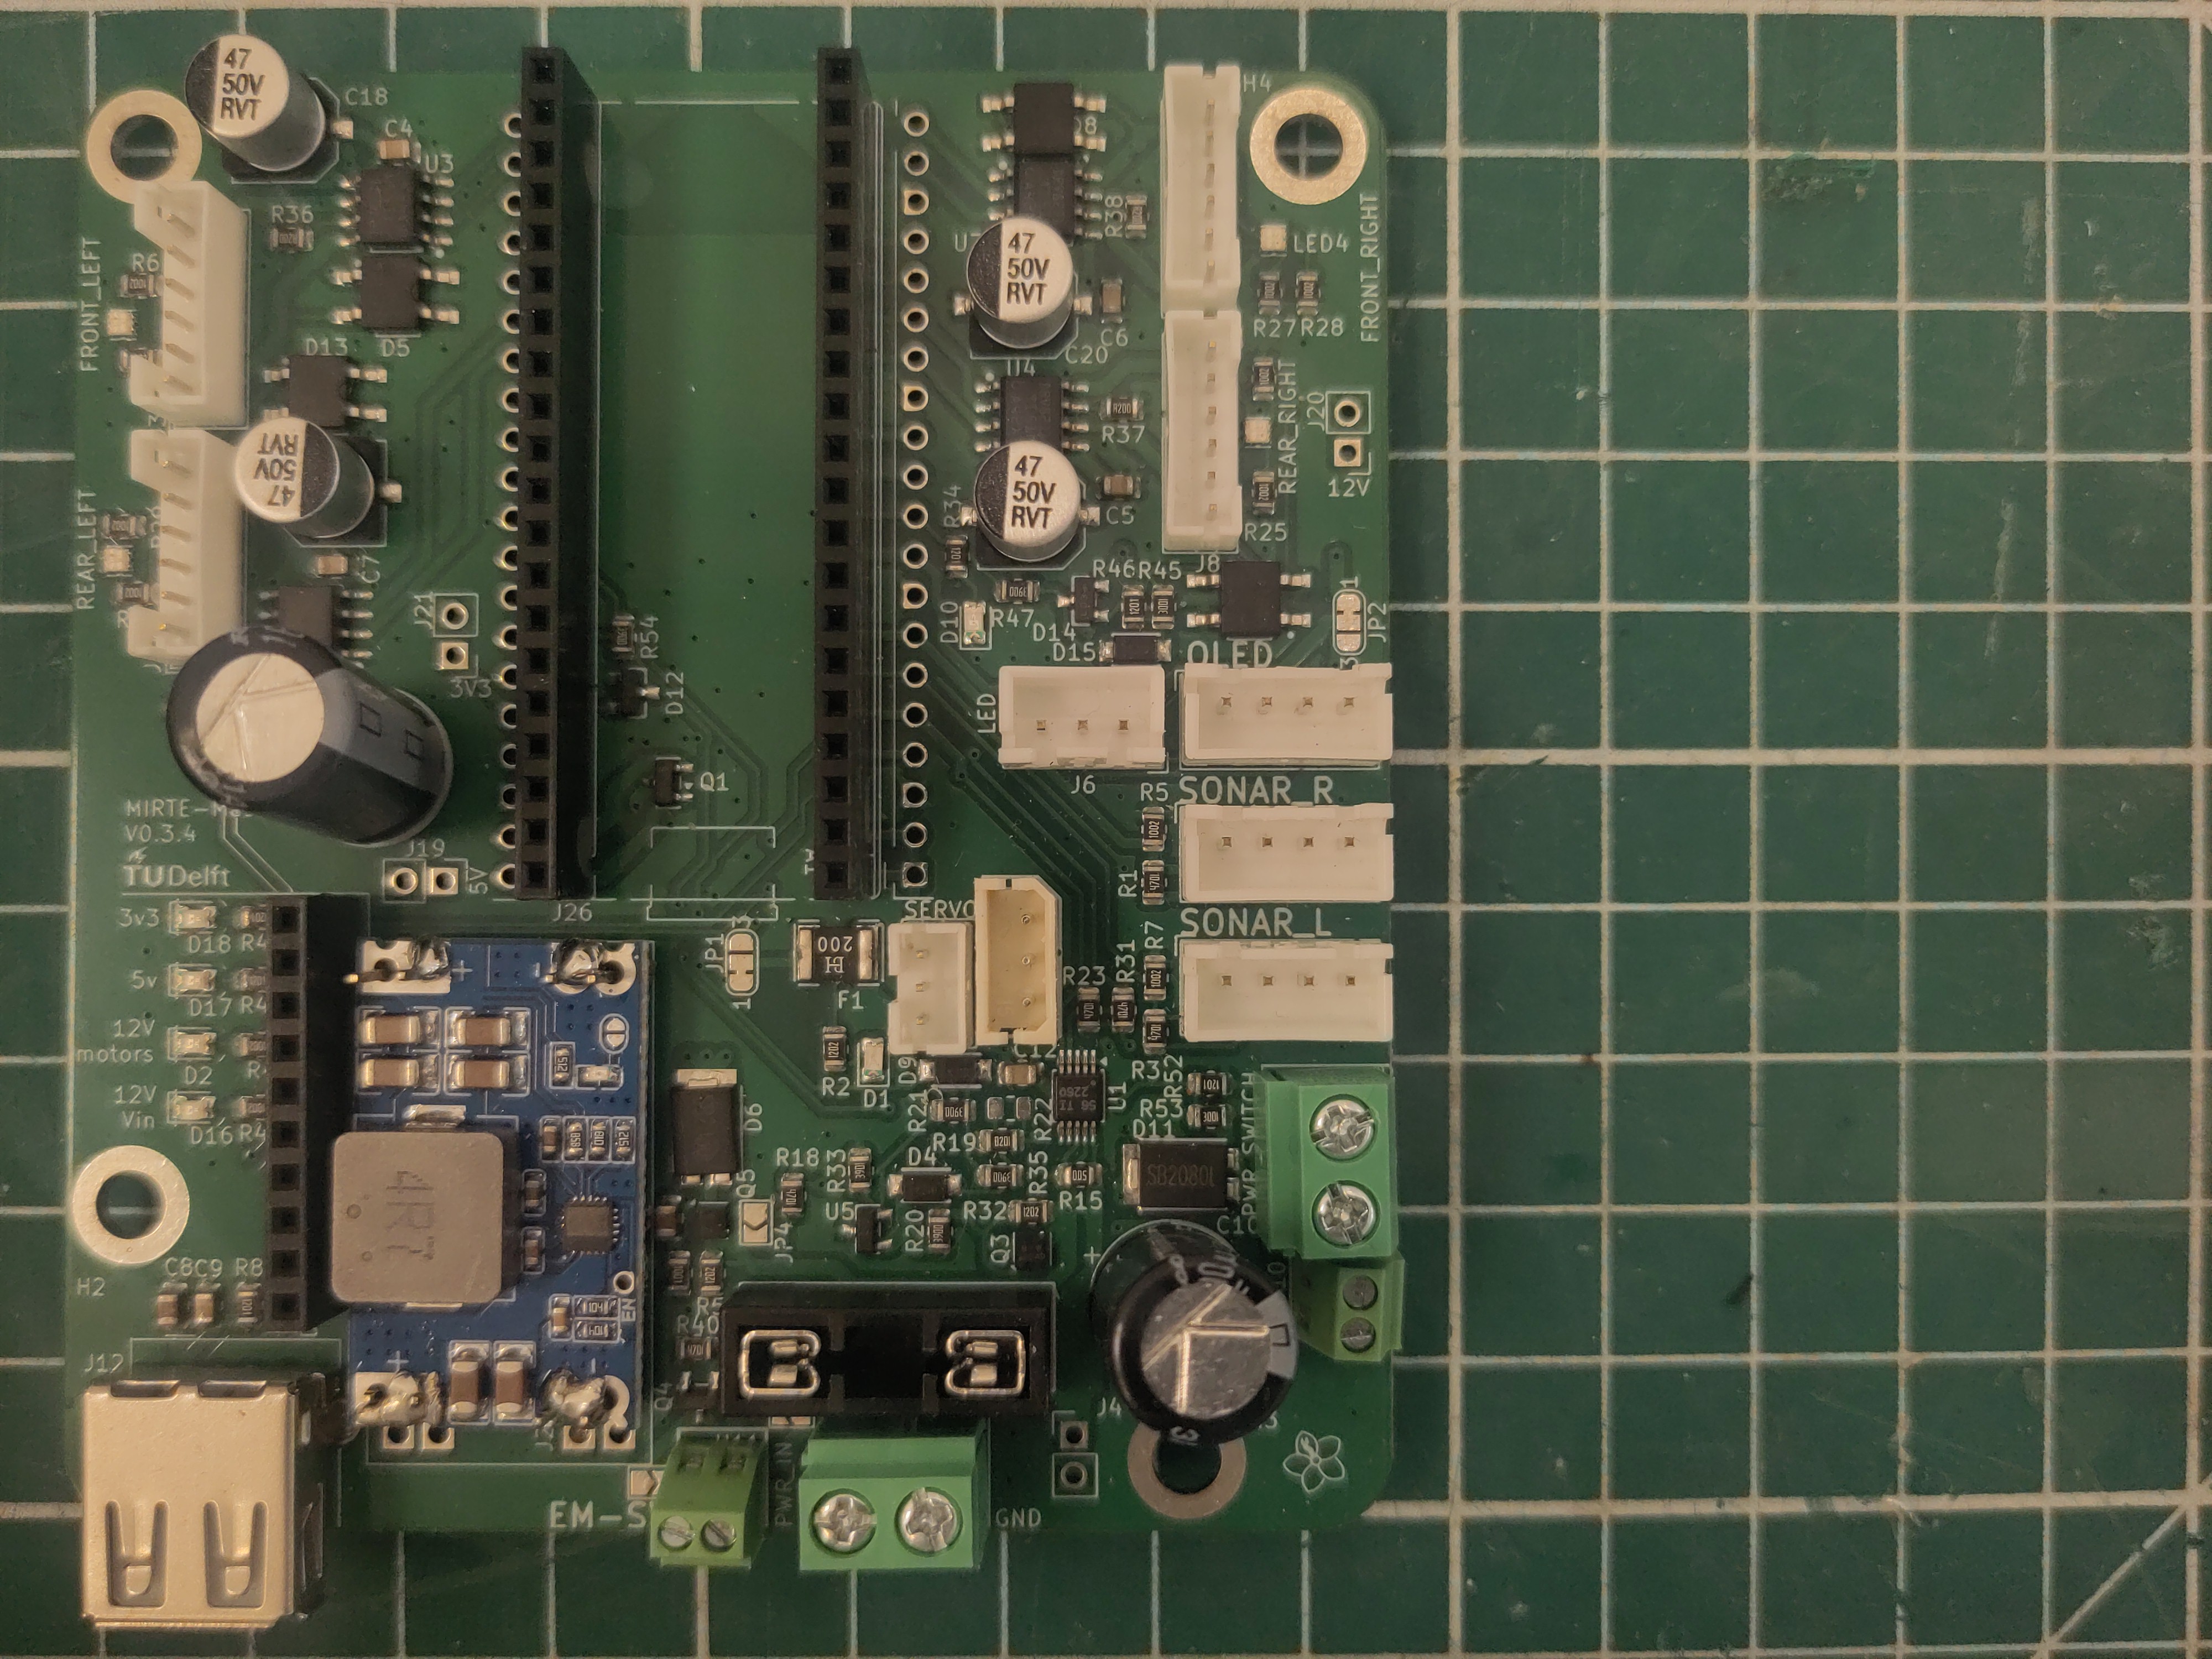
Solder the step-down onto the PCB. Make sure to have it in the right direction.
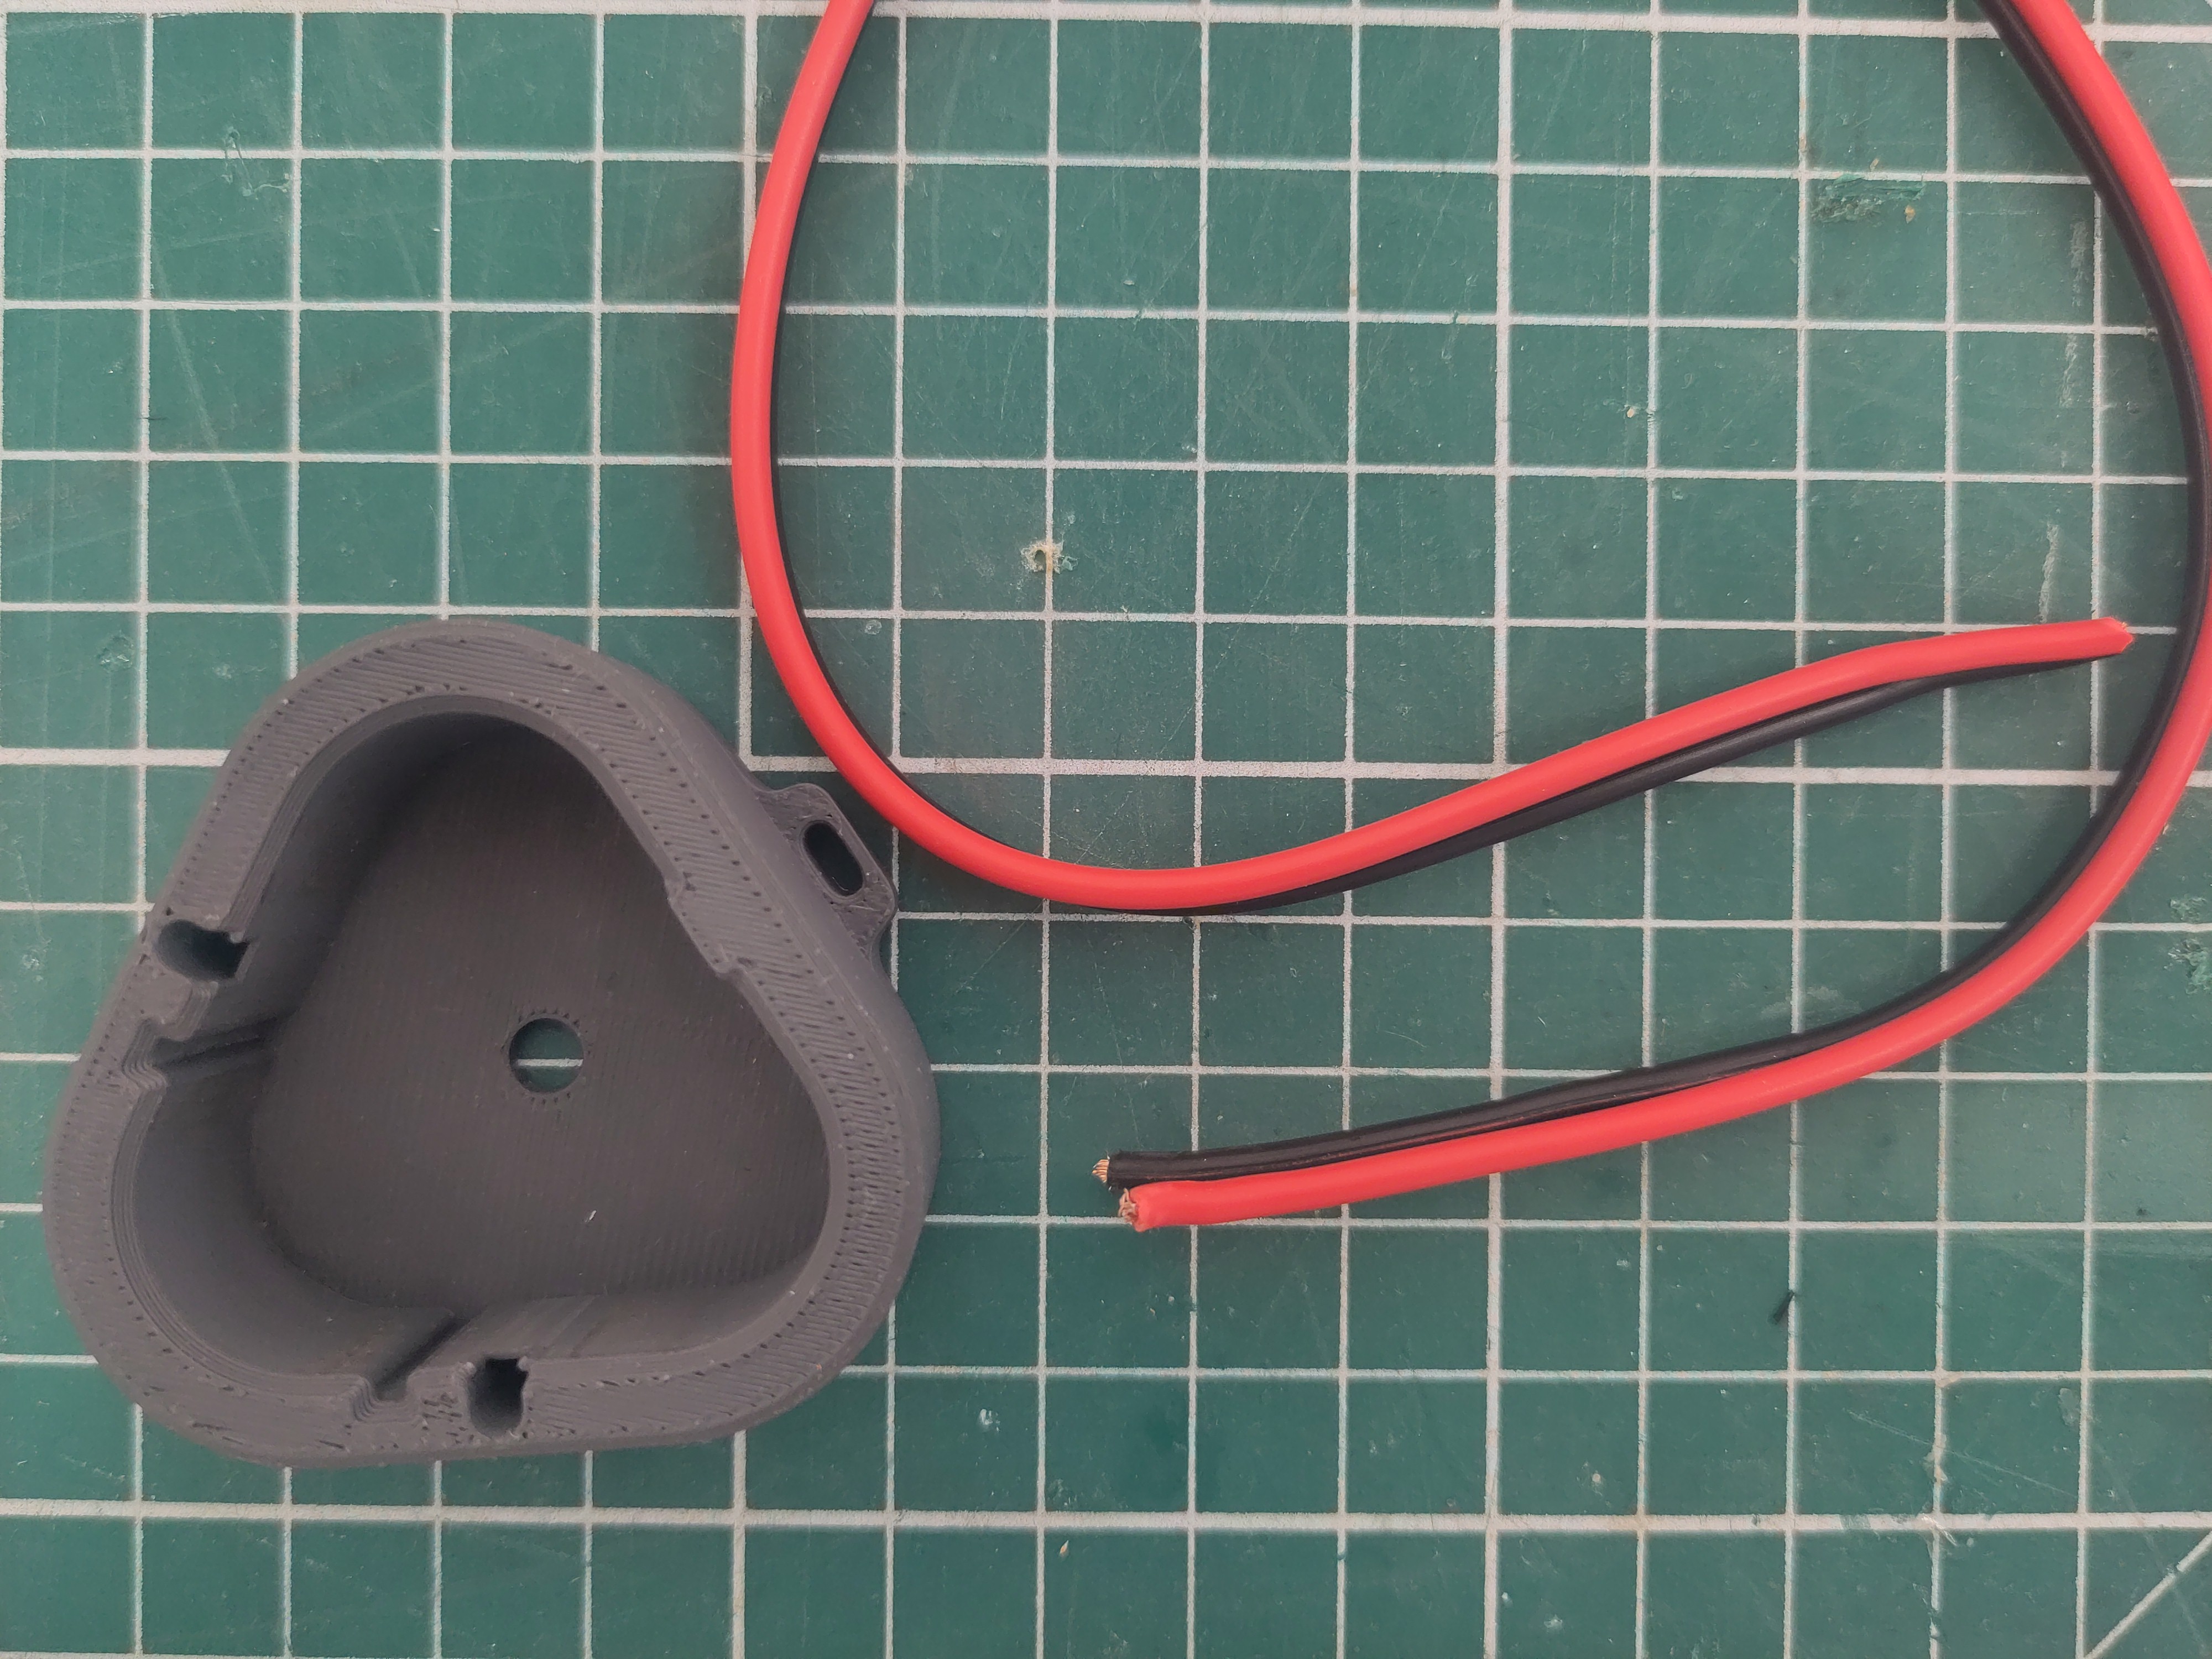
Cut 30 cm of cable.
Put the cable through the holes. Make sure the colors are on the correct side.
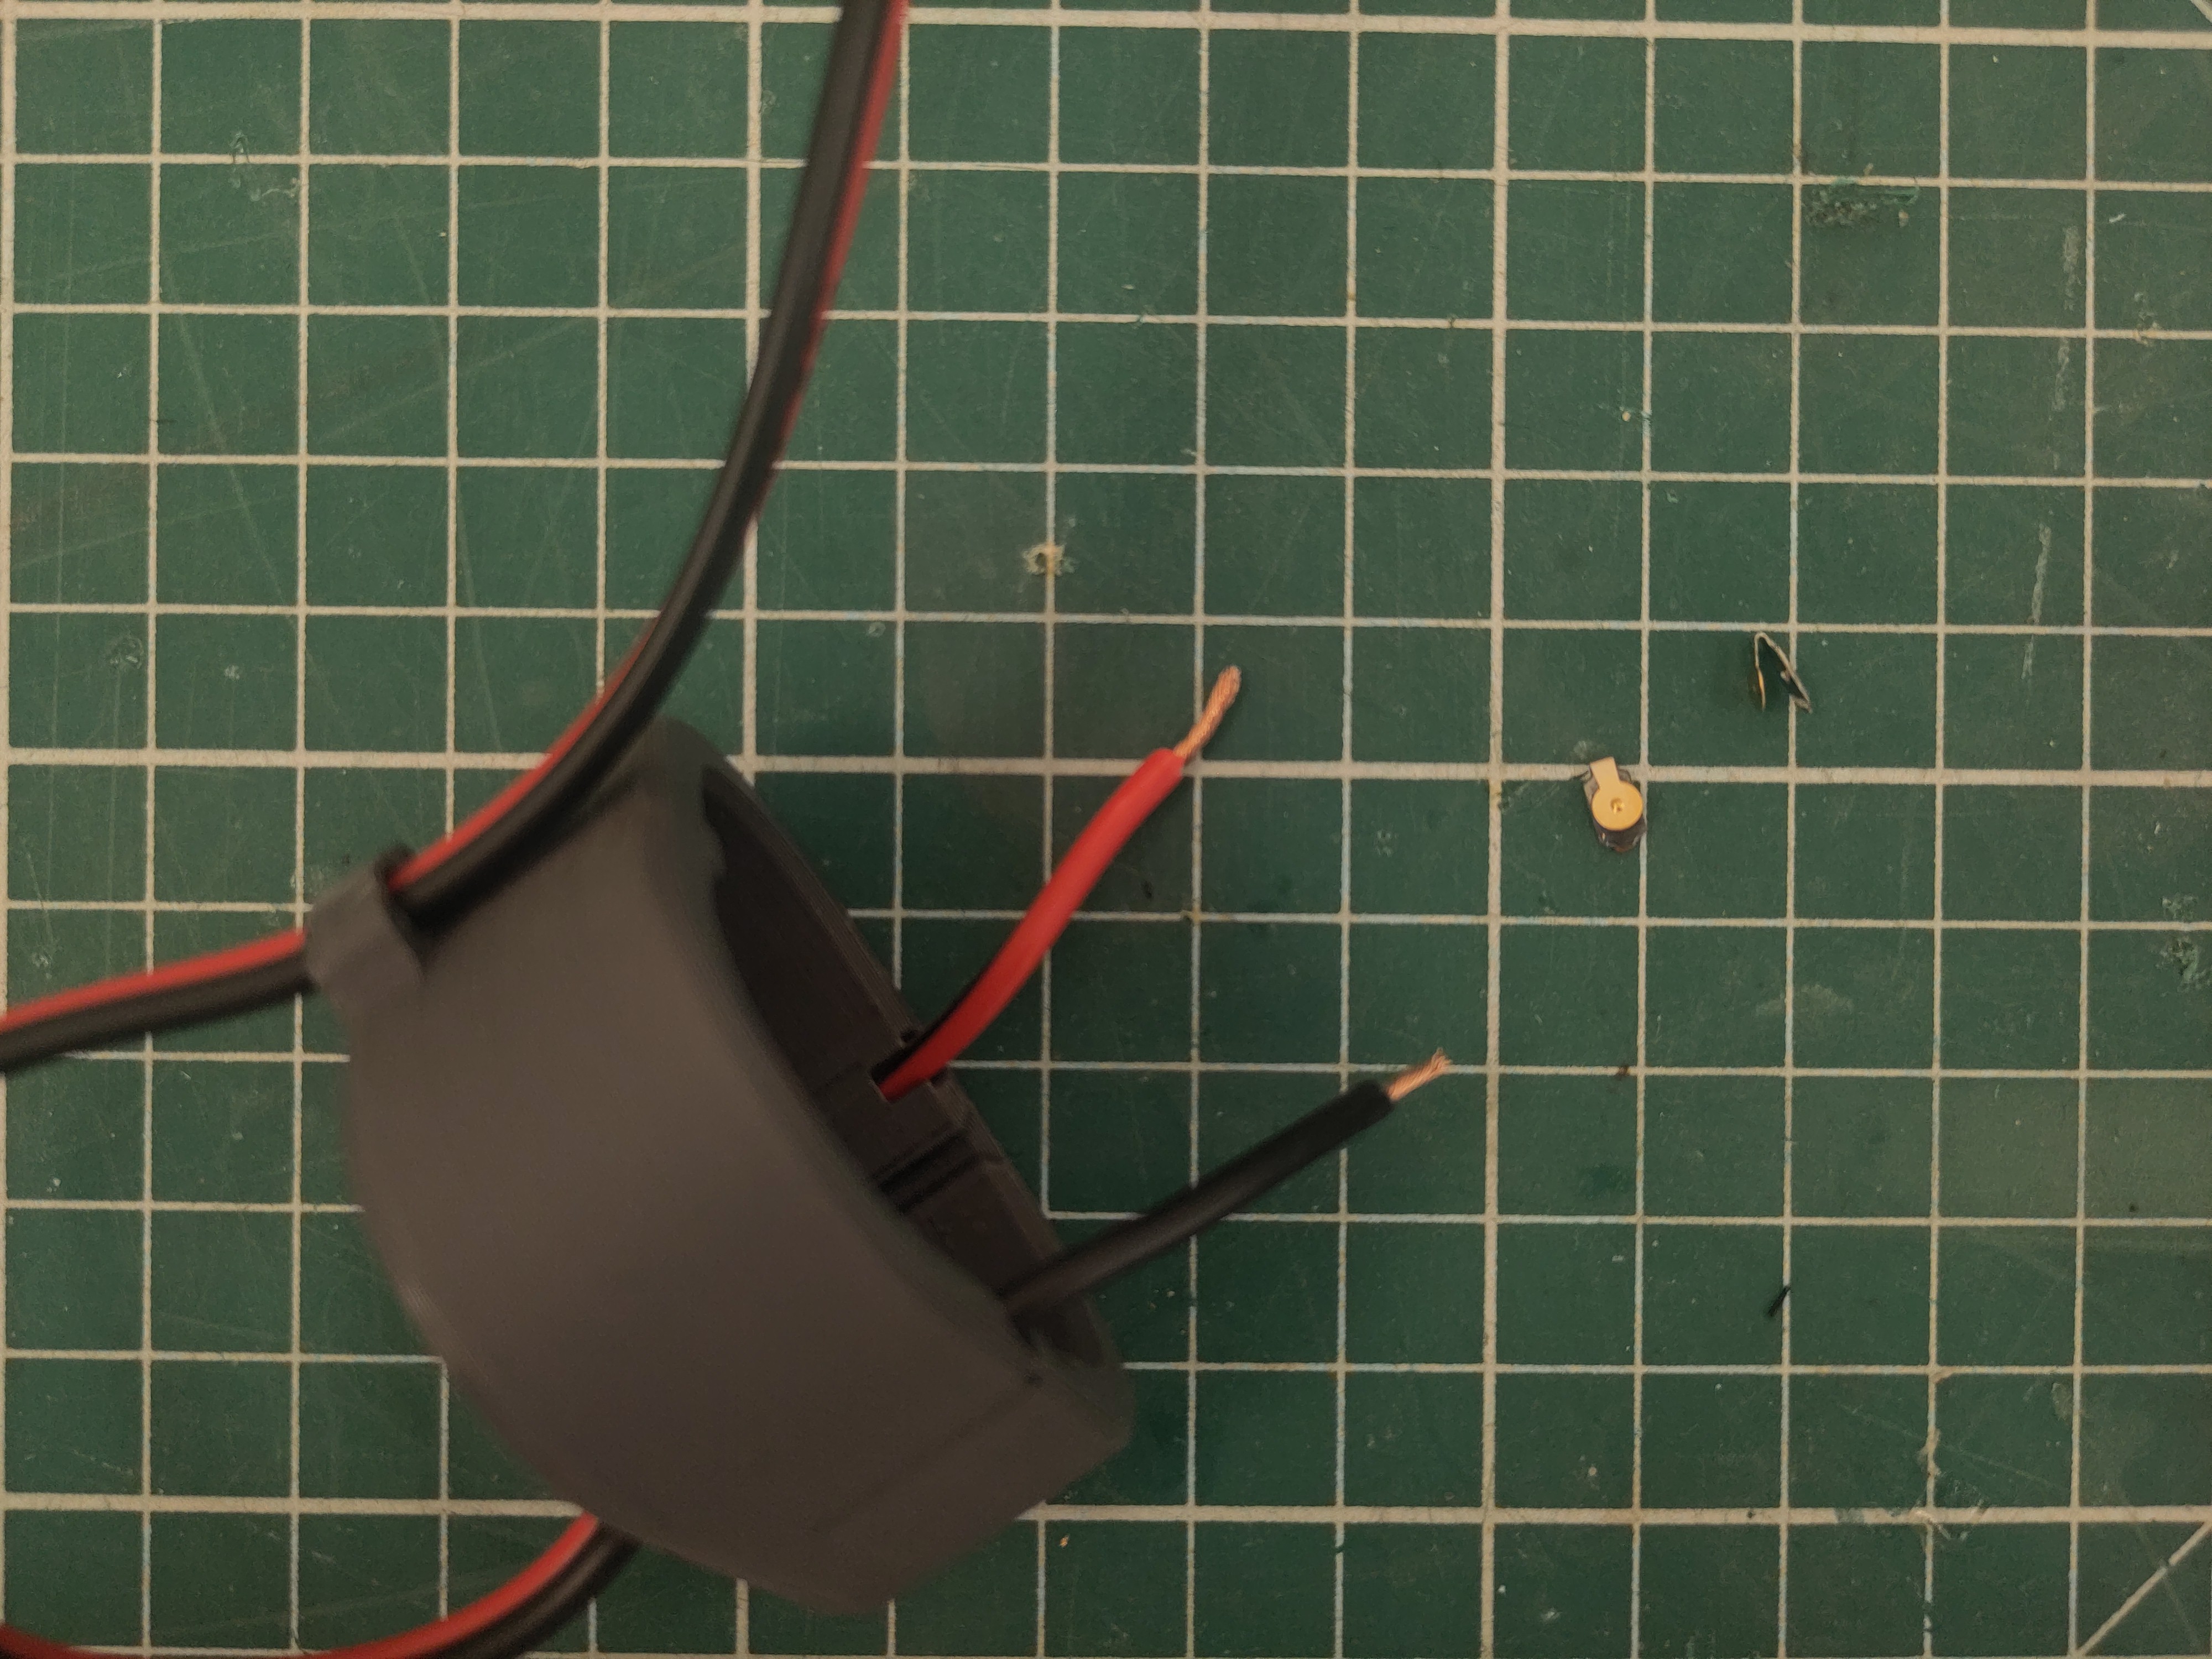
Strip the ends.
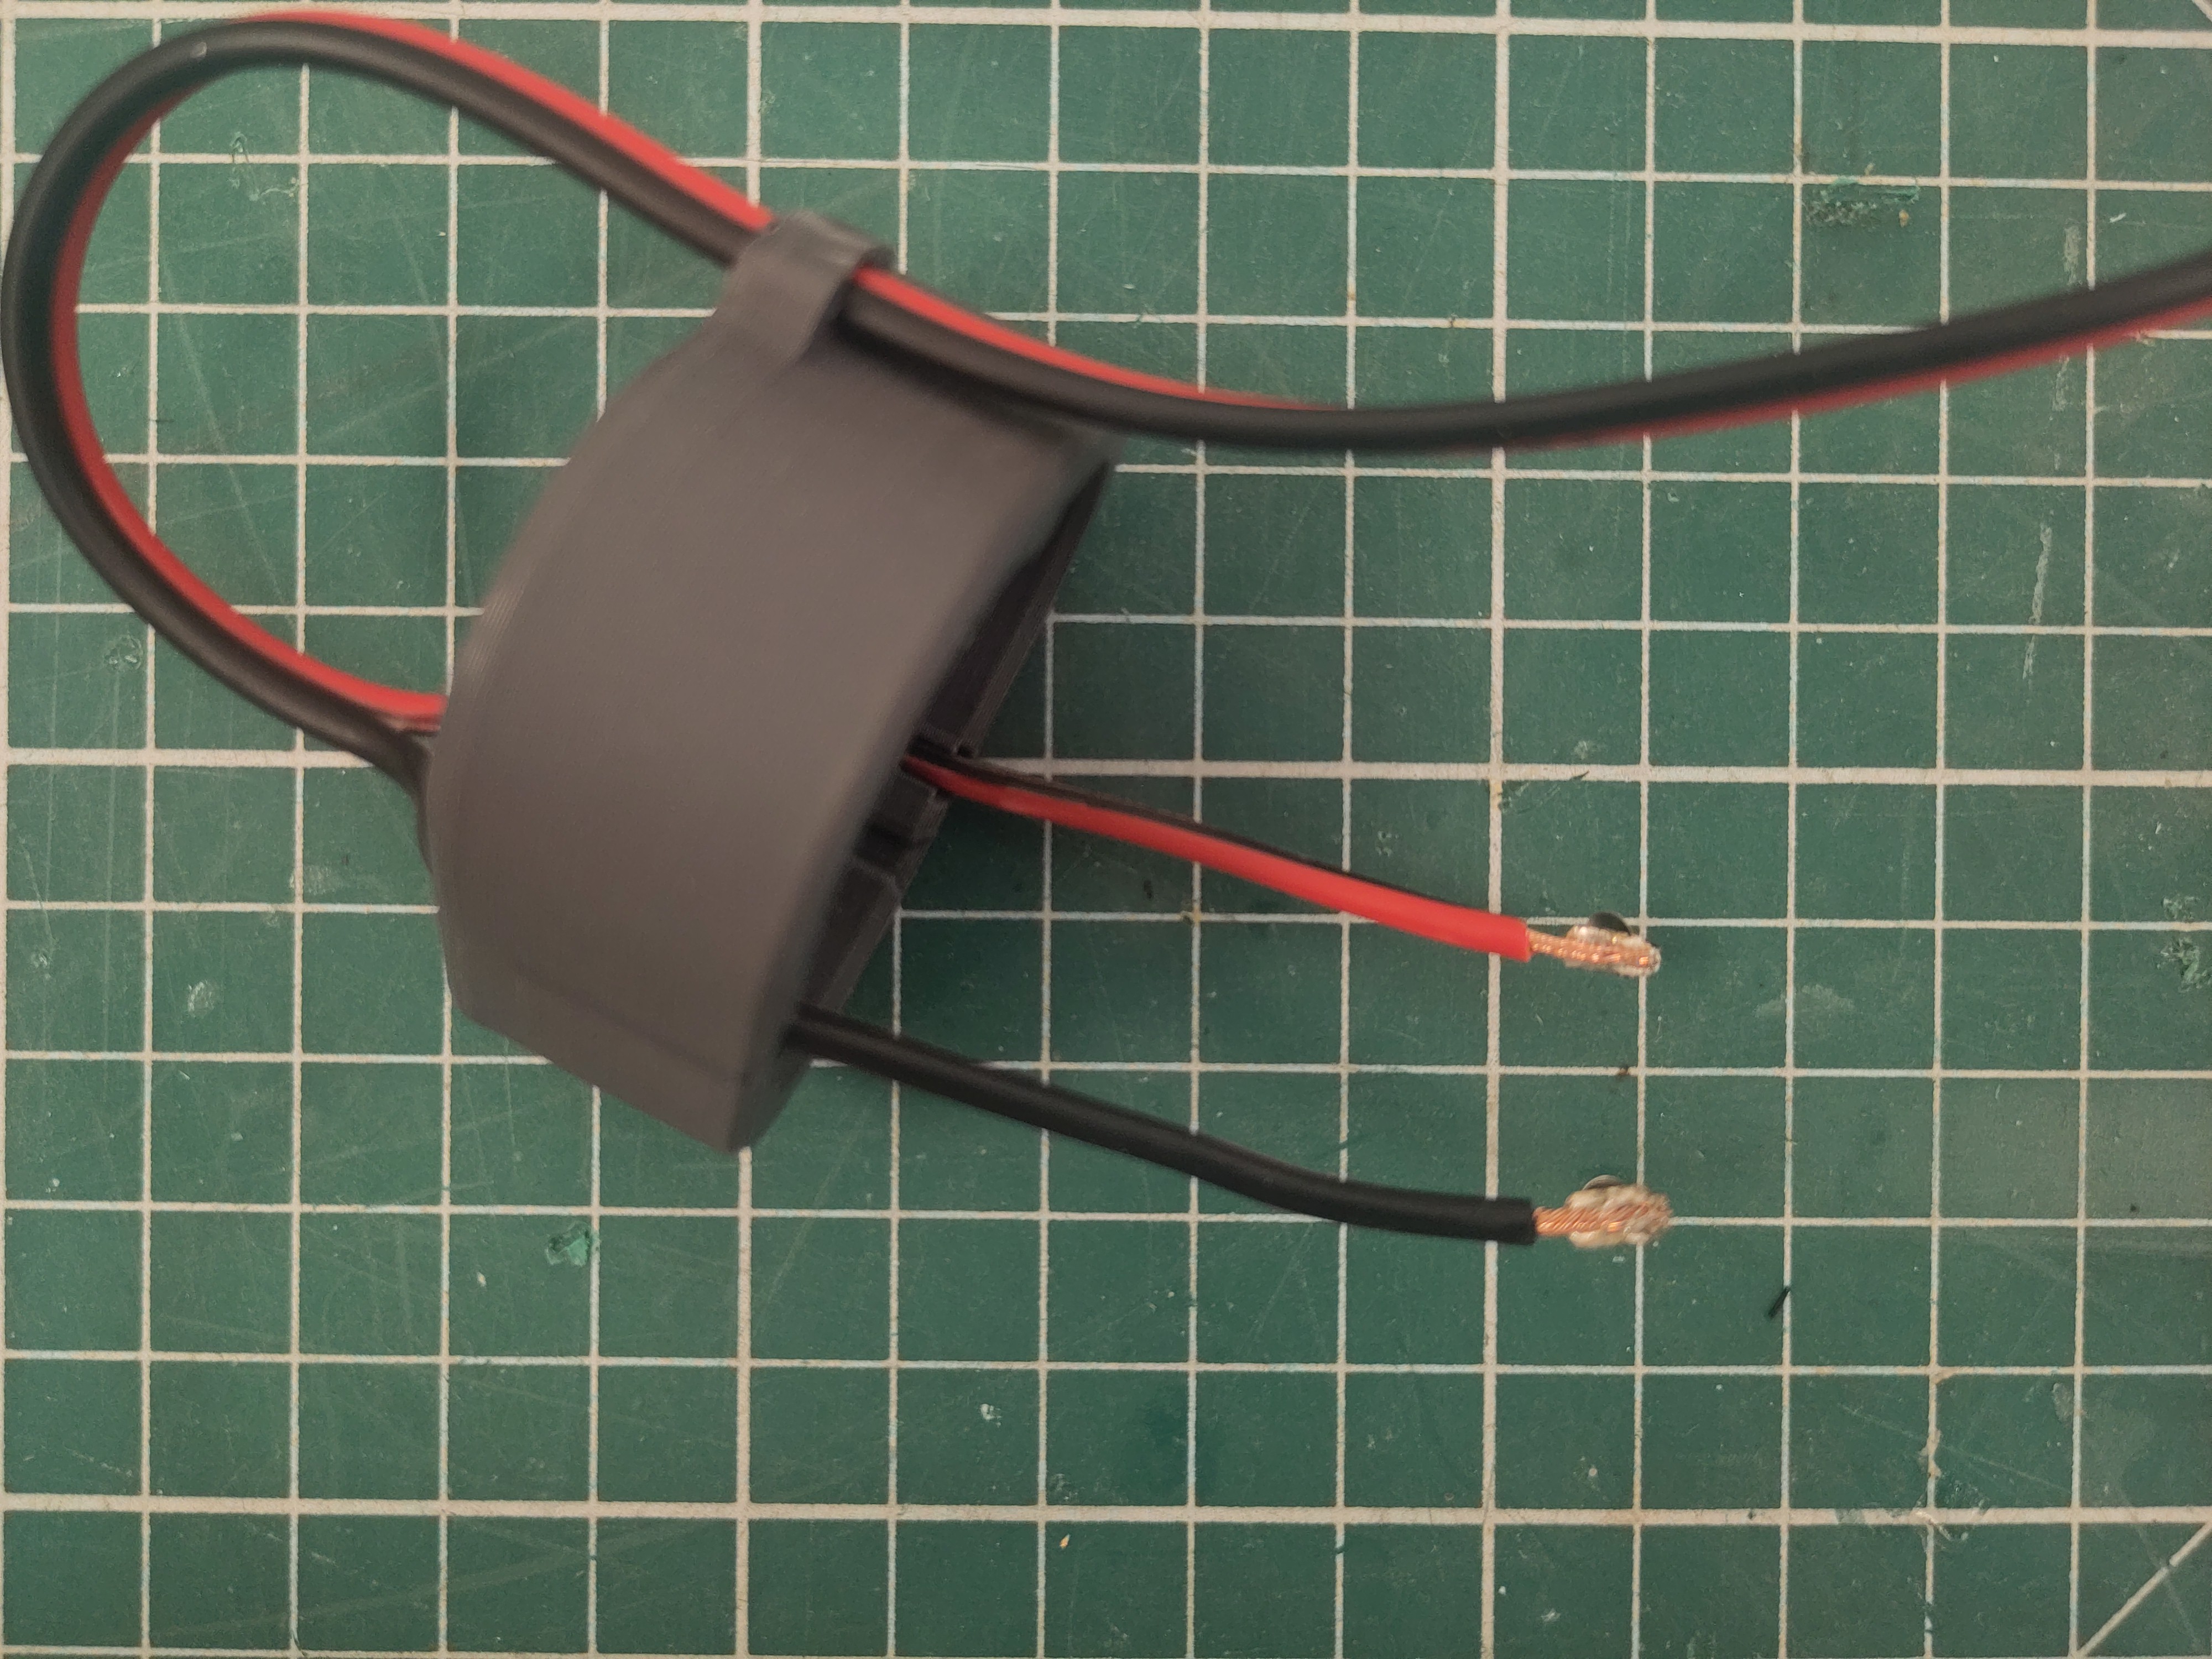
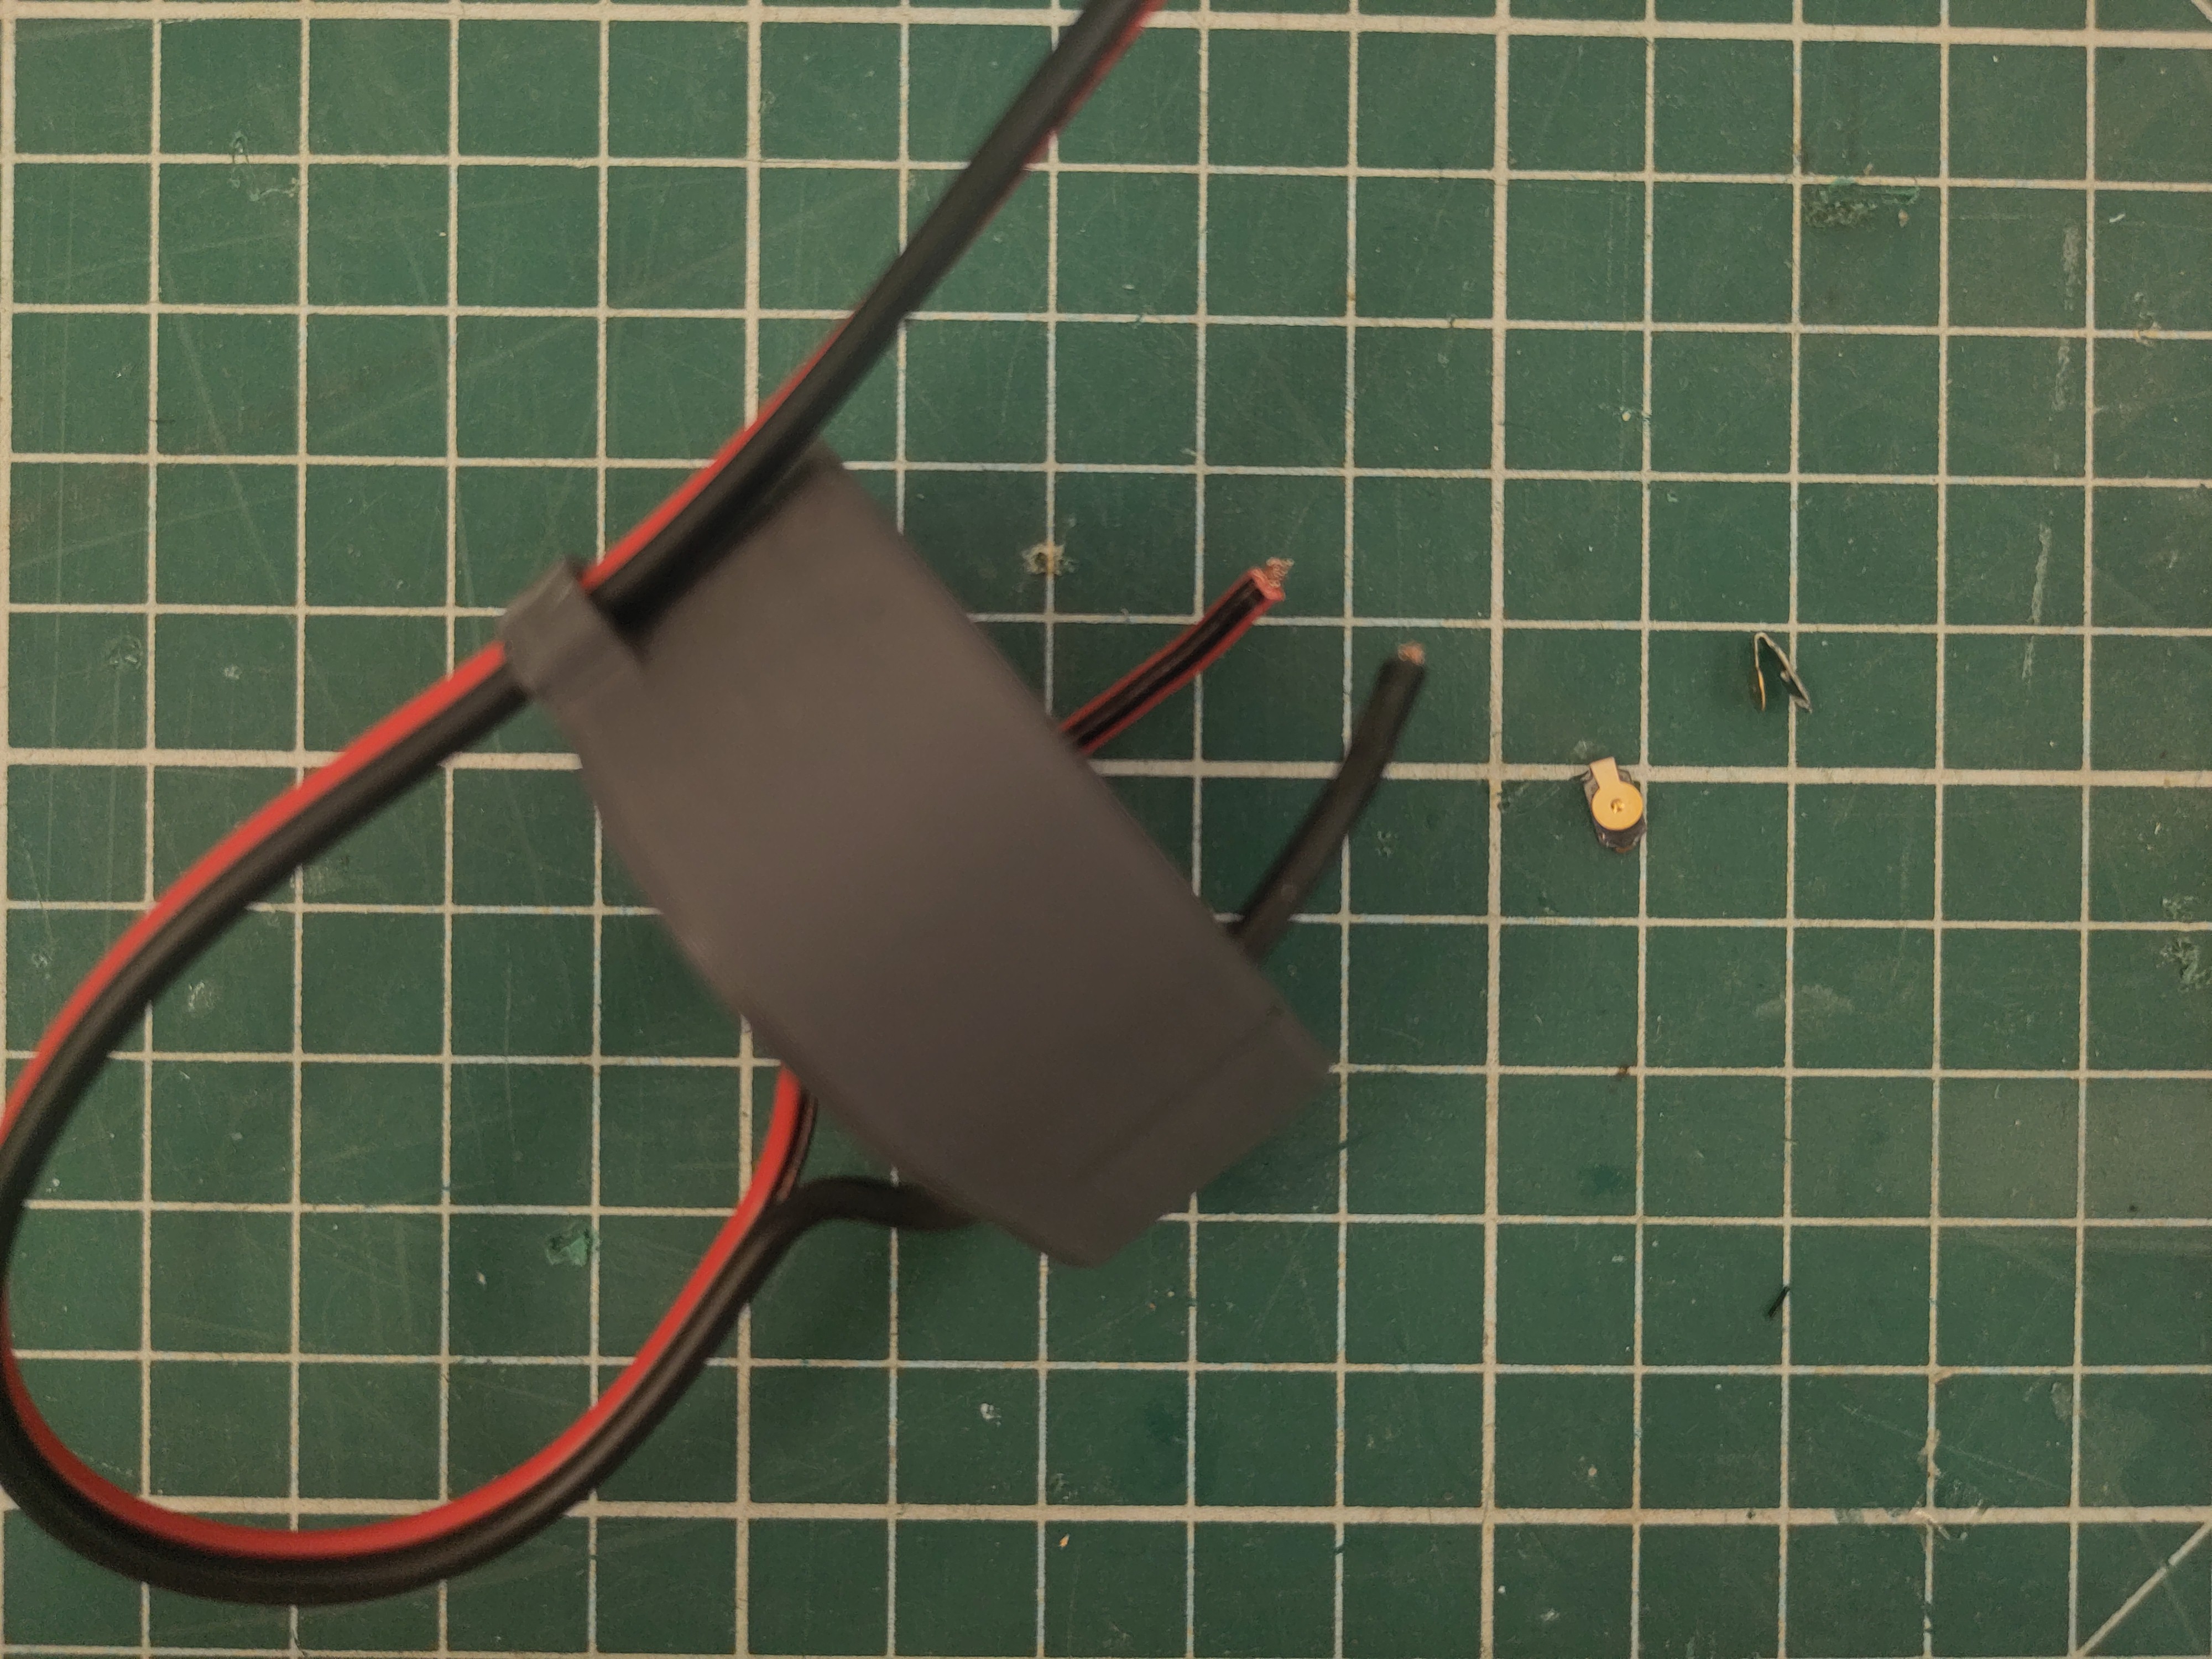
And solder the spring contacts.

Put the spring contacts in place and tighten the cable.
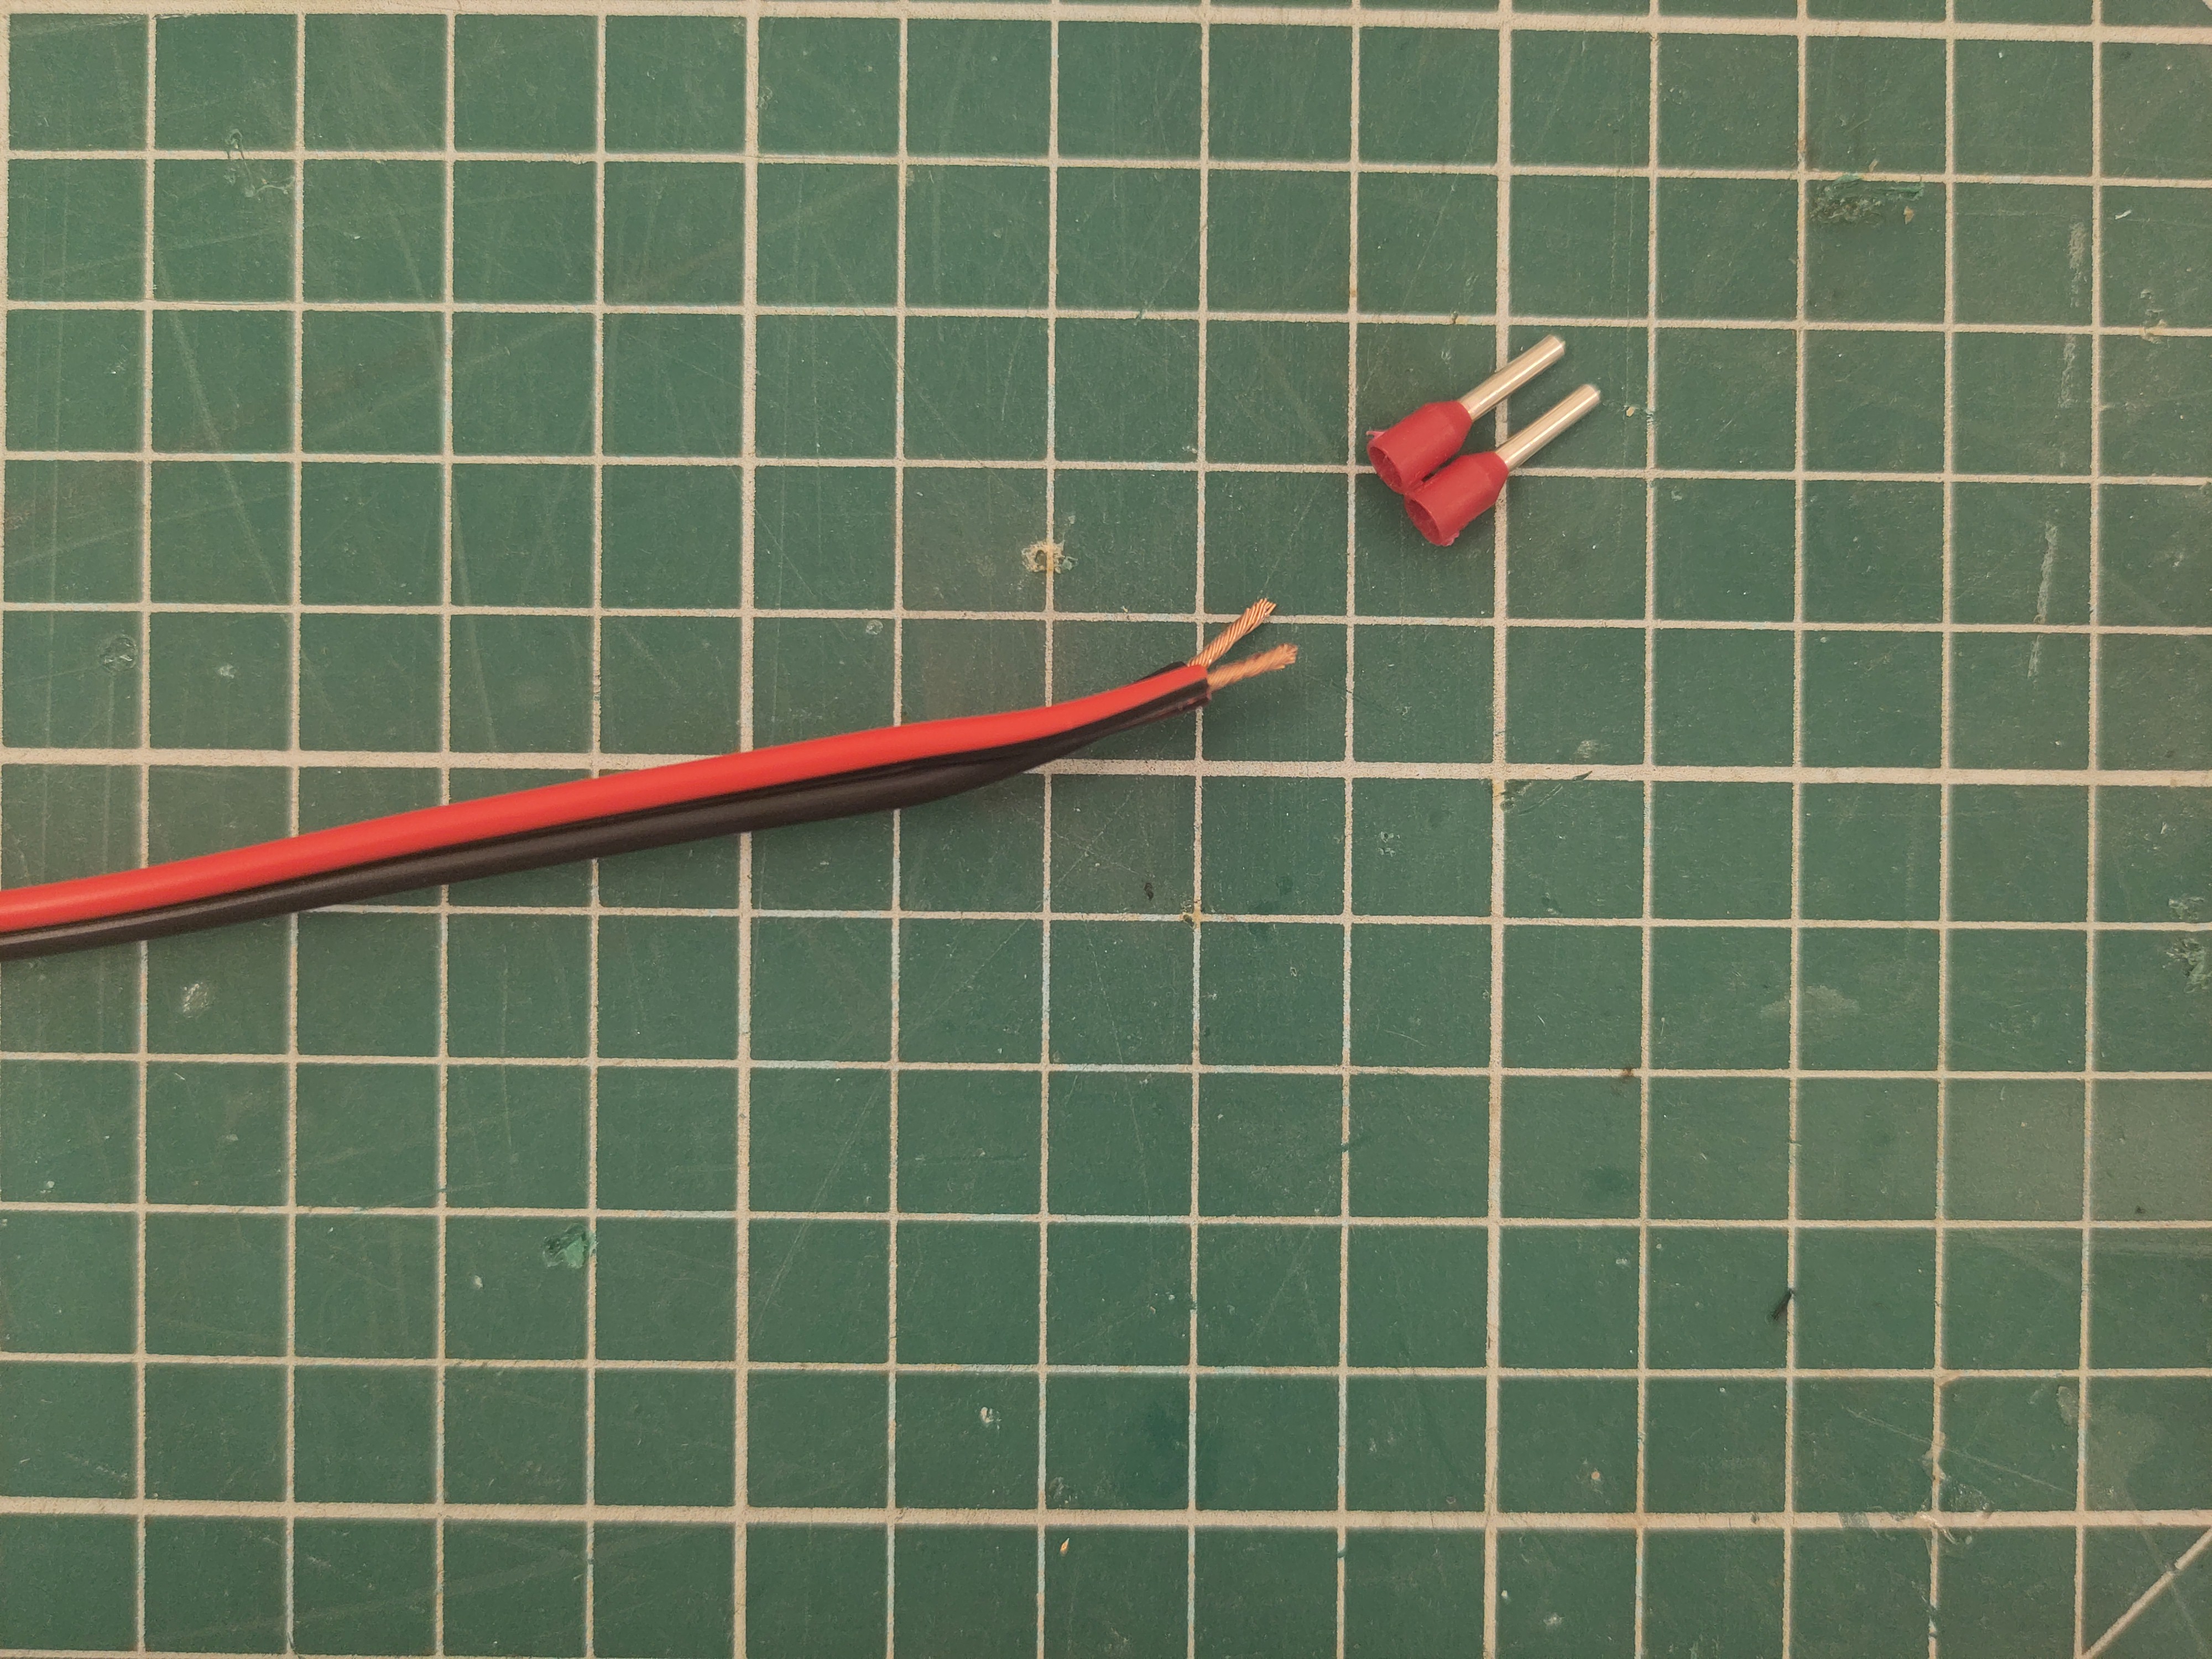
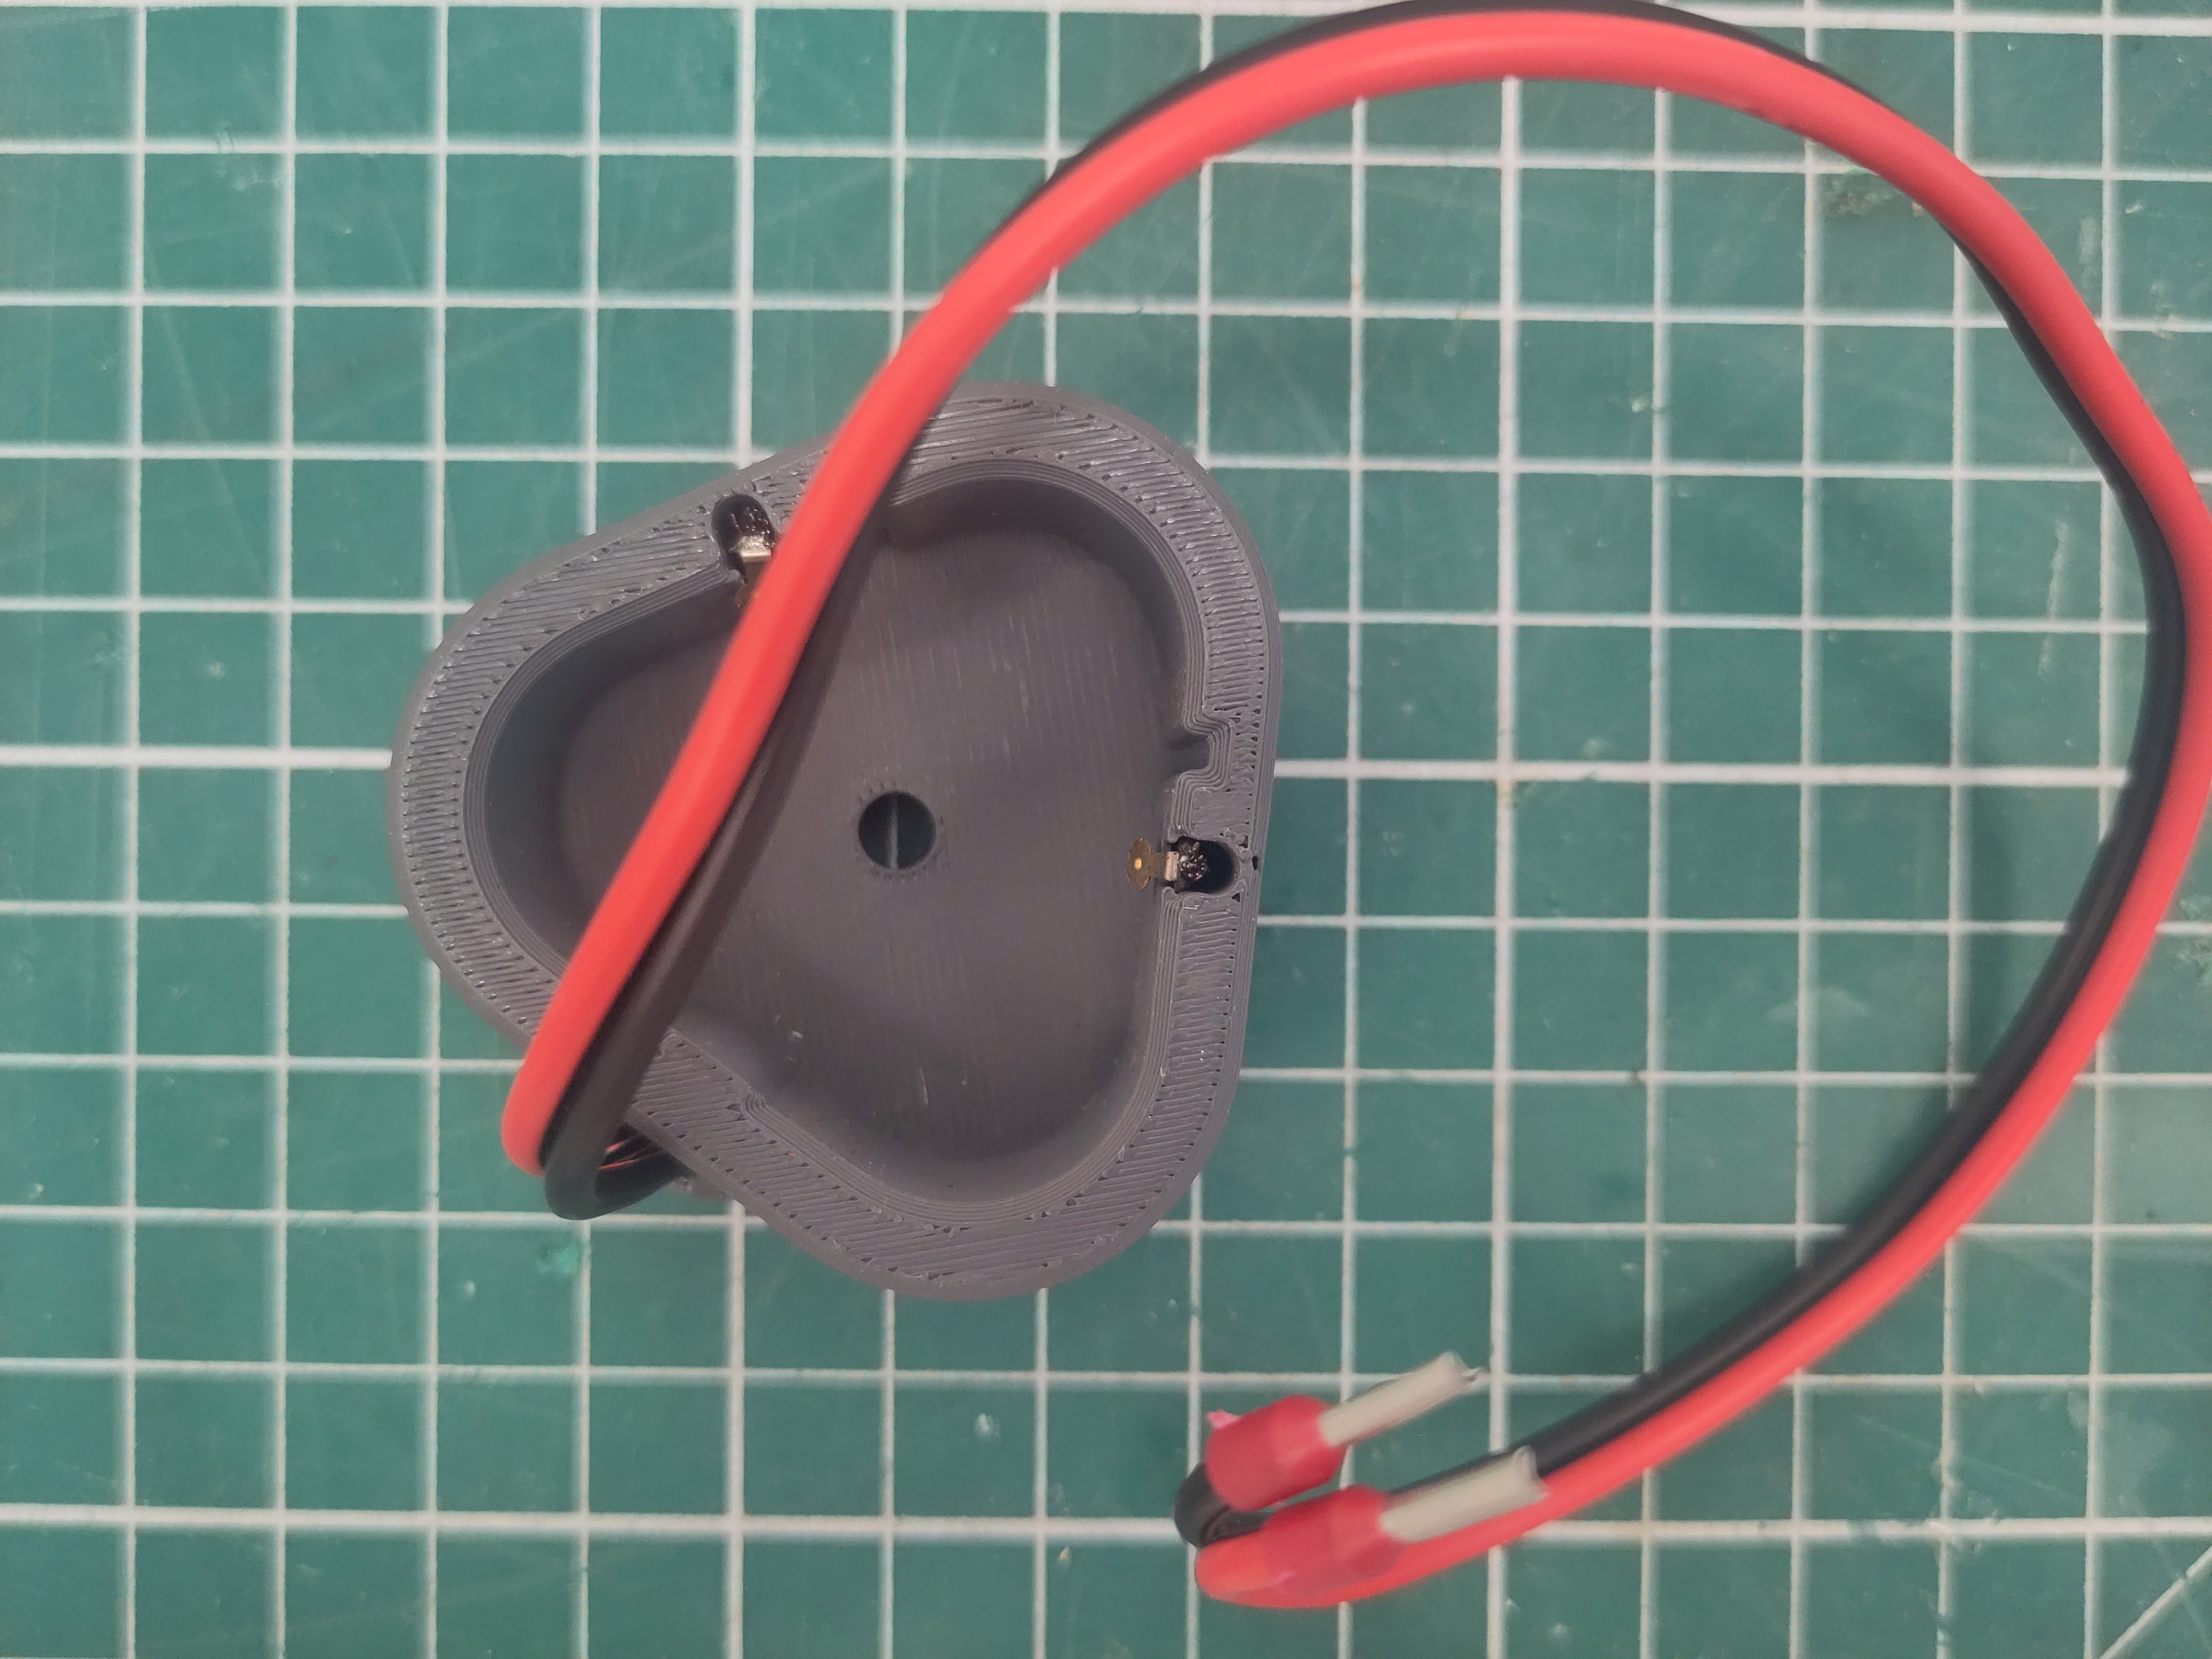
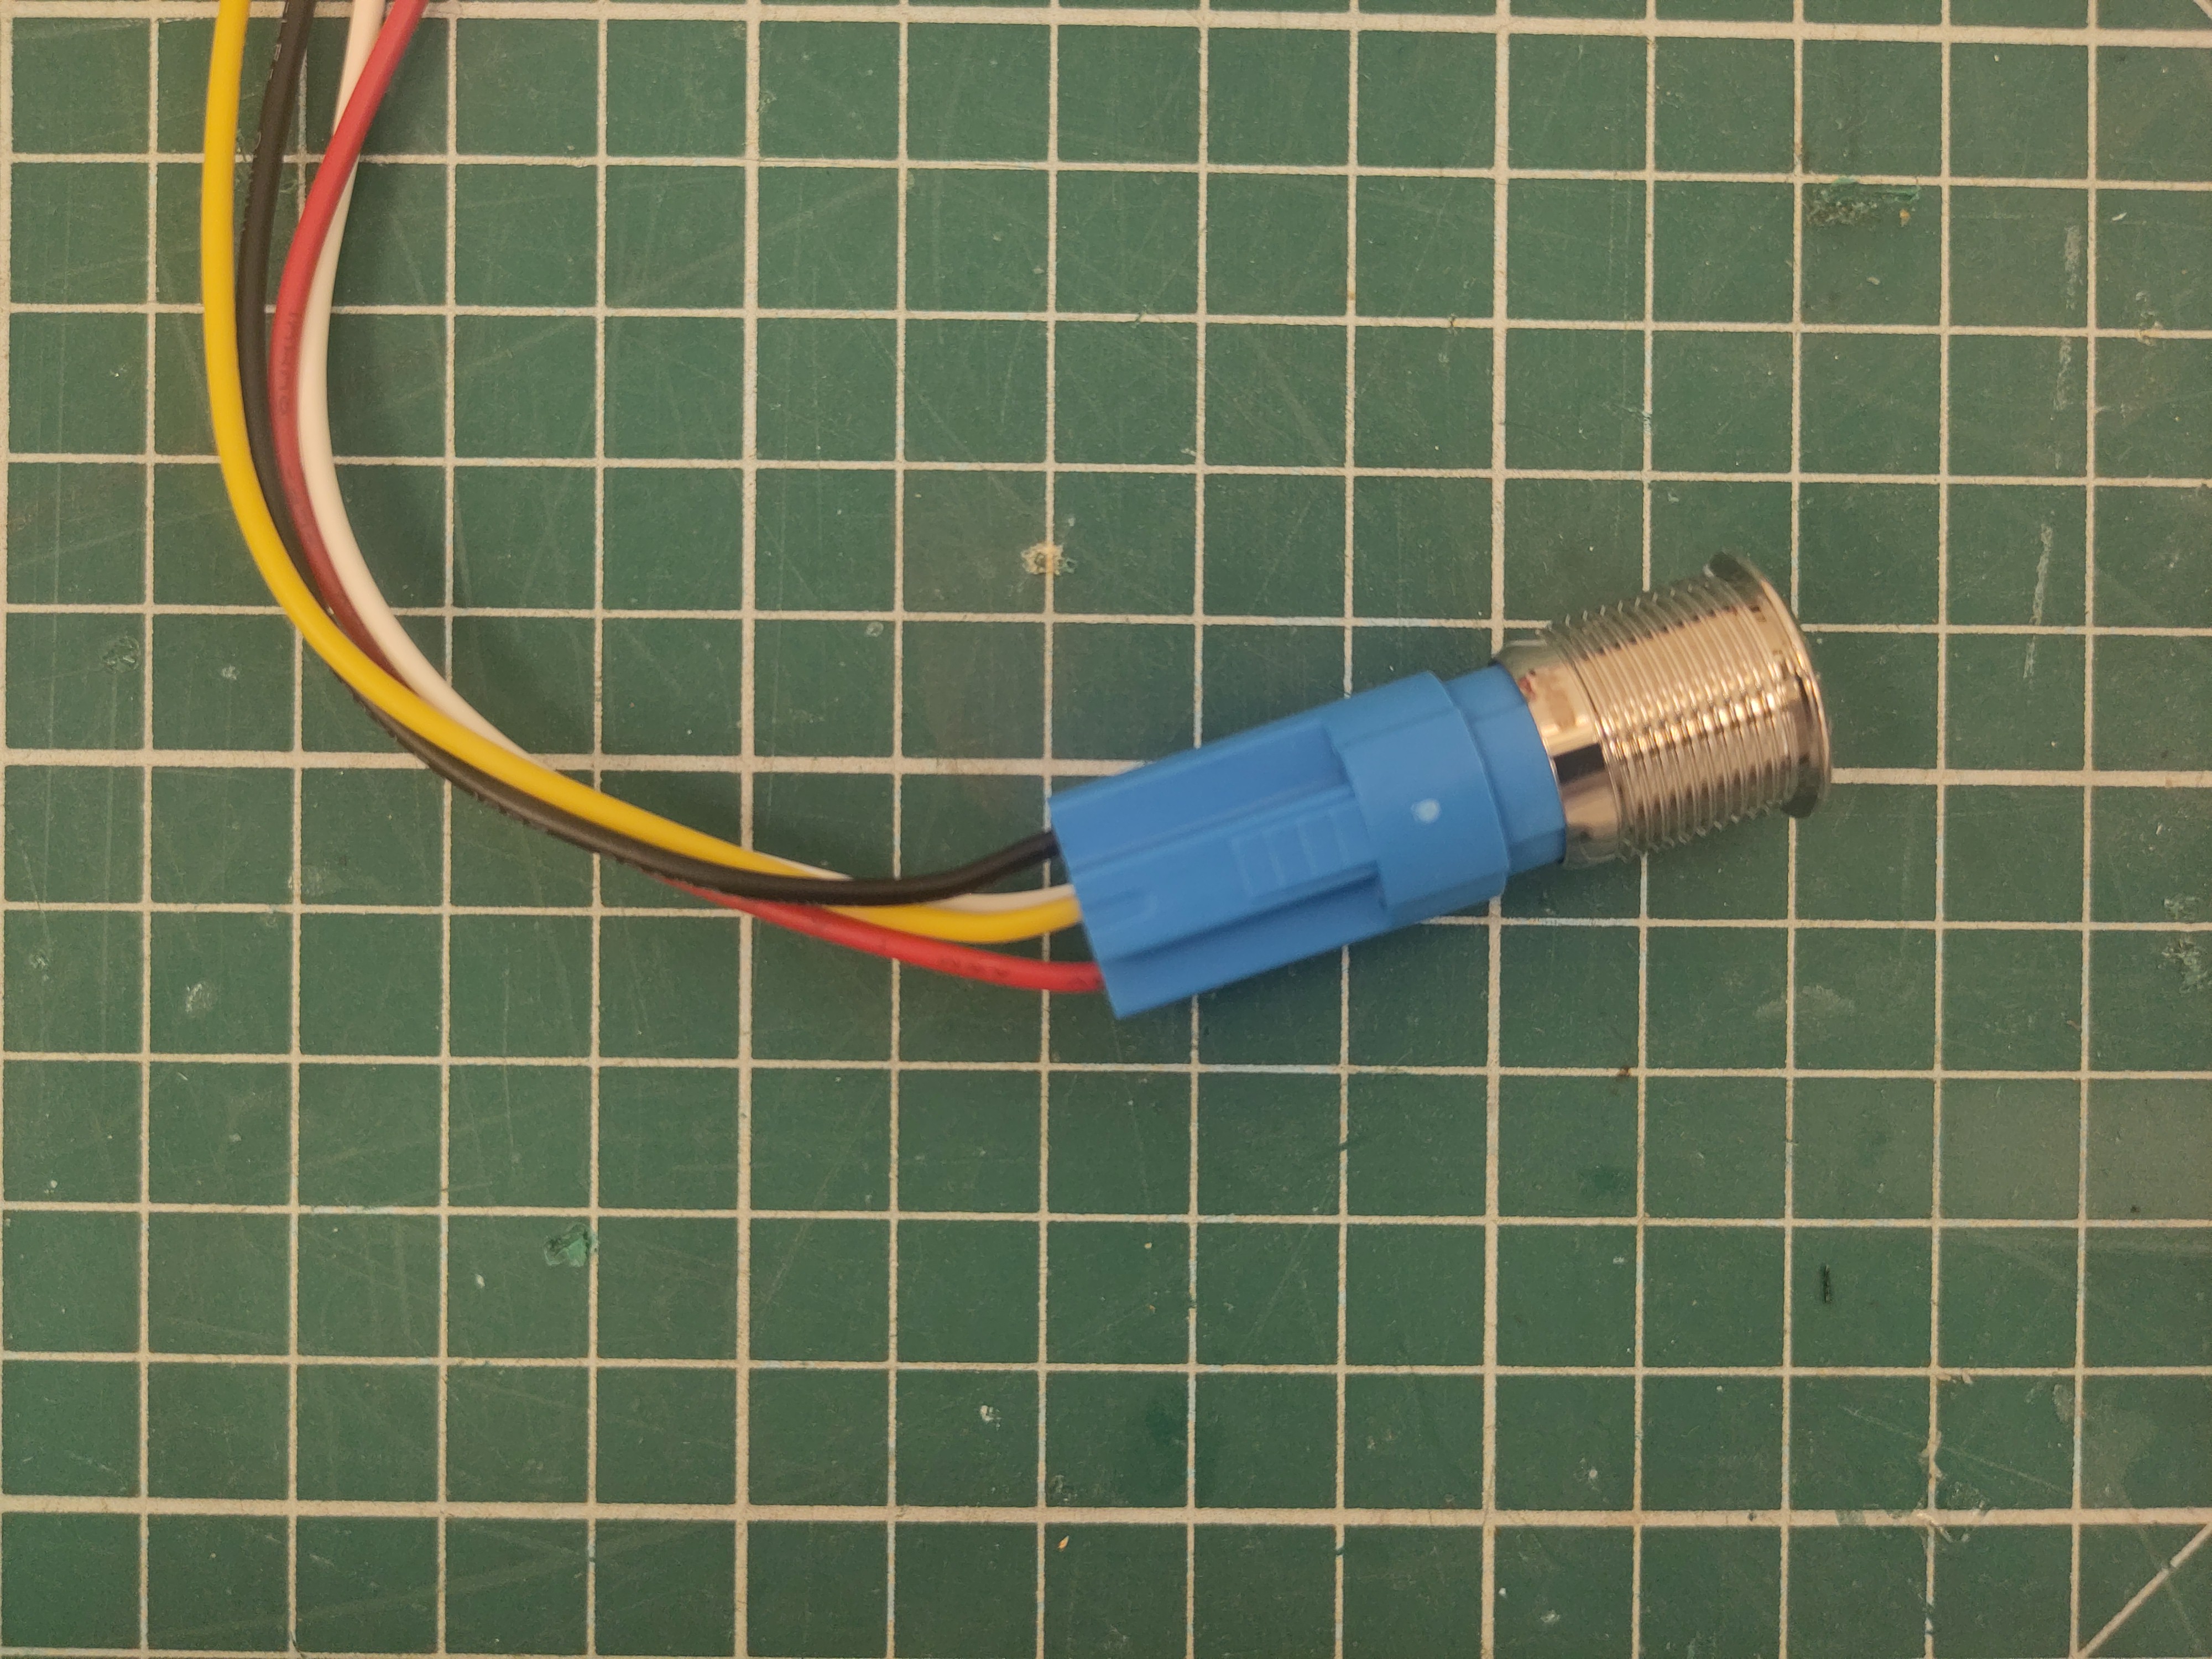
Add the ferrules in order to finish the battery cap.
Attach the battery cap to the PCB.
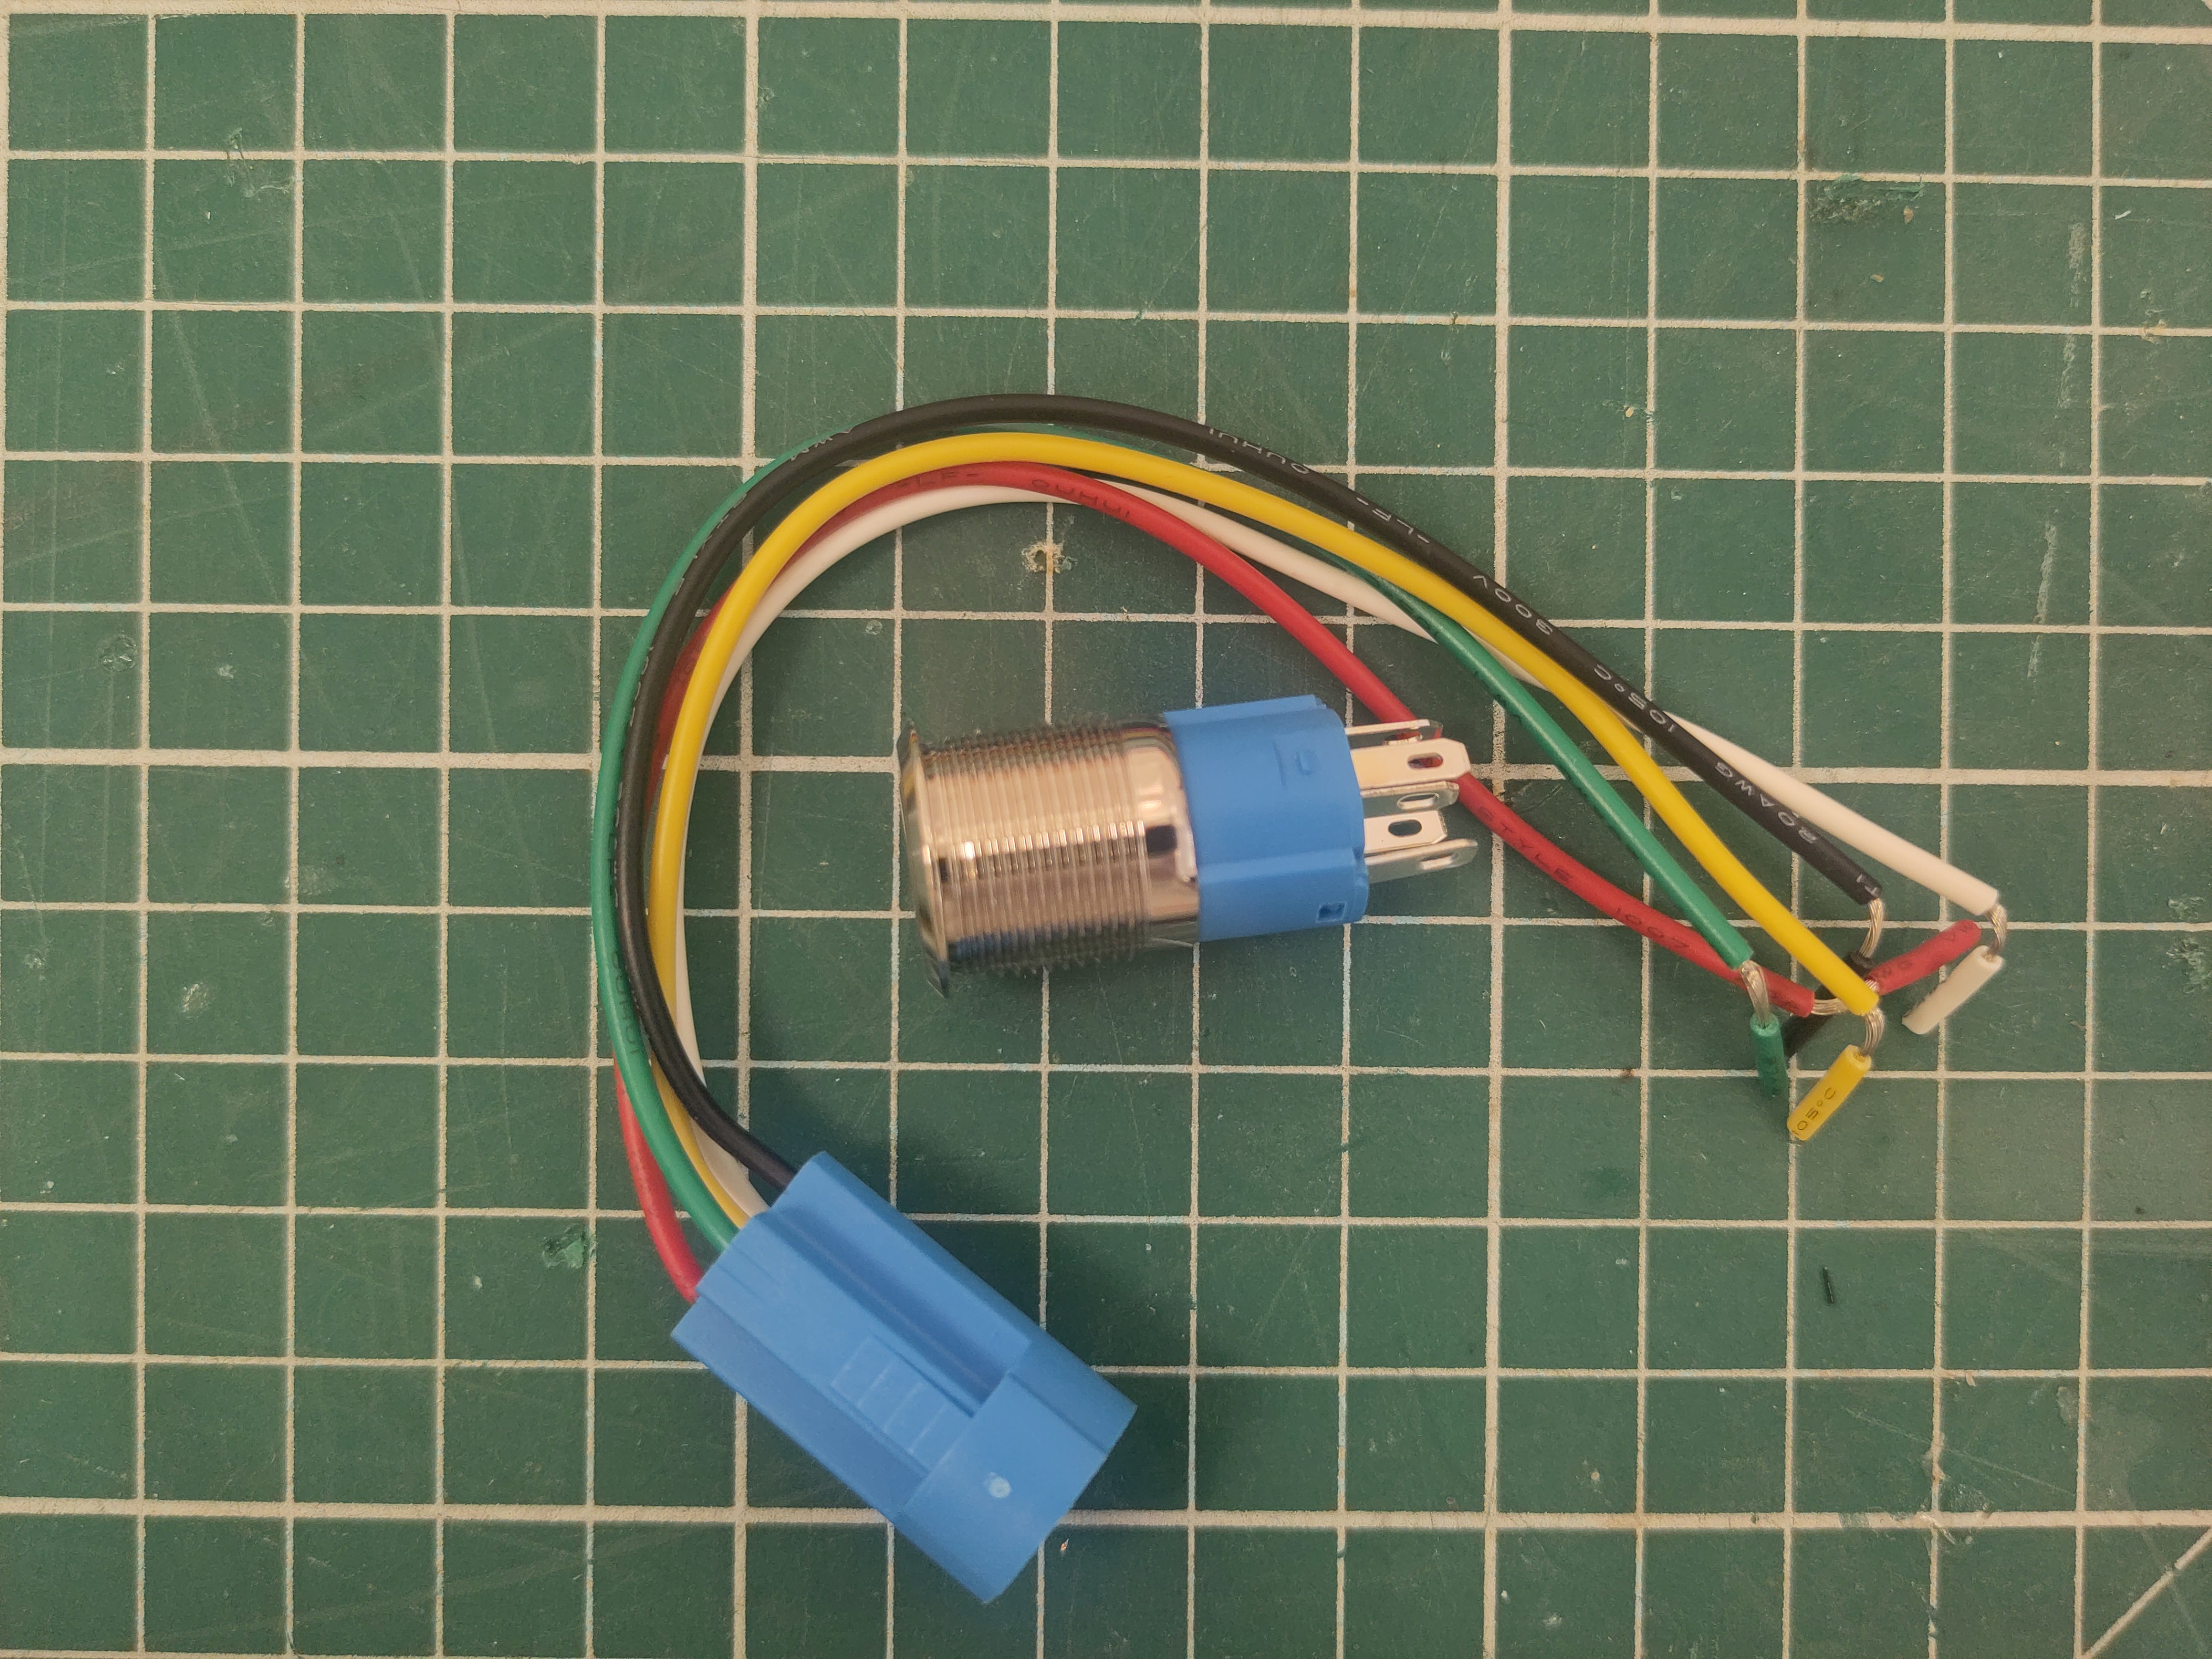
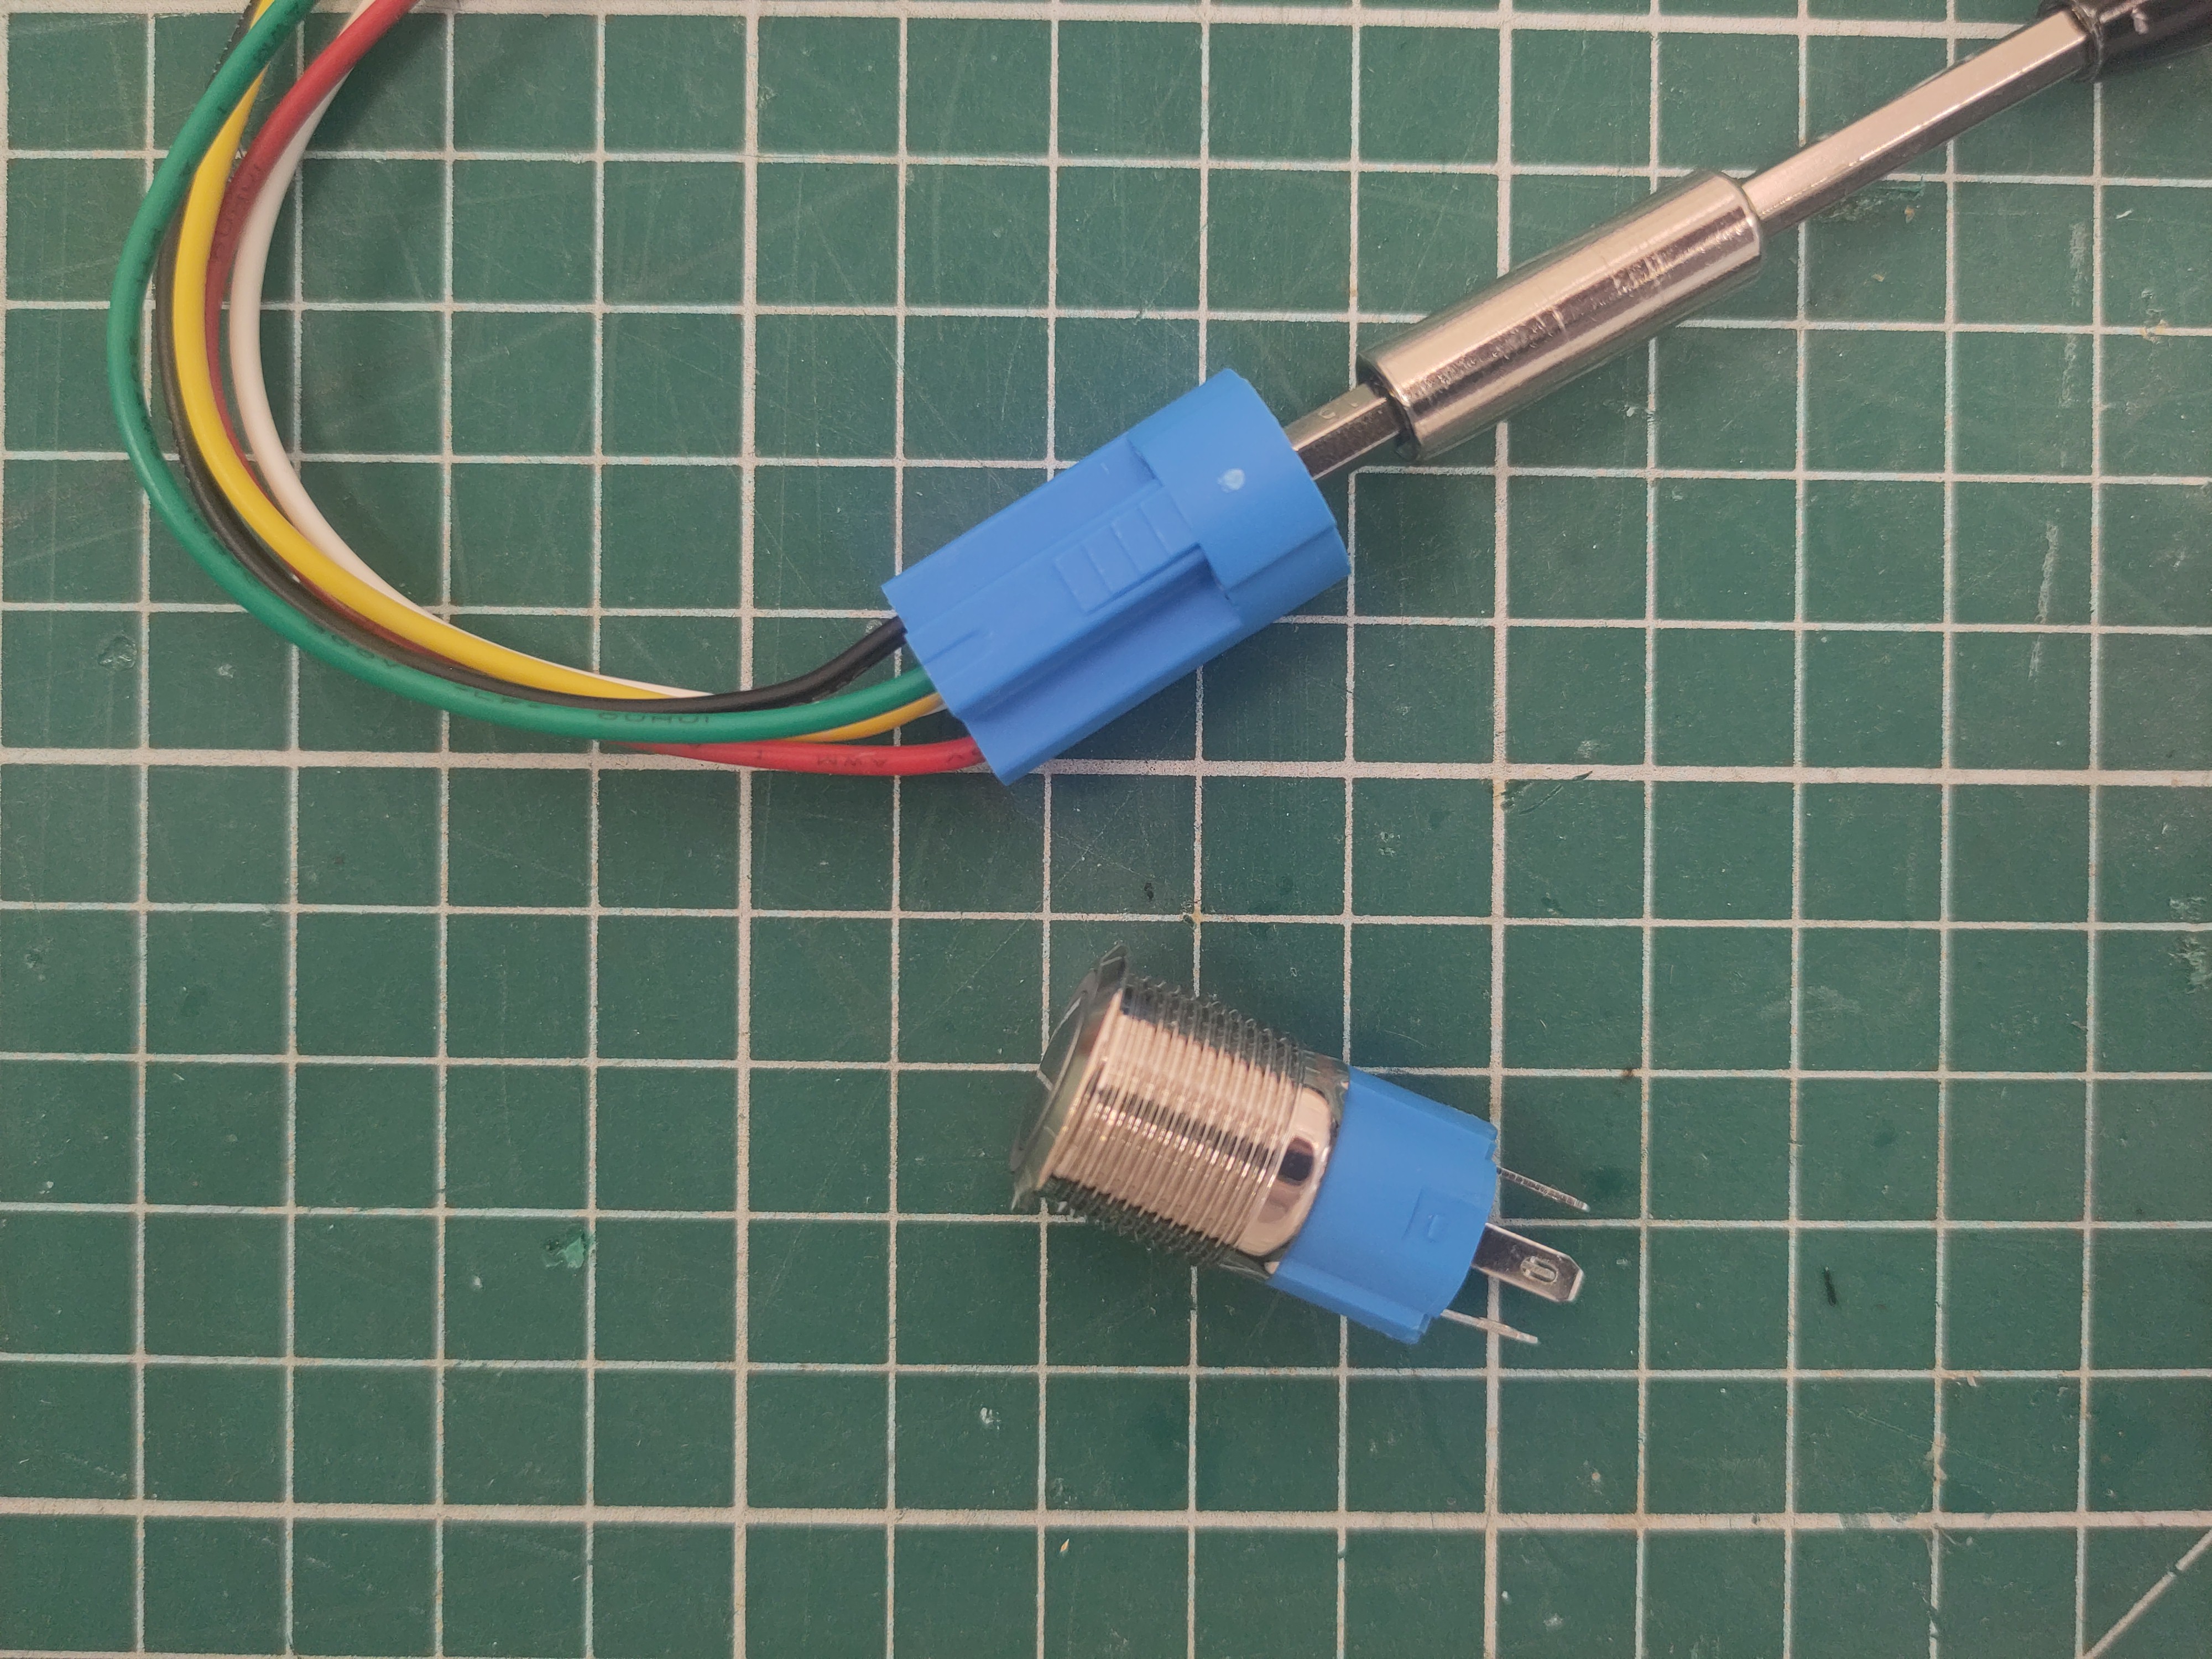
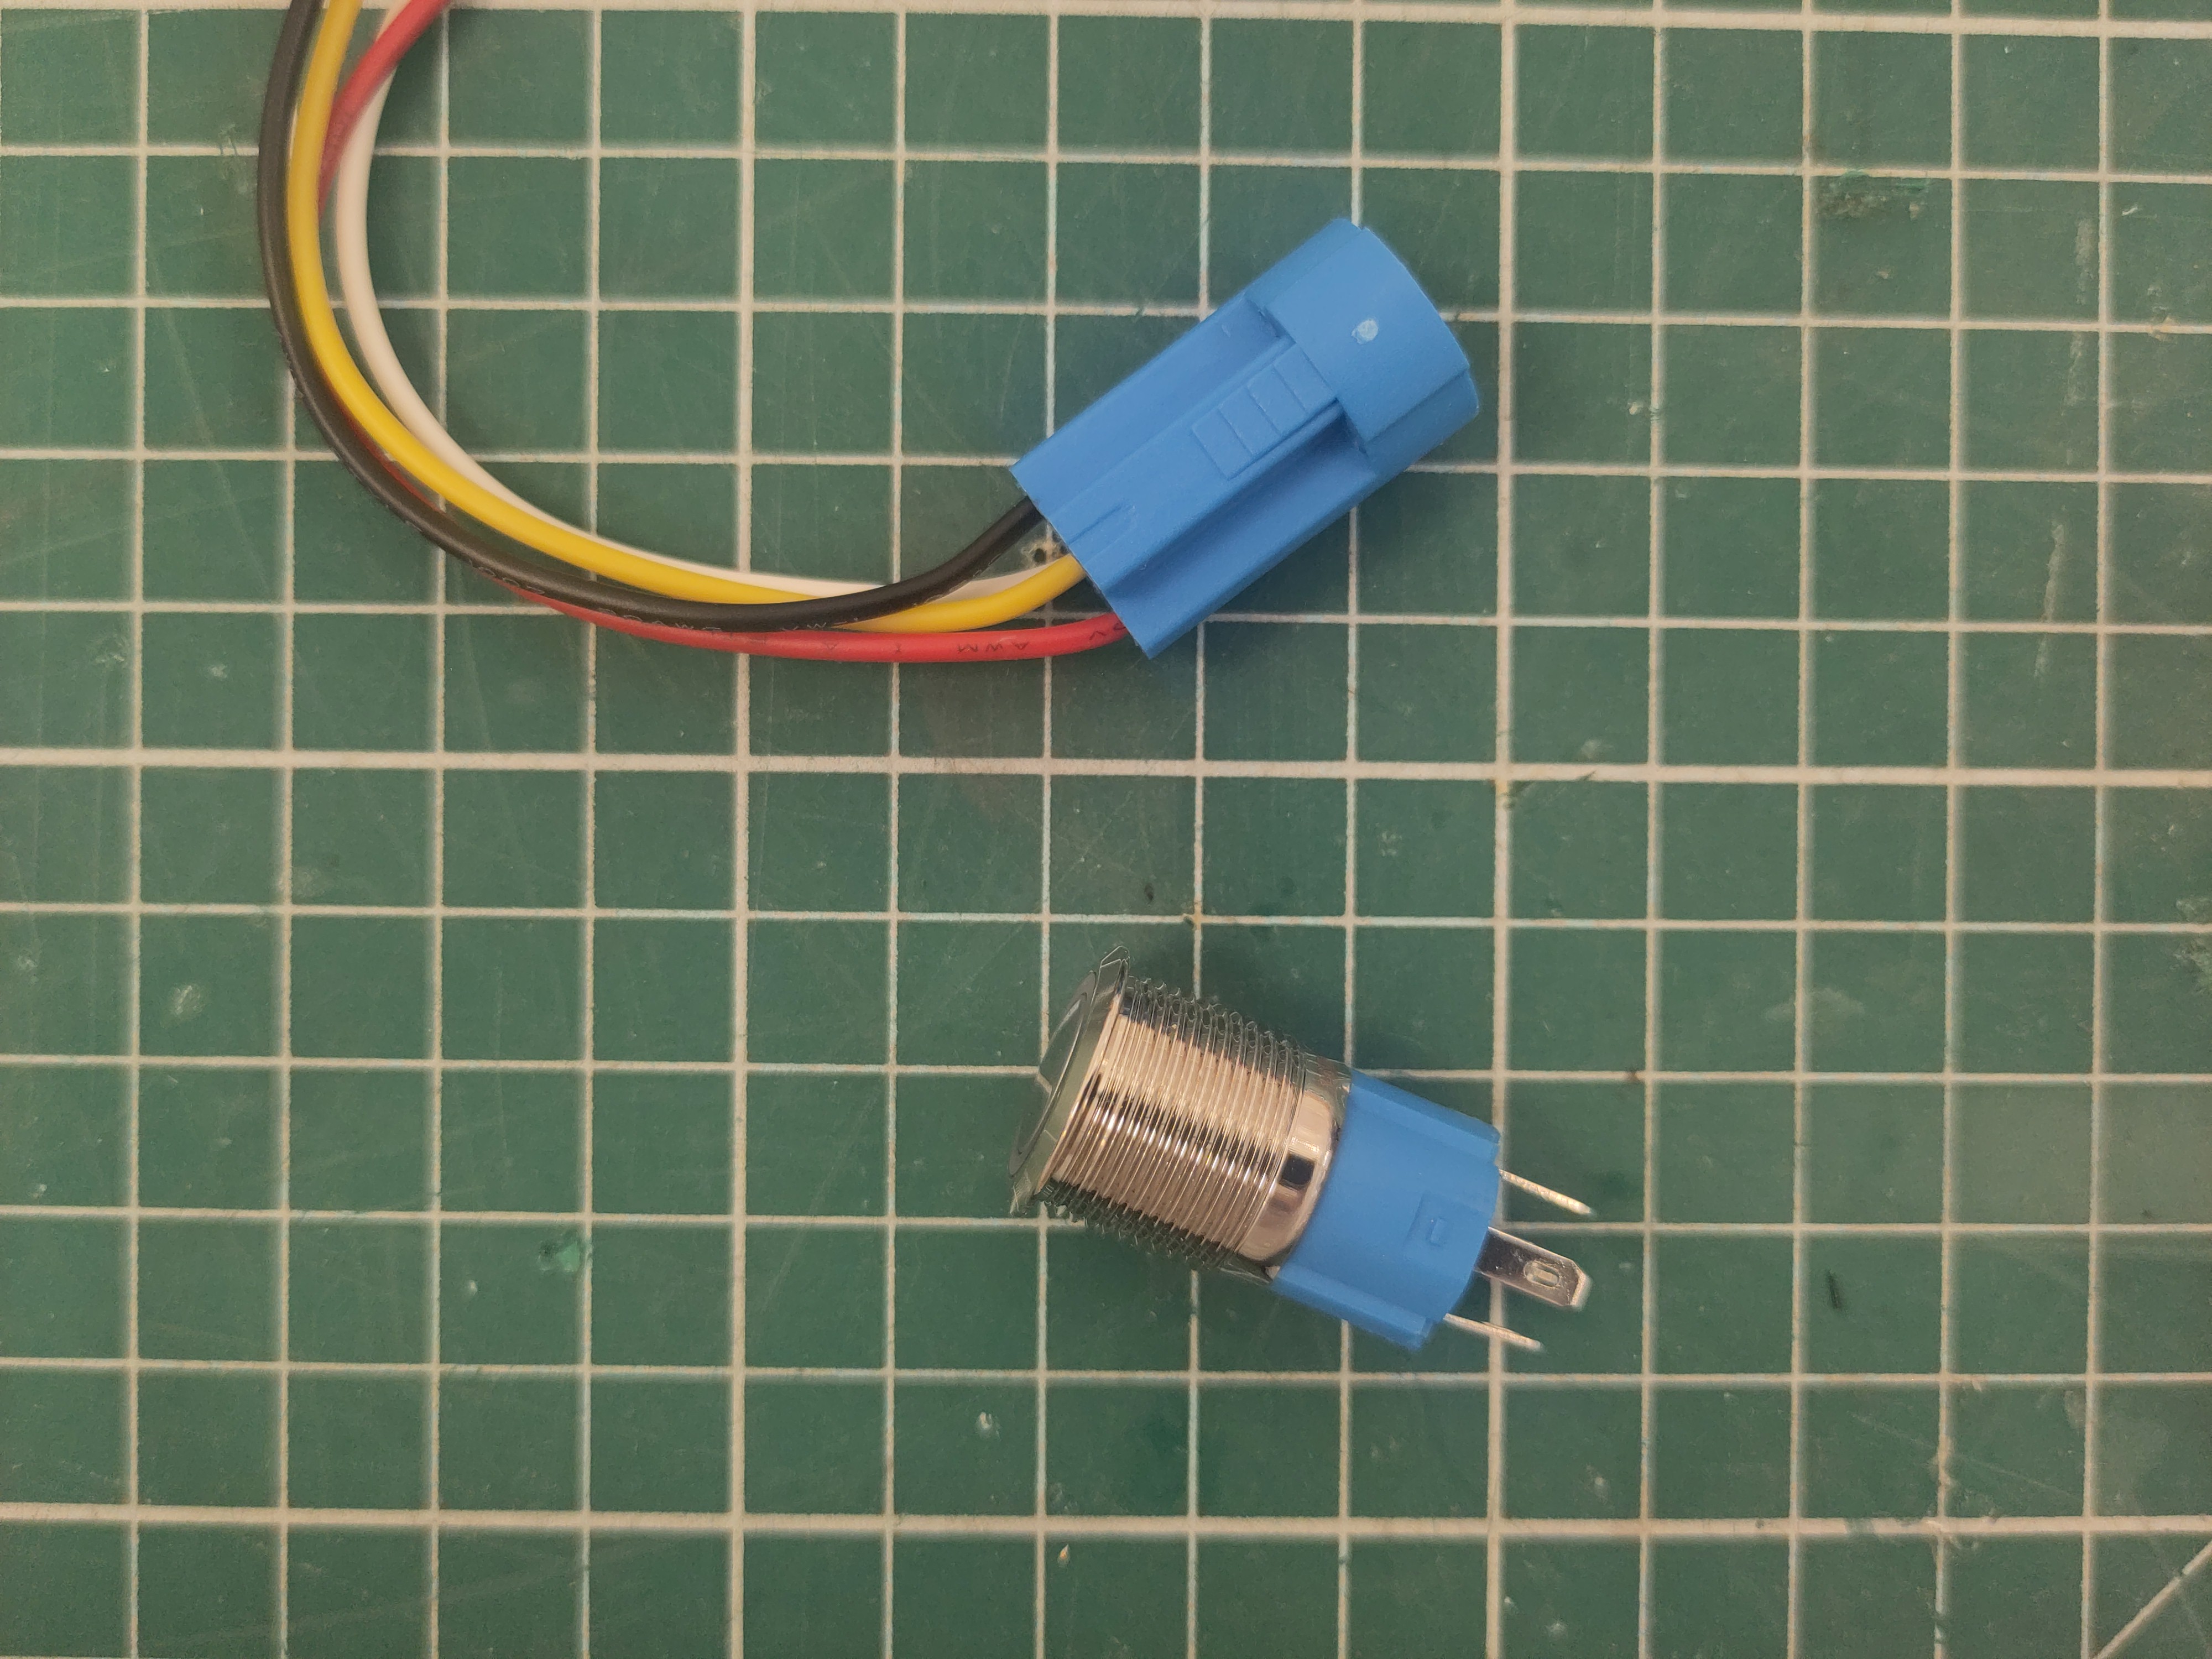
Remove the green wire using a flat screwdriver.

Notice the "NC" an "C" labels on the plug.
And make sure to put the "NC" label where the green cable was.
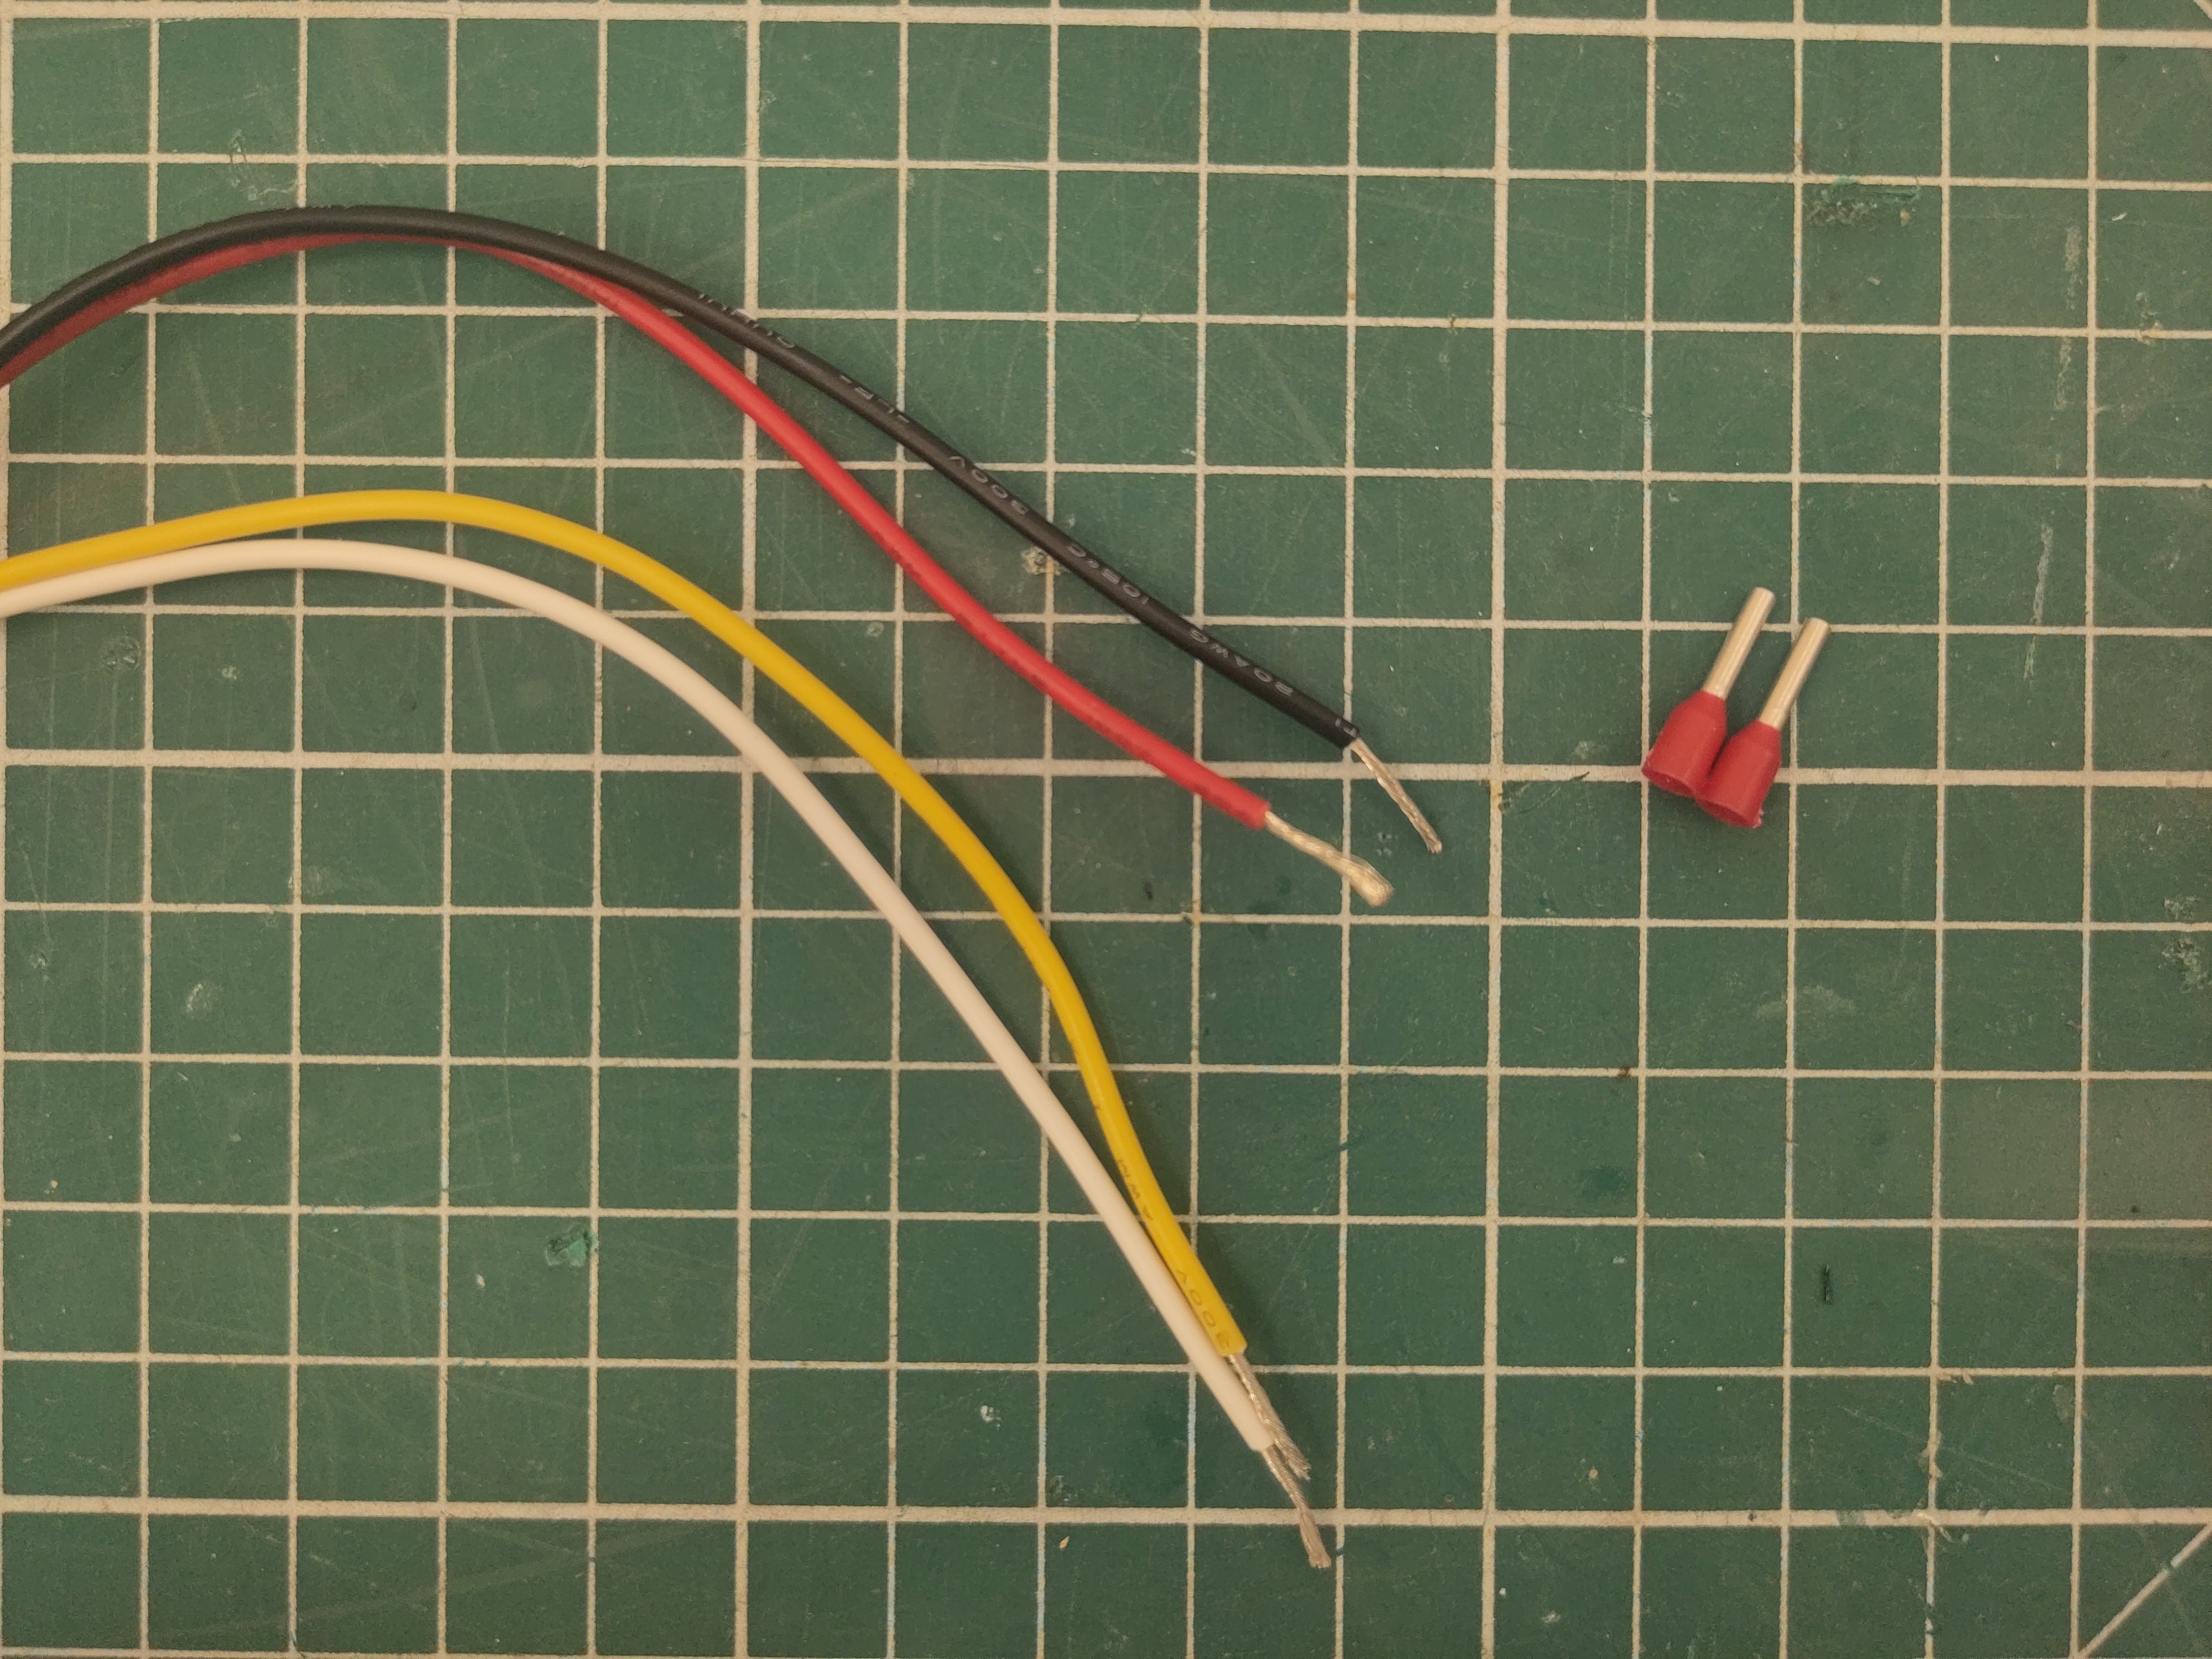

Add ferrules to the yellow and white wire.
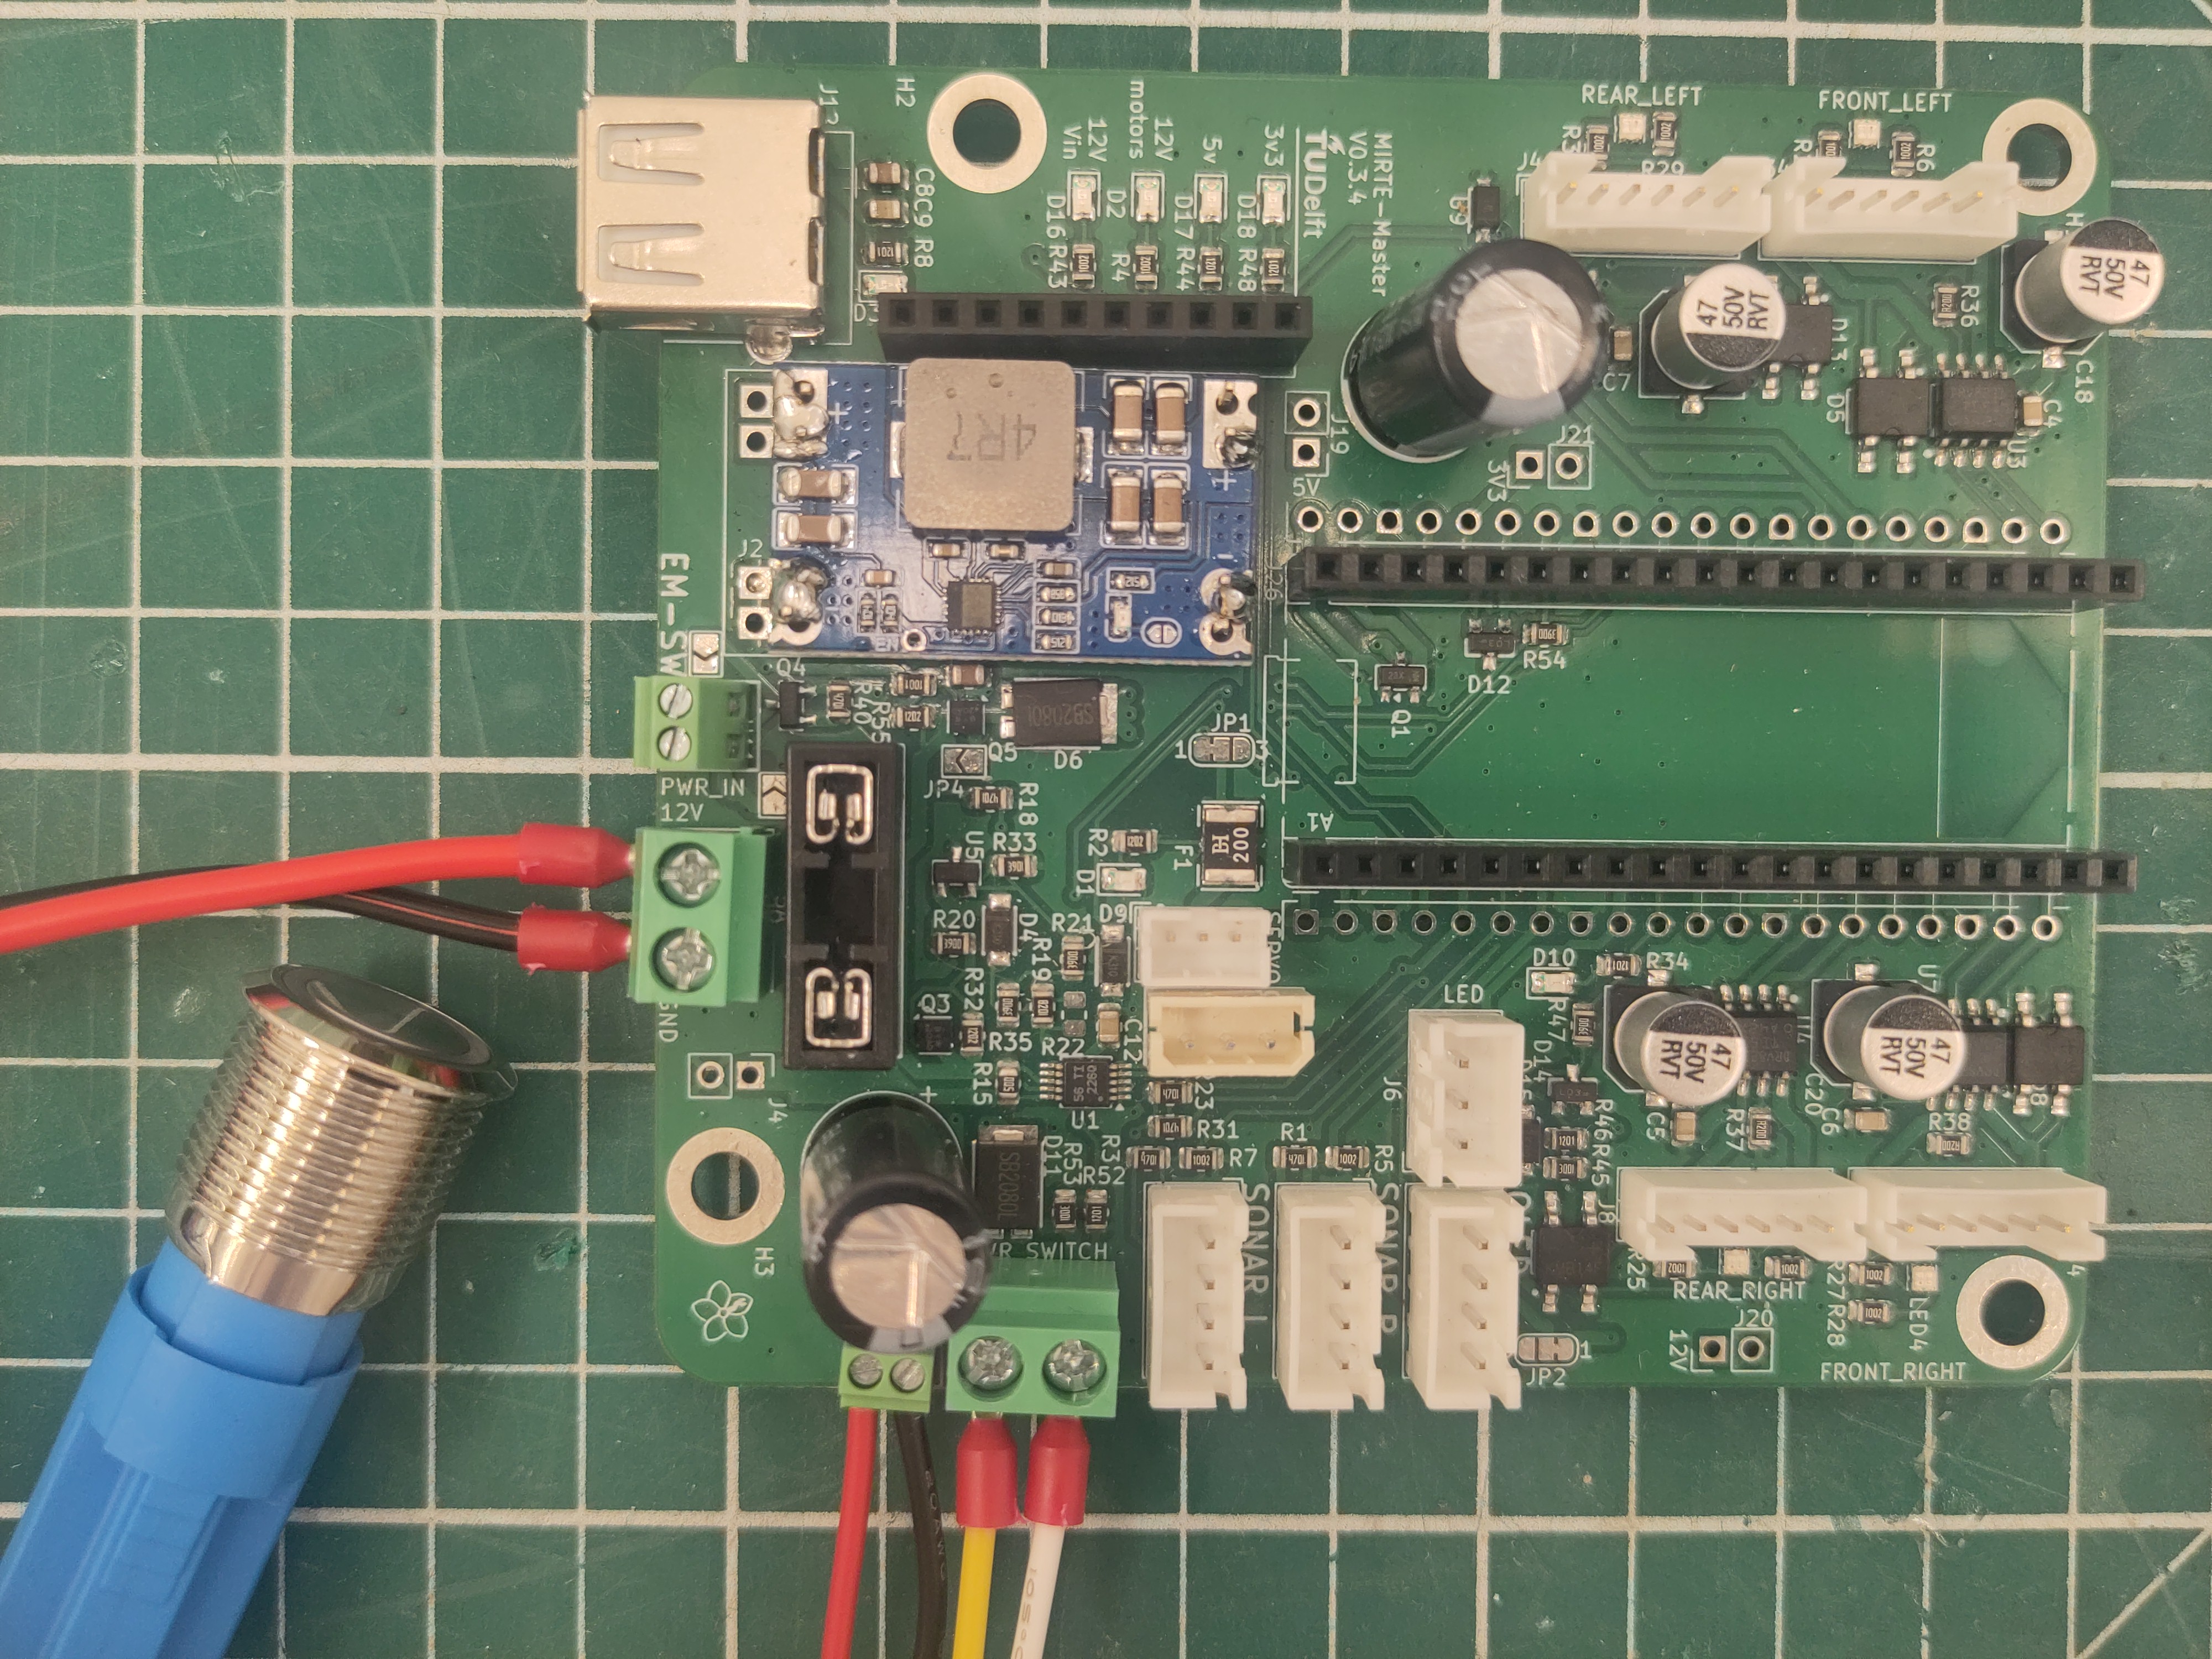
And connect the button wires to the PCB as seen in the picture.
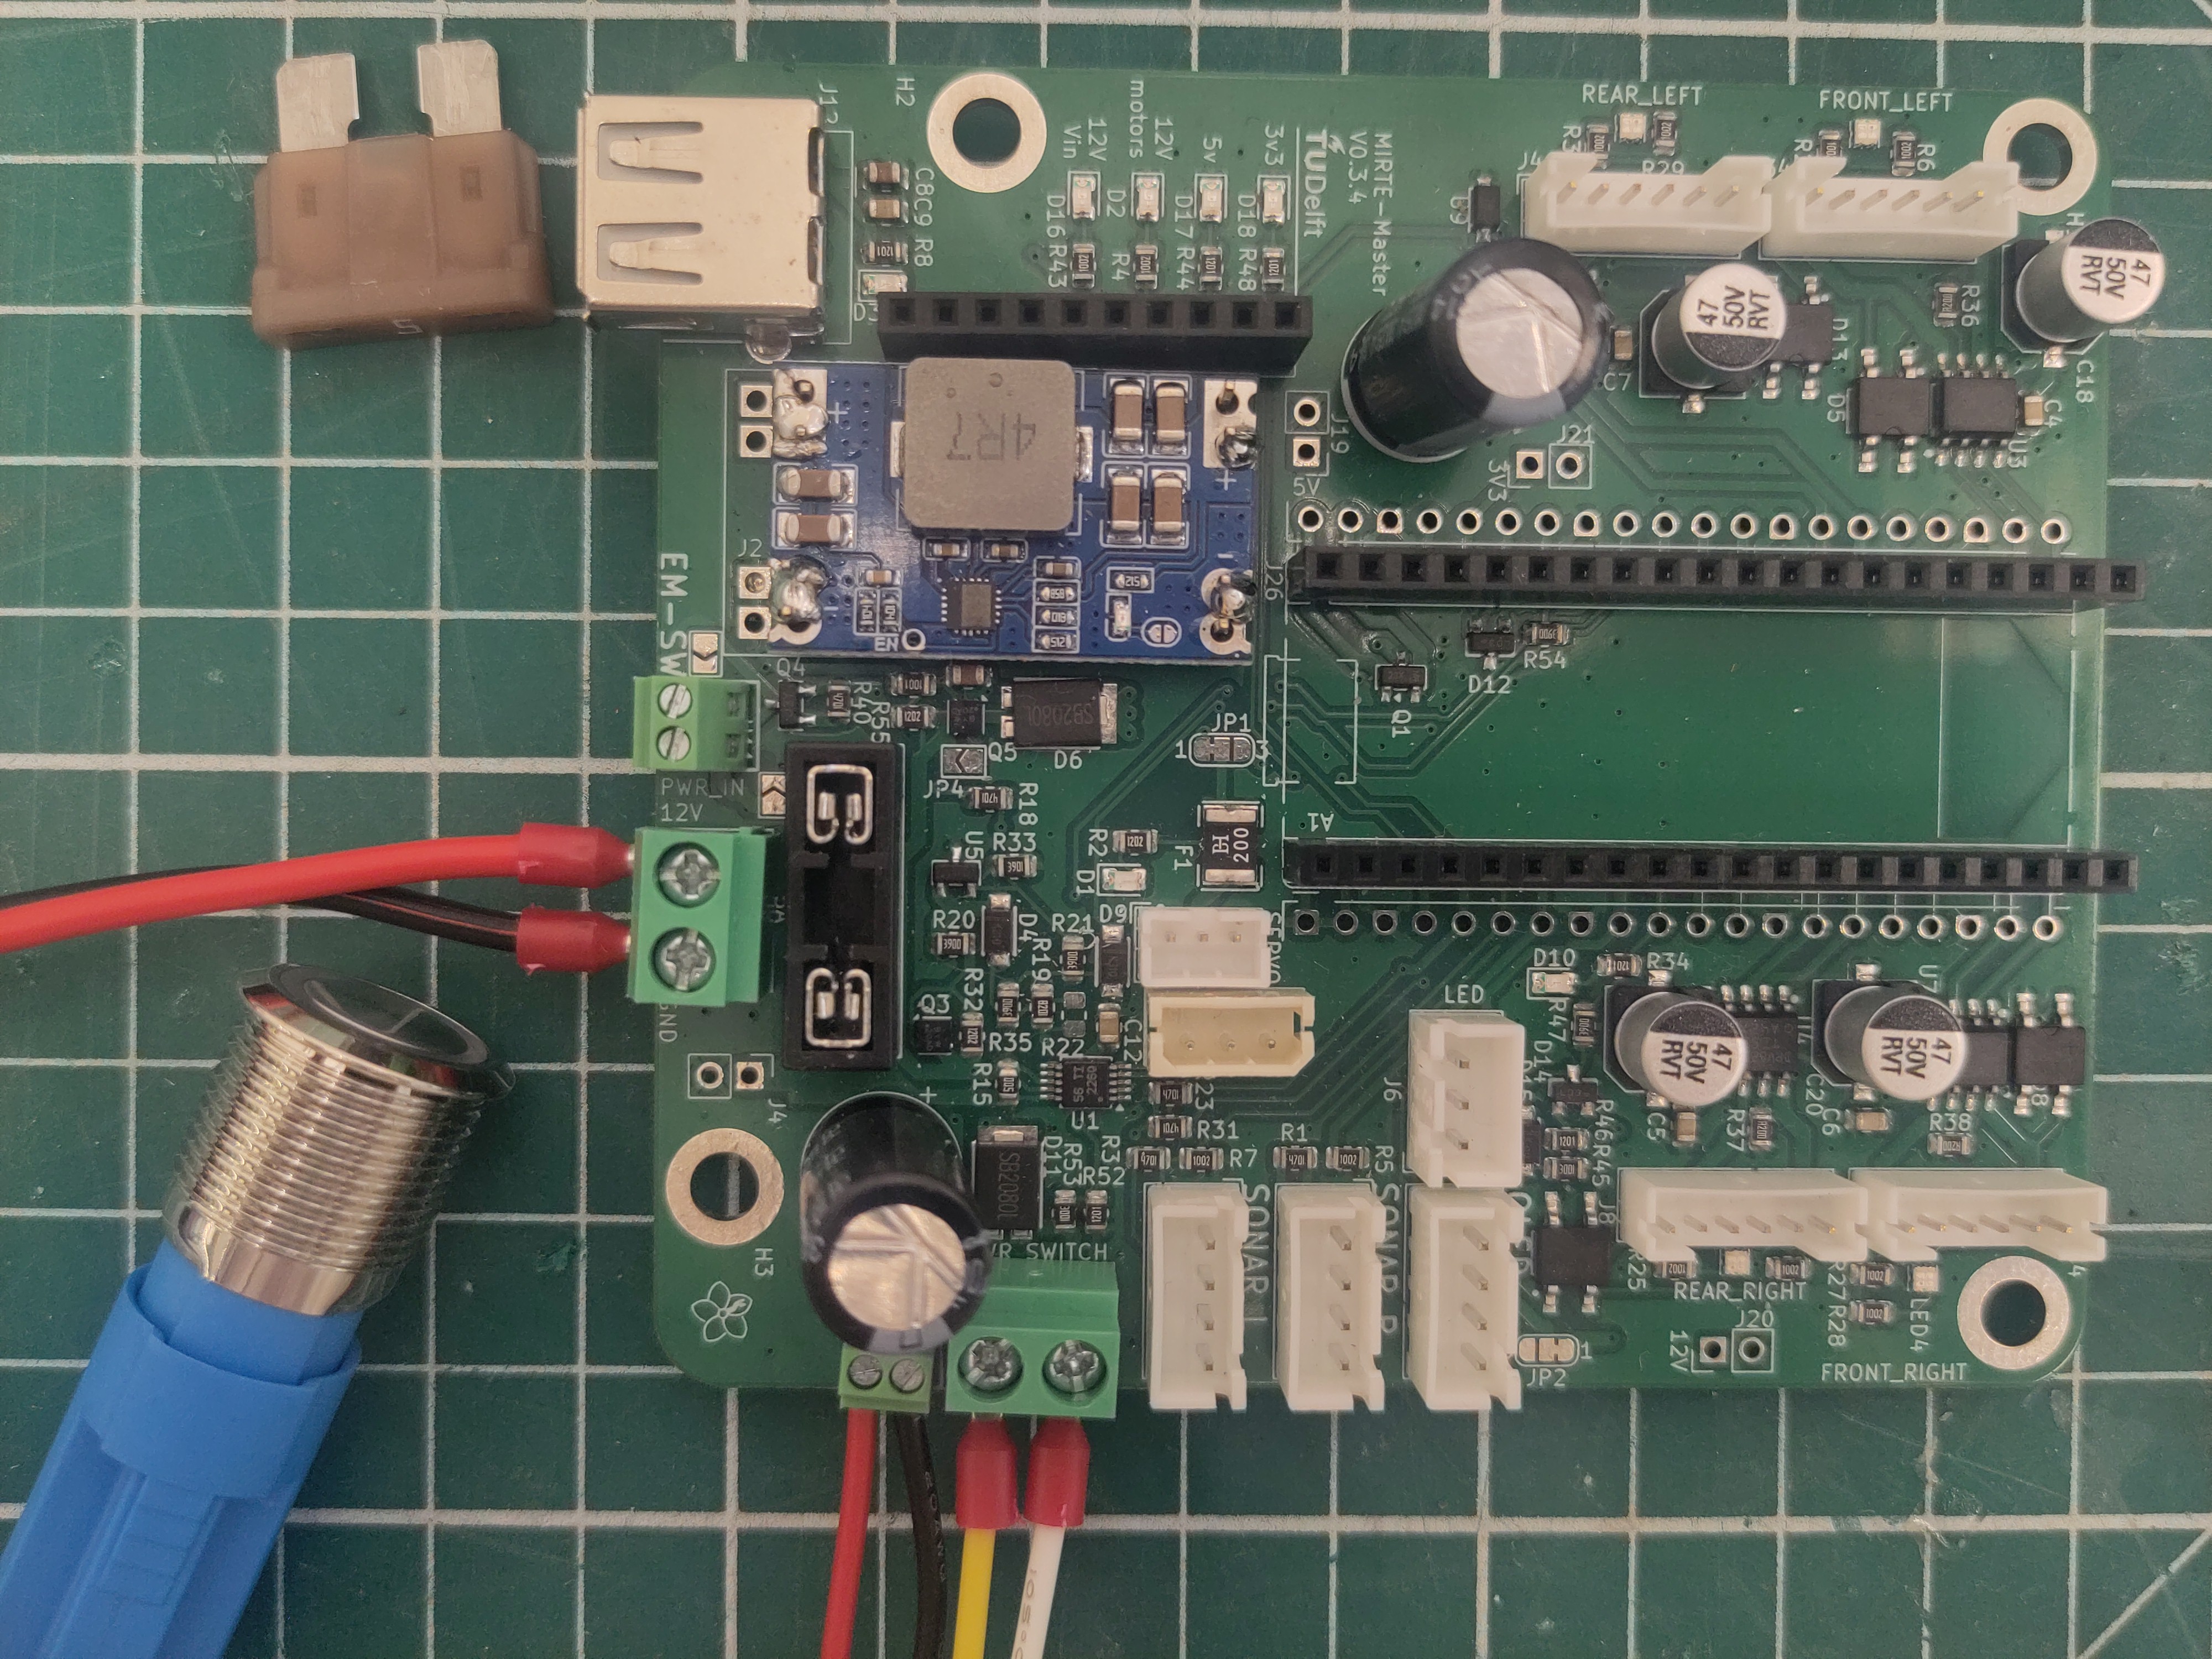
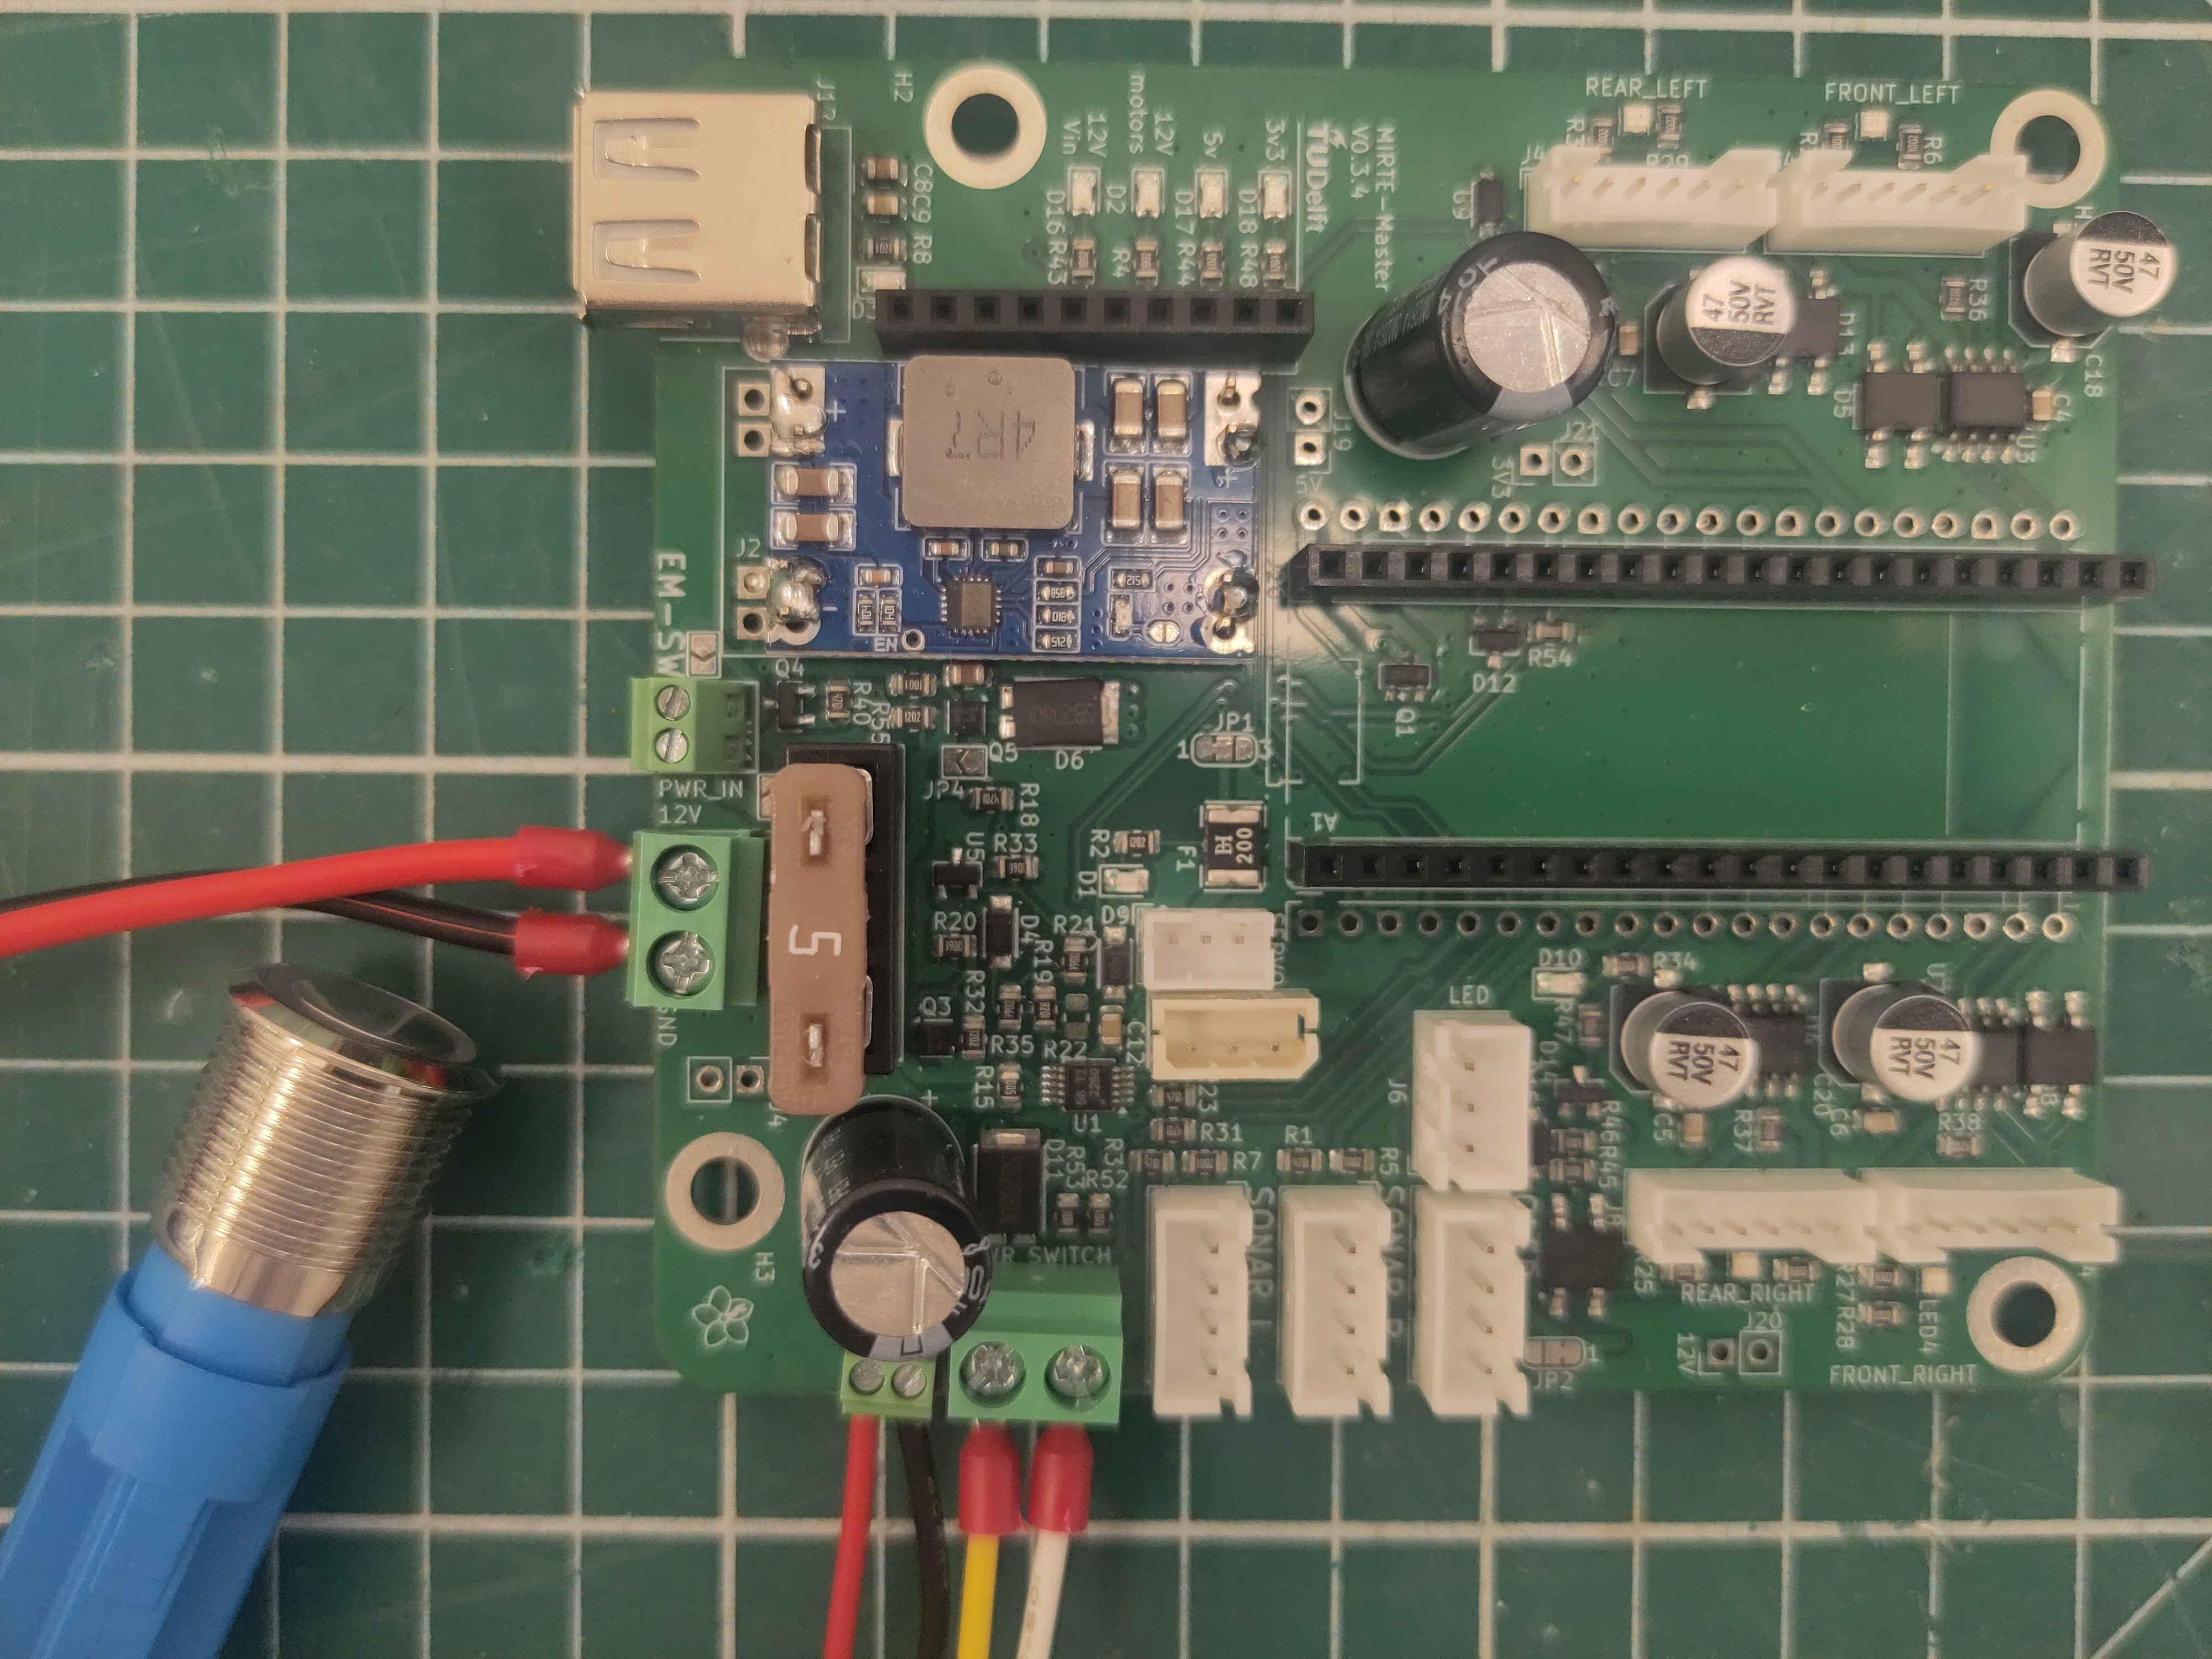
Add the blade fuse.
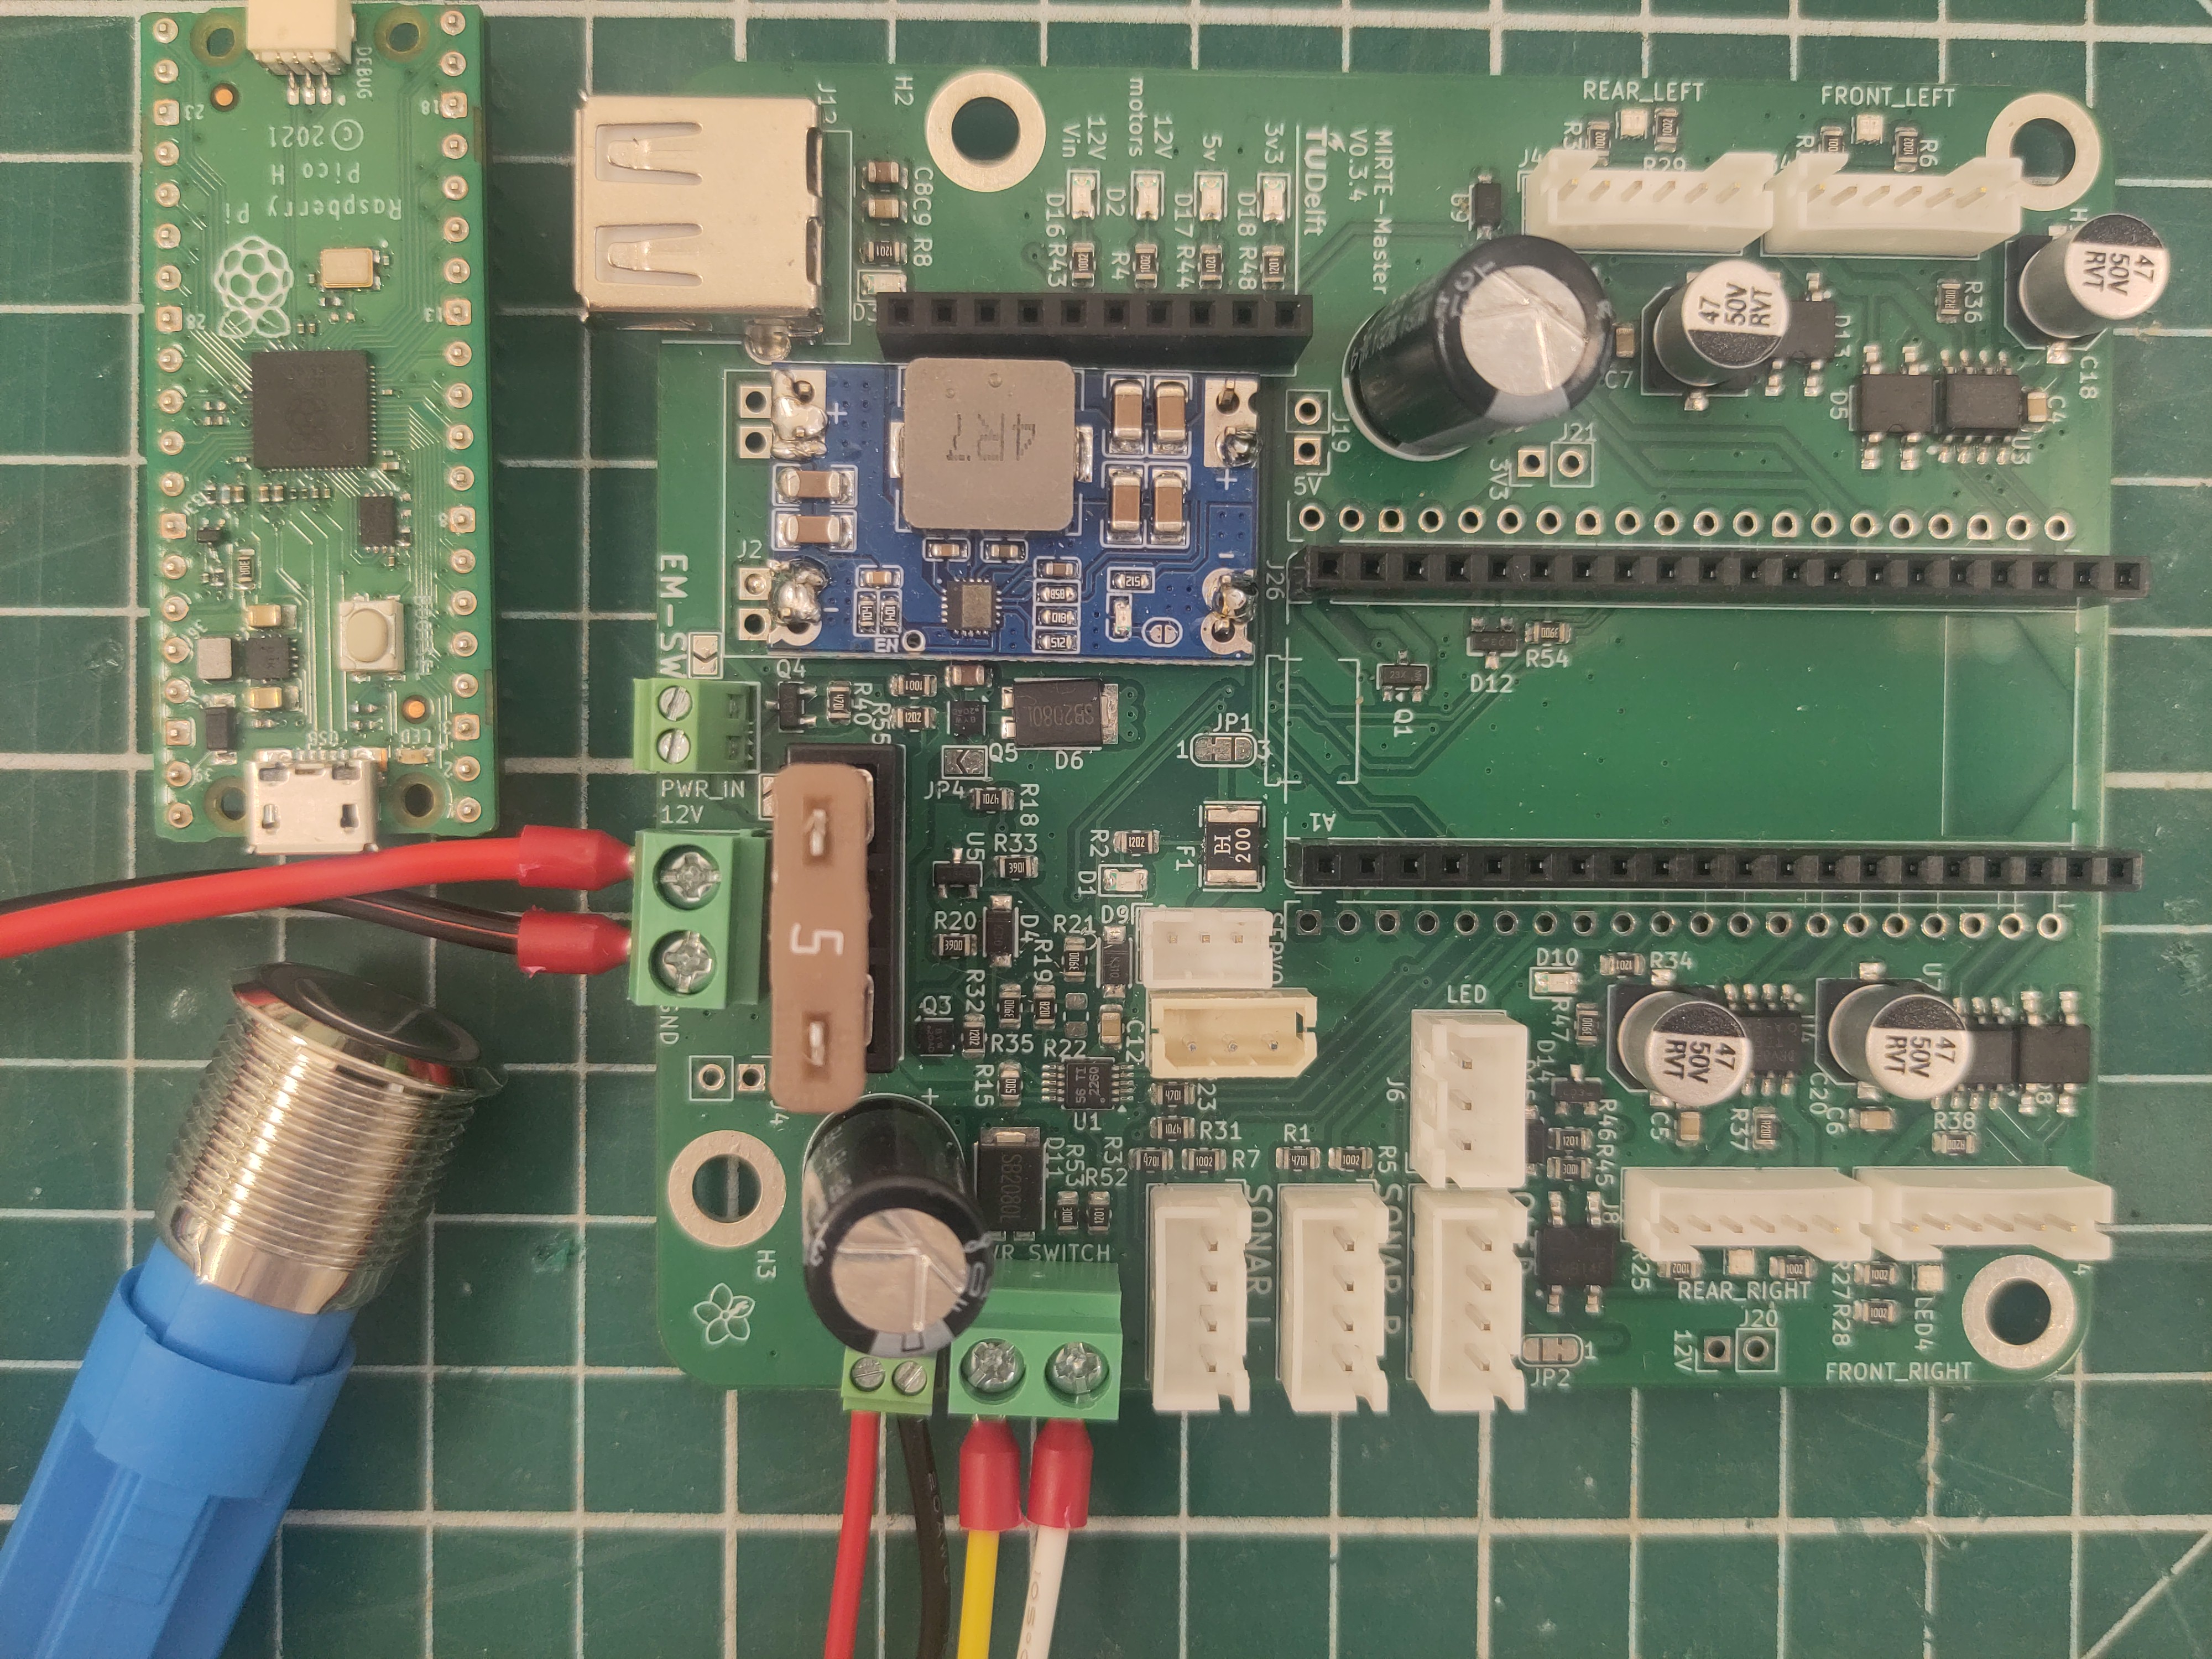

Add the Raspberry Pi Pico.
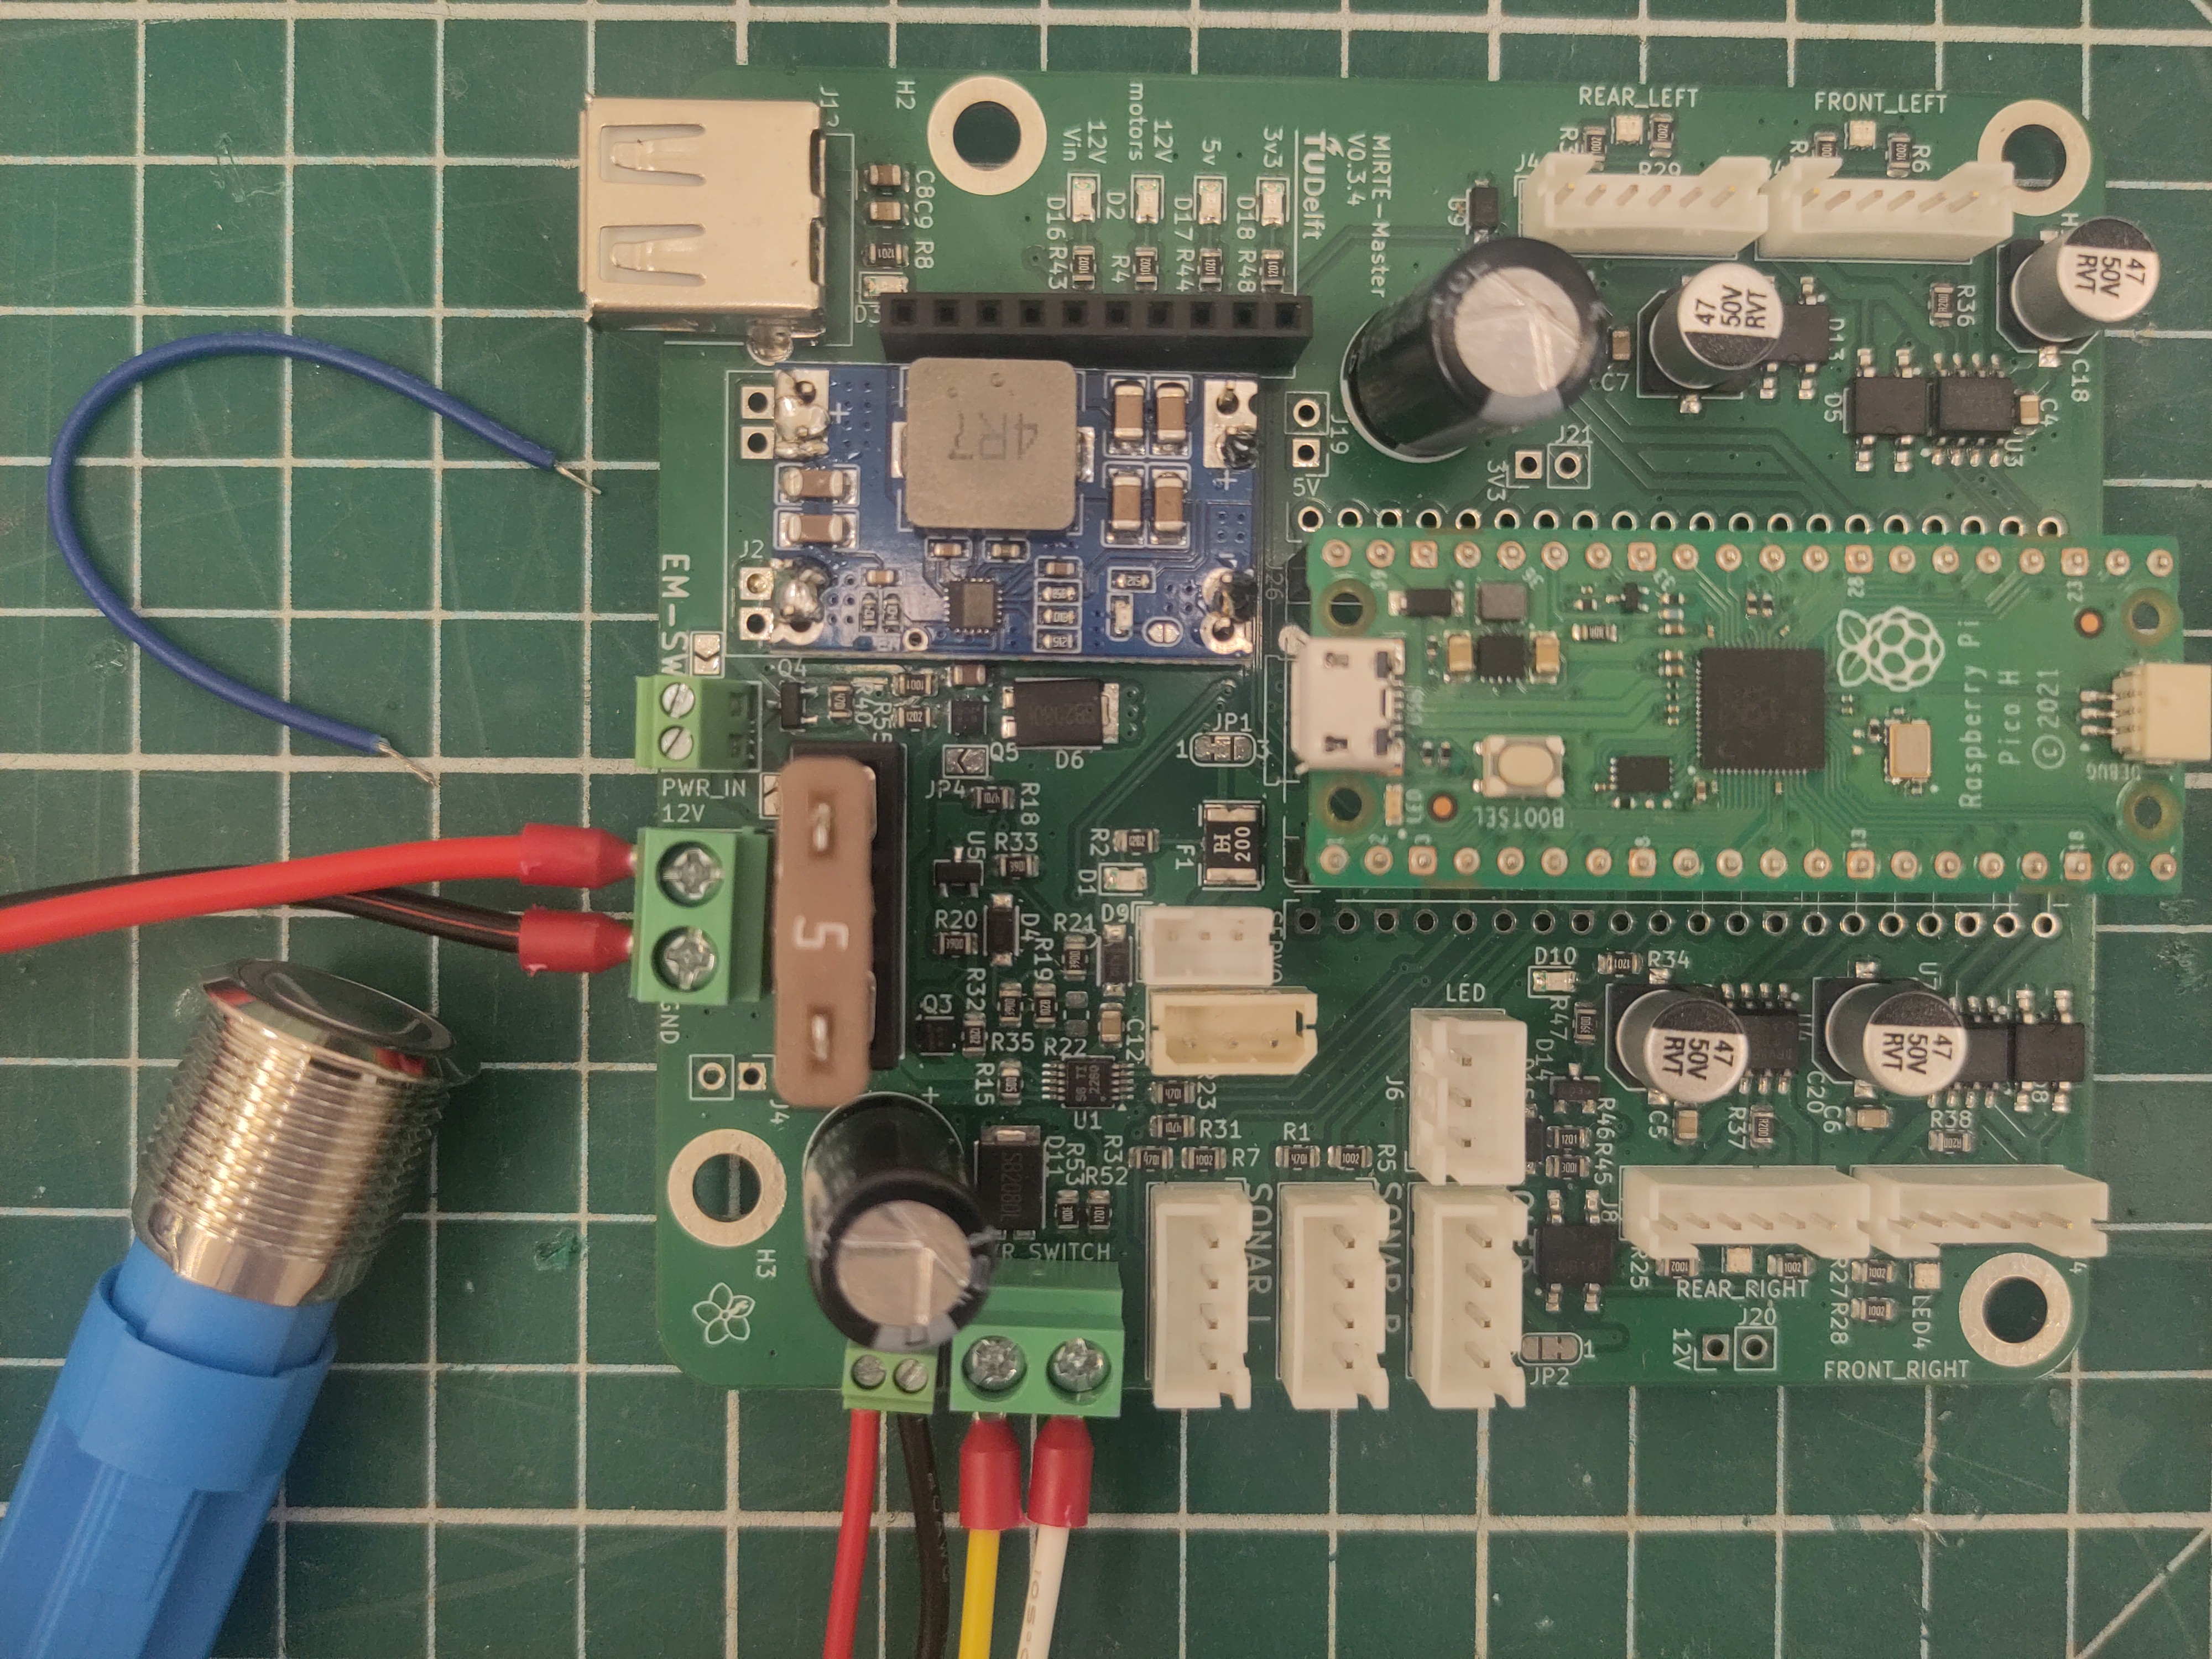

The PCB is already capable of having an emergency button attached. We do not use this yet. So we need to short this for now.
Servo settings
Before assembling the arm, please make sure that the servo’s have the correct ID, and are positioned in their 0 state. In order to do so, we have created a script that does this for each servo.
Each servo needs to be set seperately (so the servos can not be connected/daisy chained with eachother). For this setup you should upload the right uf2 to the Raspberry Pi Pico, You should now add the switch and the battery mount to the MIRTE PCB as on the picture below.
Servo |
Type |
ID |
uf2 |
|---|---|---|---|
Rotation |
HX-12H |
2 |
|
Shoulder |
HTD-45H |
3 |
|
Elbow |
HTD-35H |
4 |
|
Wrist |
HX-12H |
5 |
|
Gripper |
HX-12H |
6 |
The steps you need to take for each servo are:
Upload the right uf2 to the Pico
Connect the servo to the PCB
Turn on the PCB by pressing the switch
Check if you saw the servo moving and/or validate by connecting the Pico to a (linux) pc and read from serial:
$ tio -b 115200 /dev/ttyACM0
Tip
When assembling multiple MIRTE Masters at once it makes sense to set all the servos with the same ID.
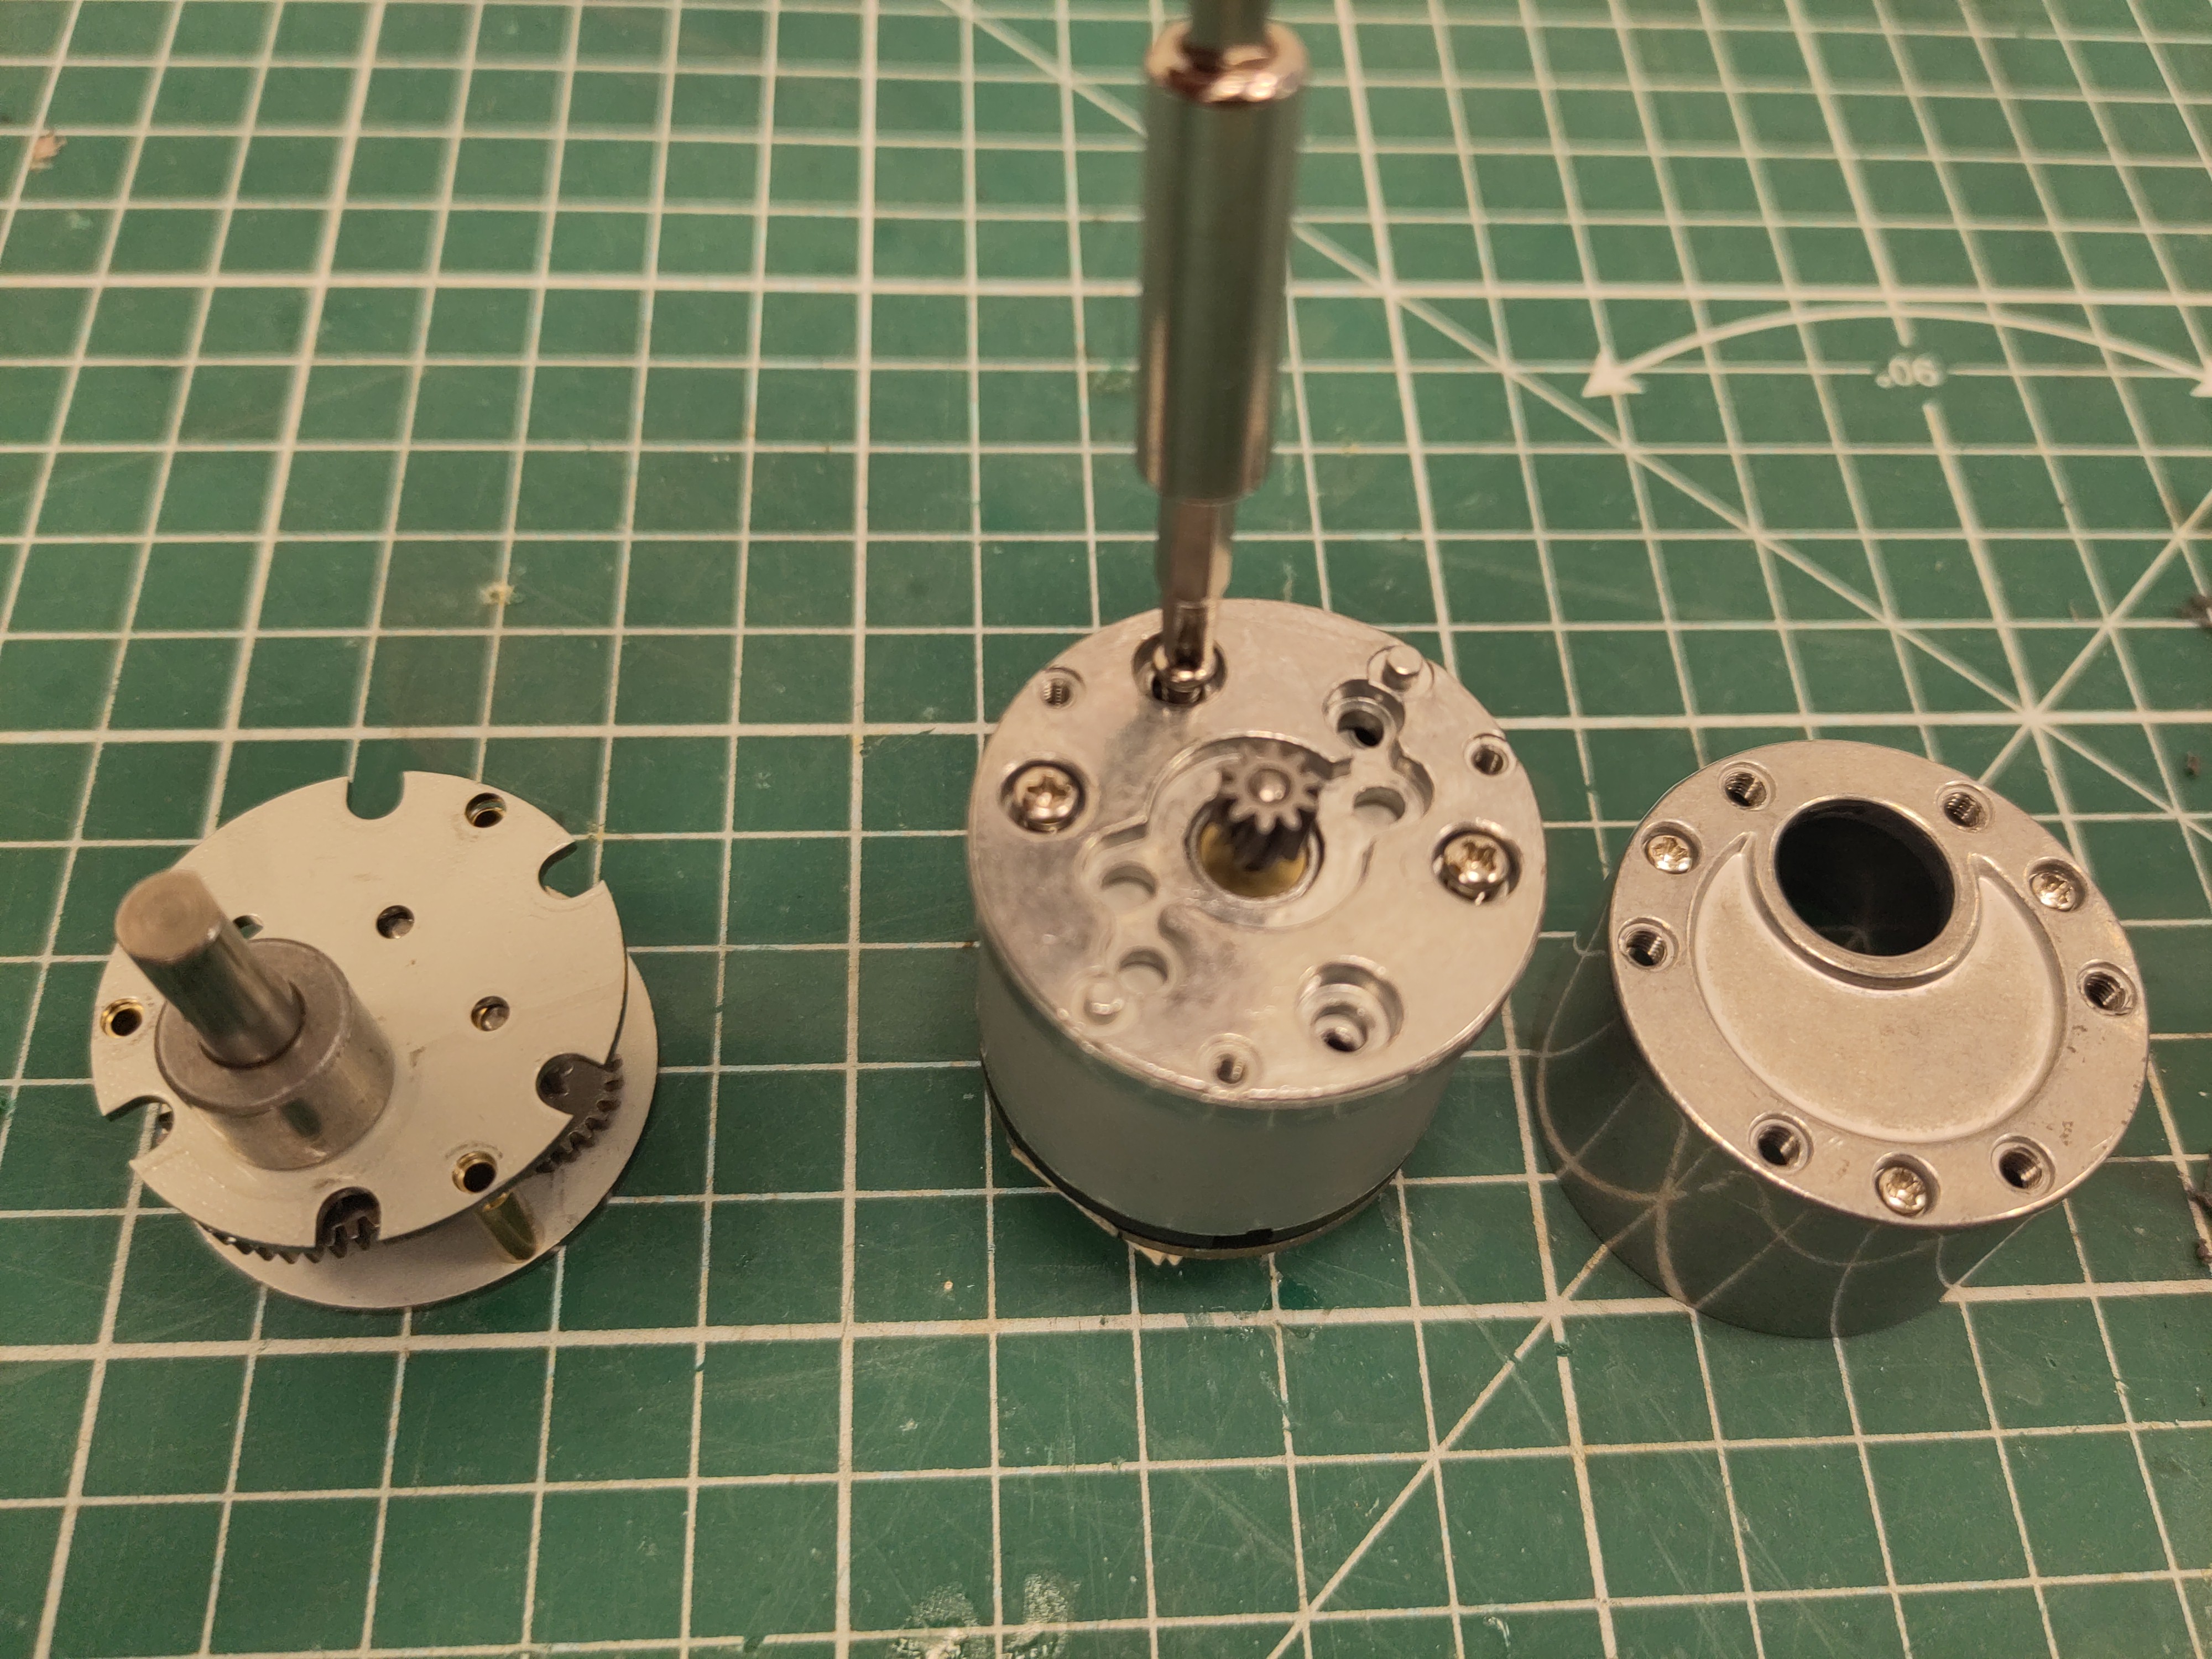
DC motor alignment
In order to assembe the MIRTE Master correctly, we need to maek sure that the connector on the motor is roughtly on the same orentation as the motor shaft. Unfortunately, not all motors have this setup. So for some we need to change this orientation by rotating the gearbox.
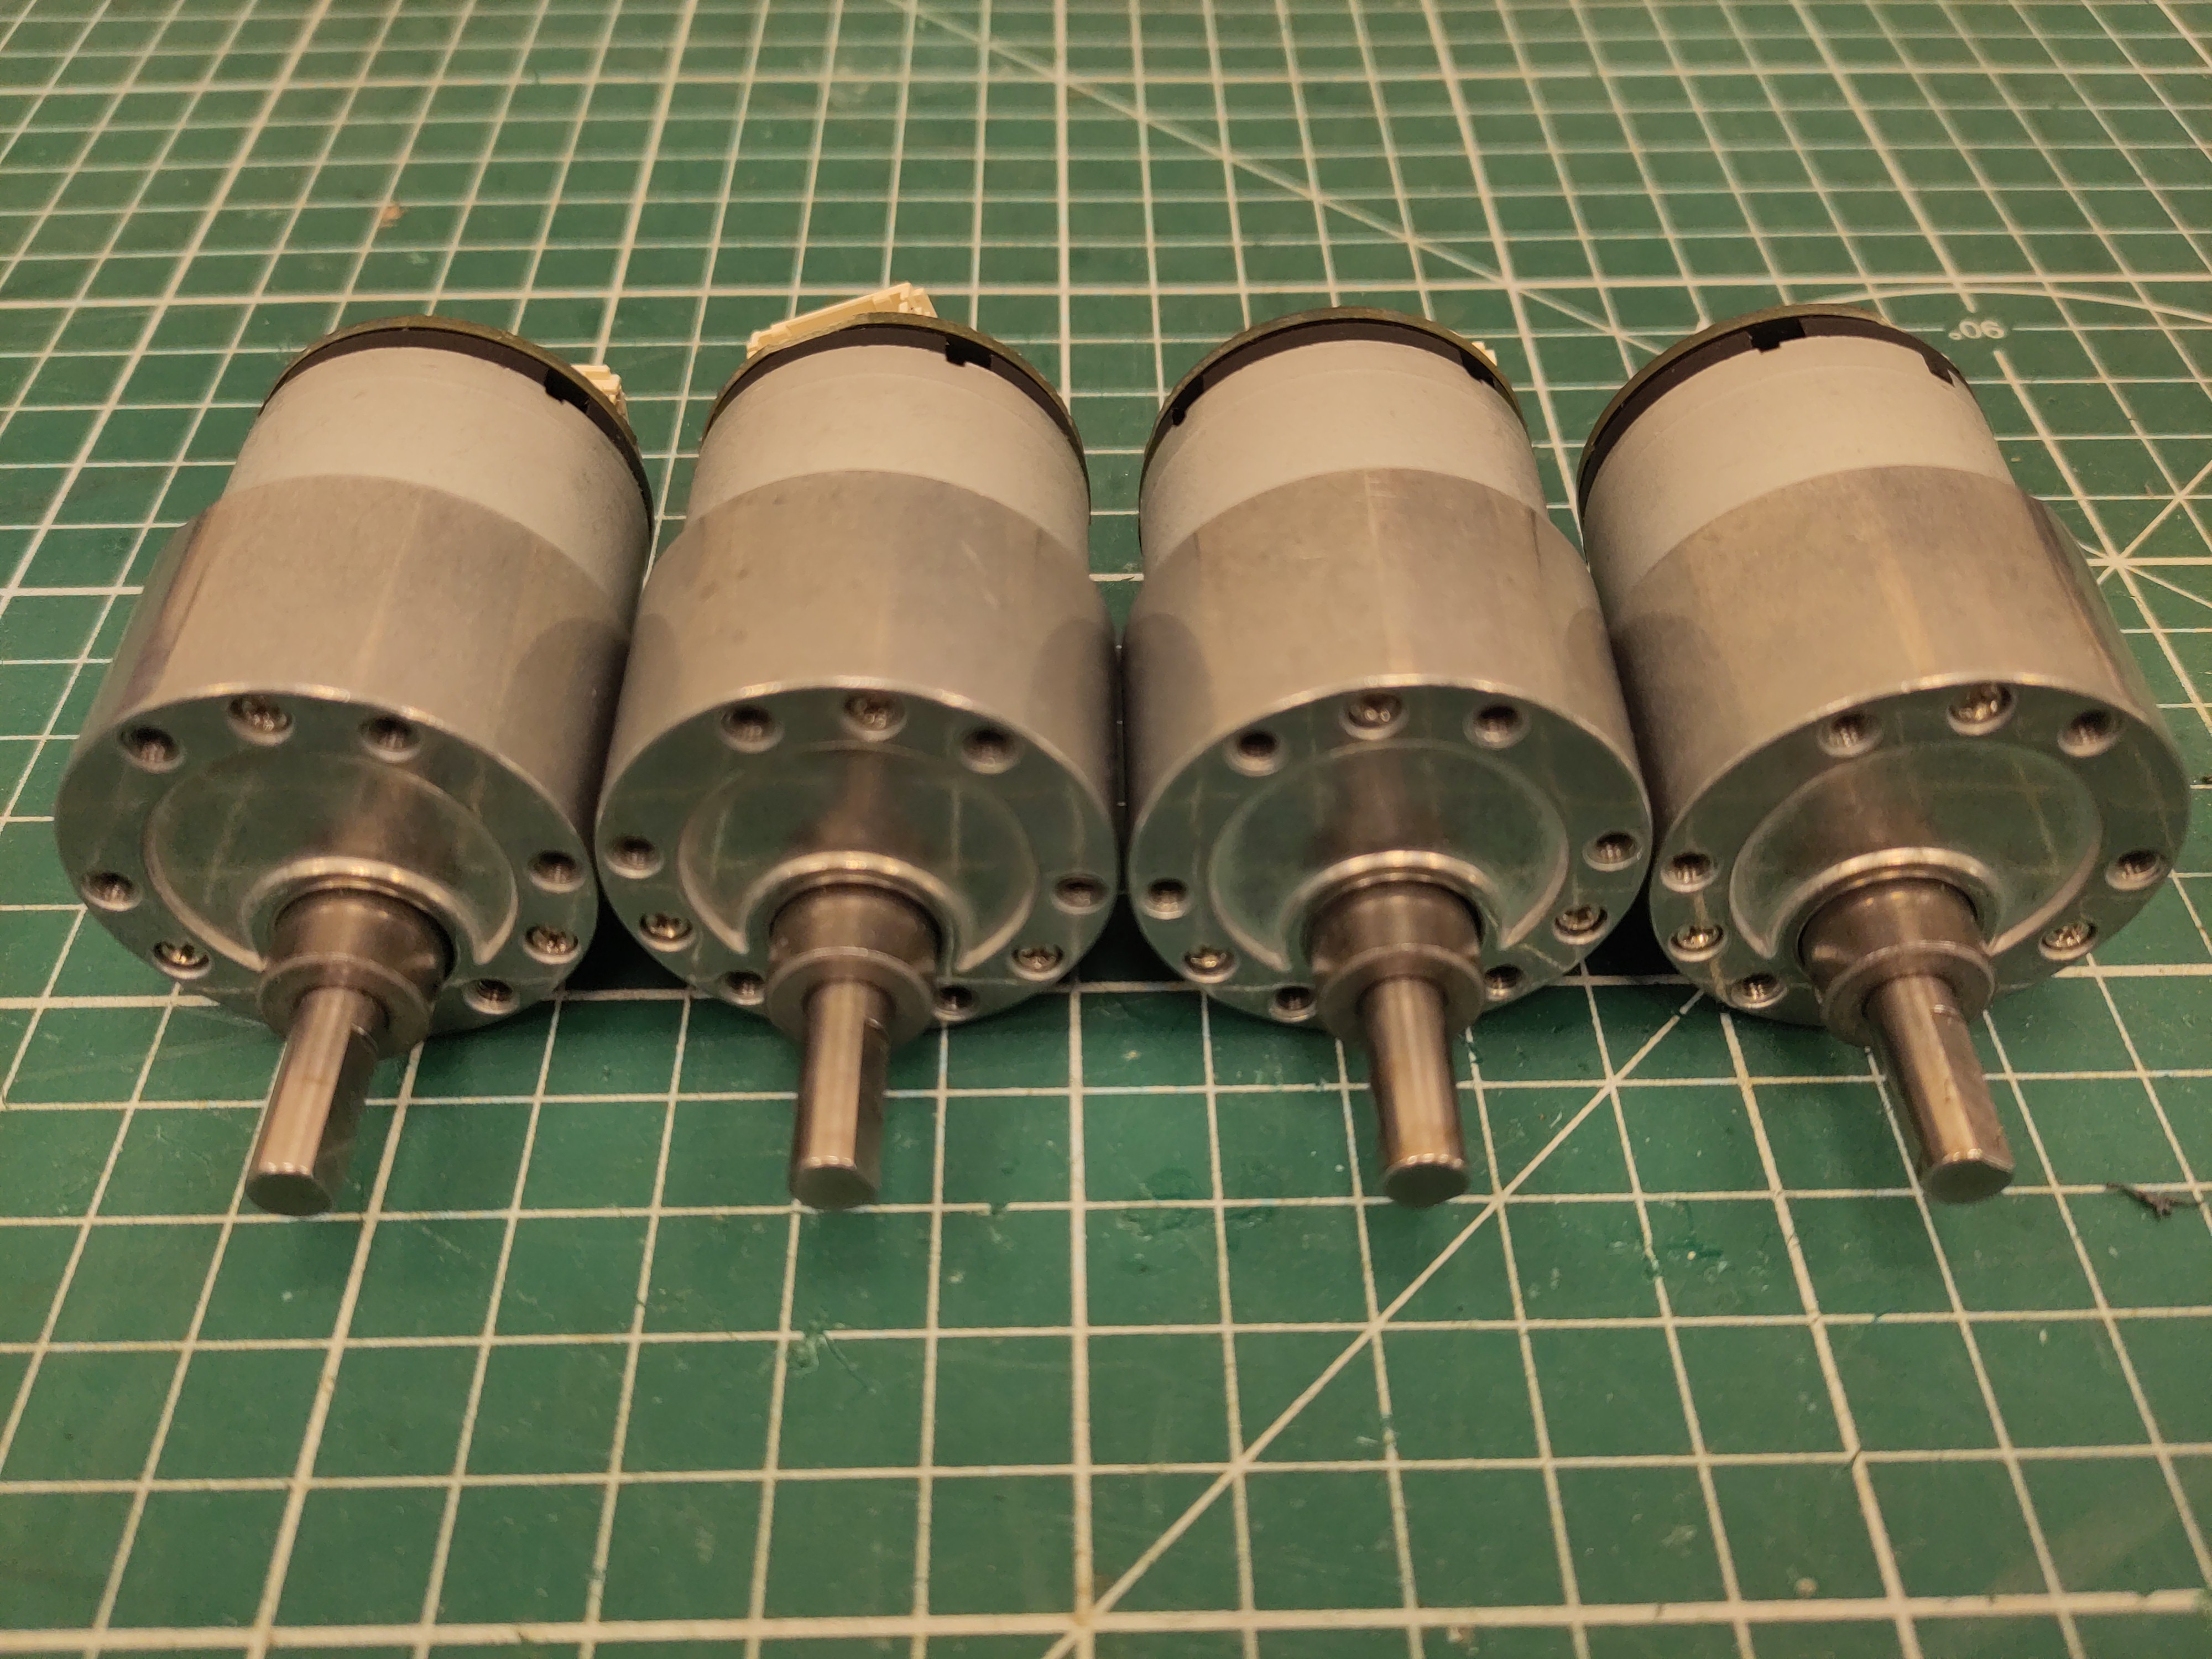
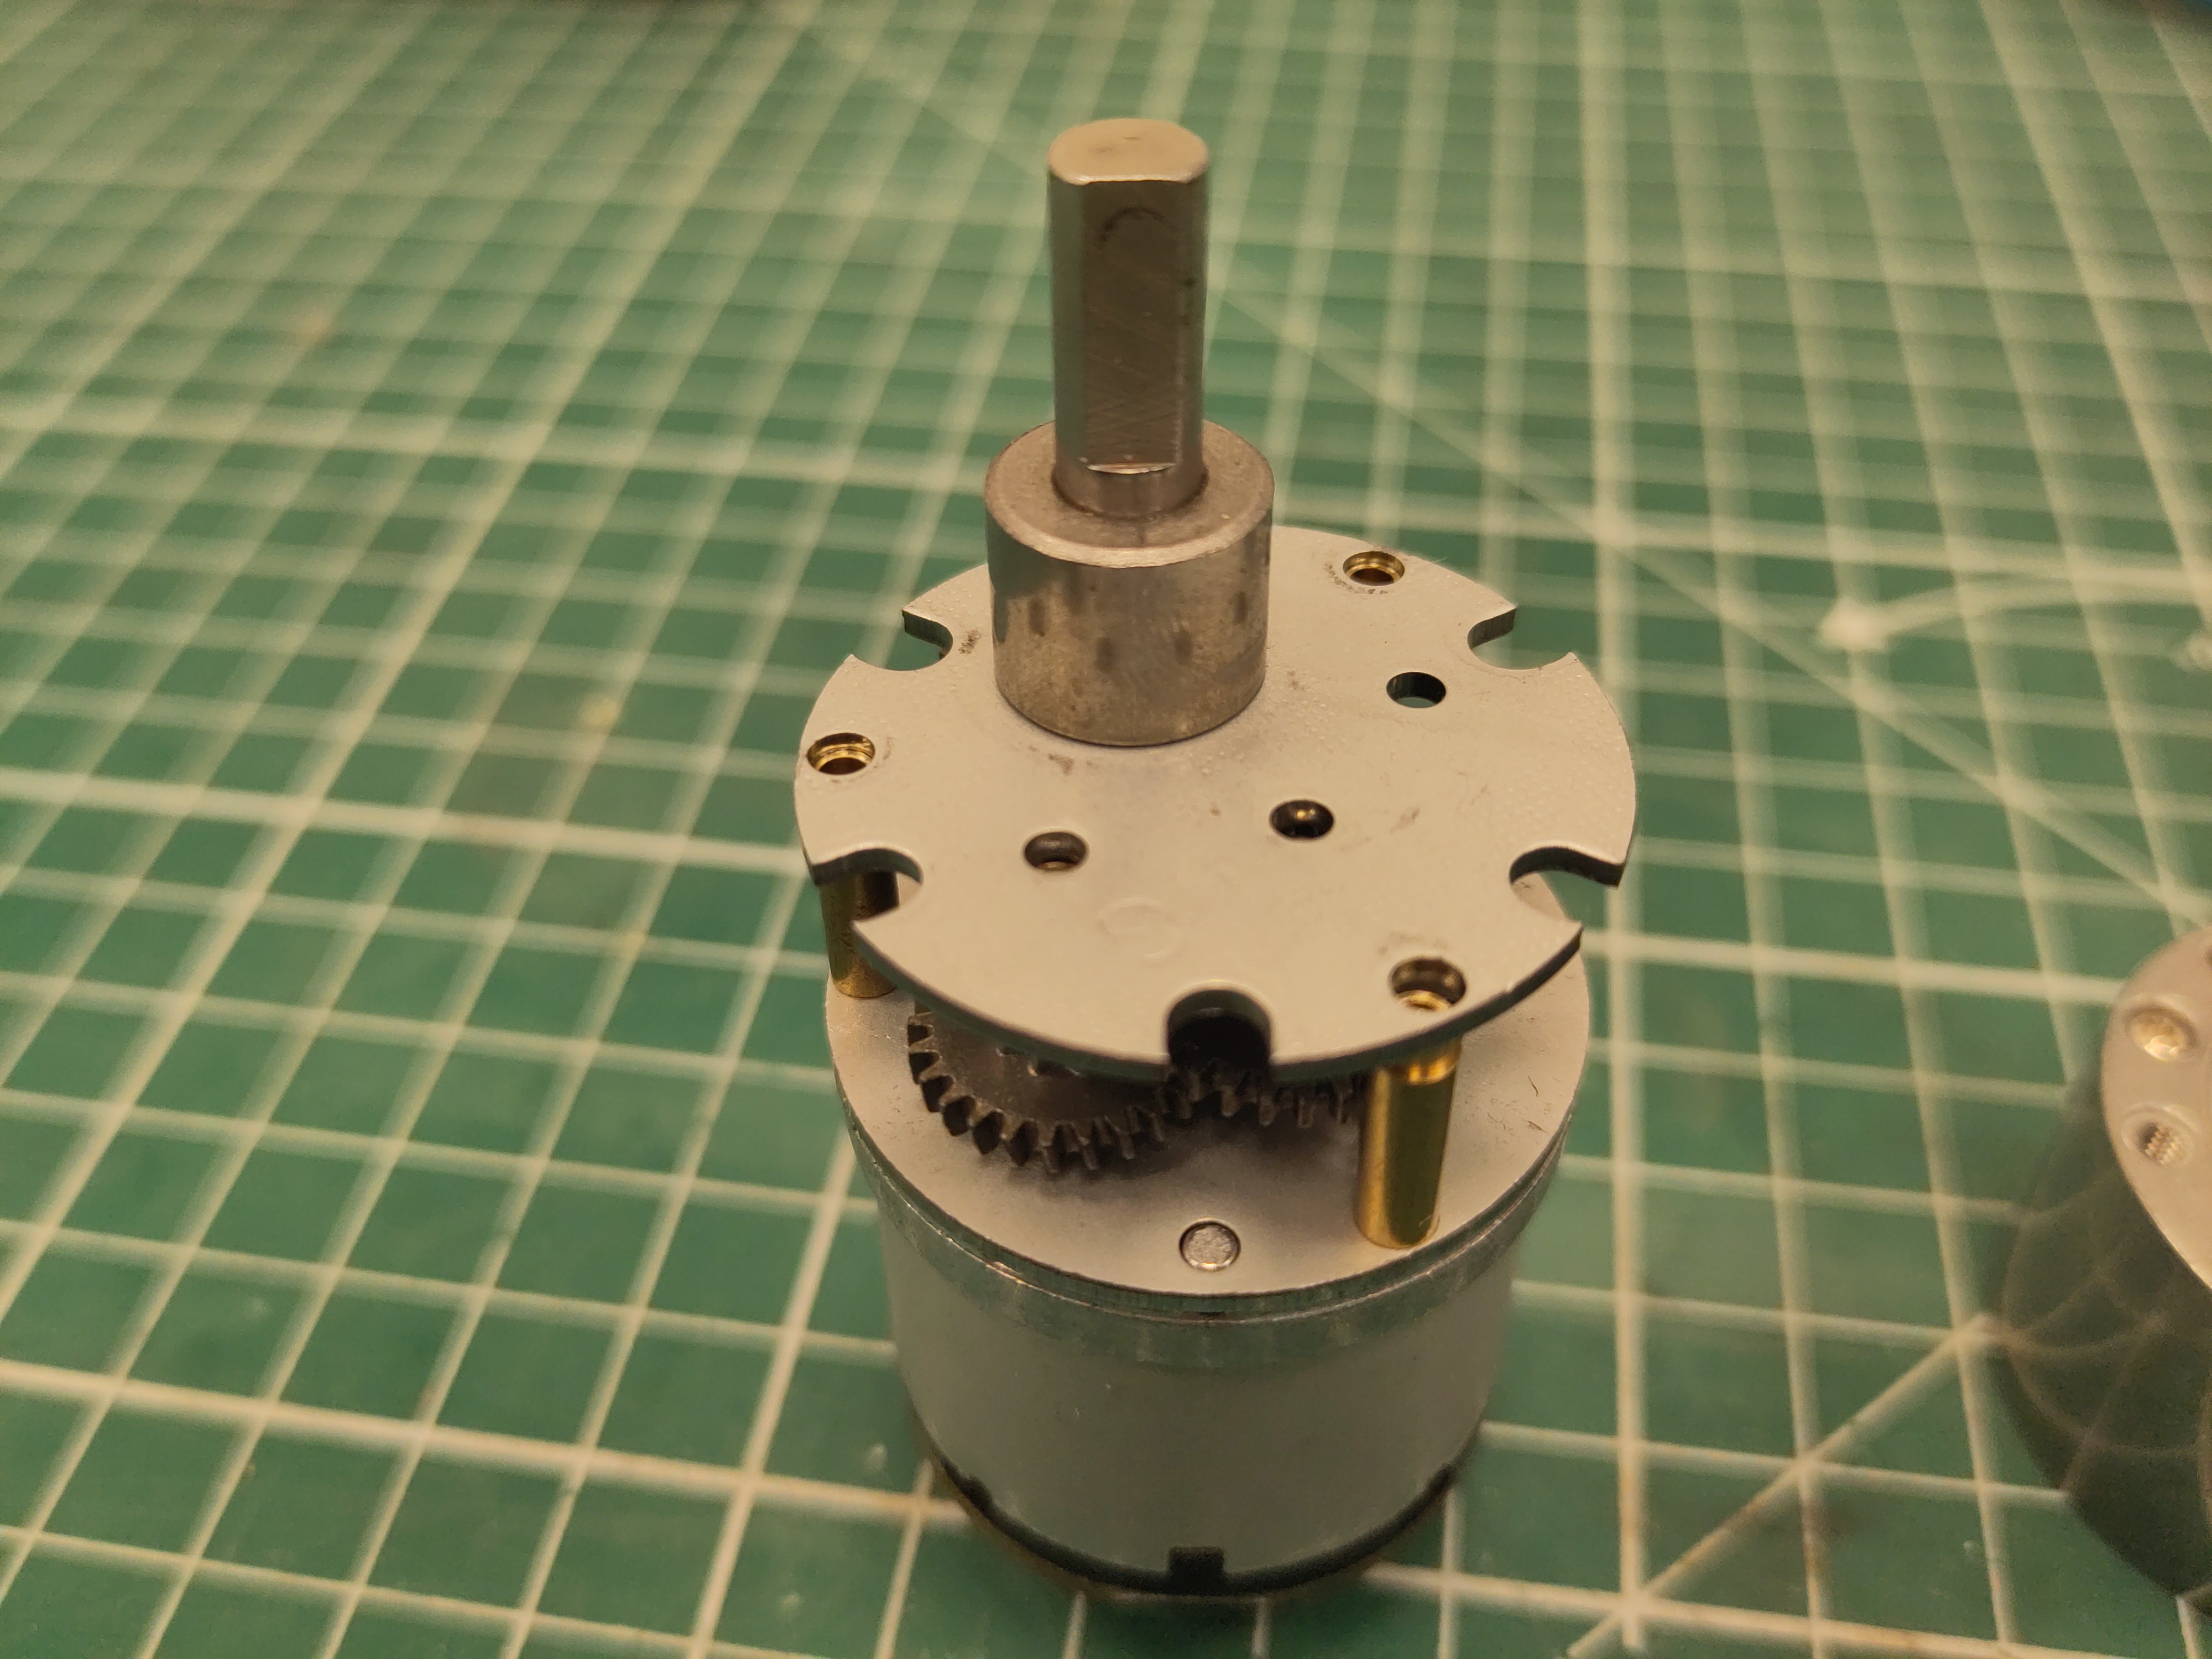
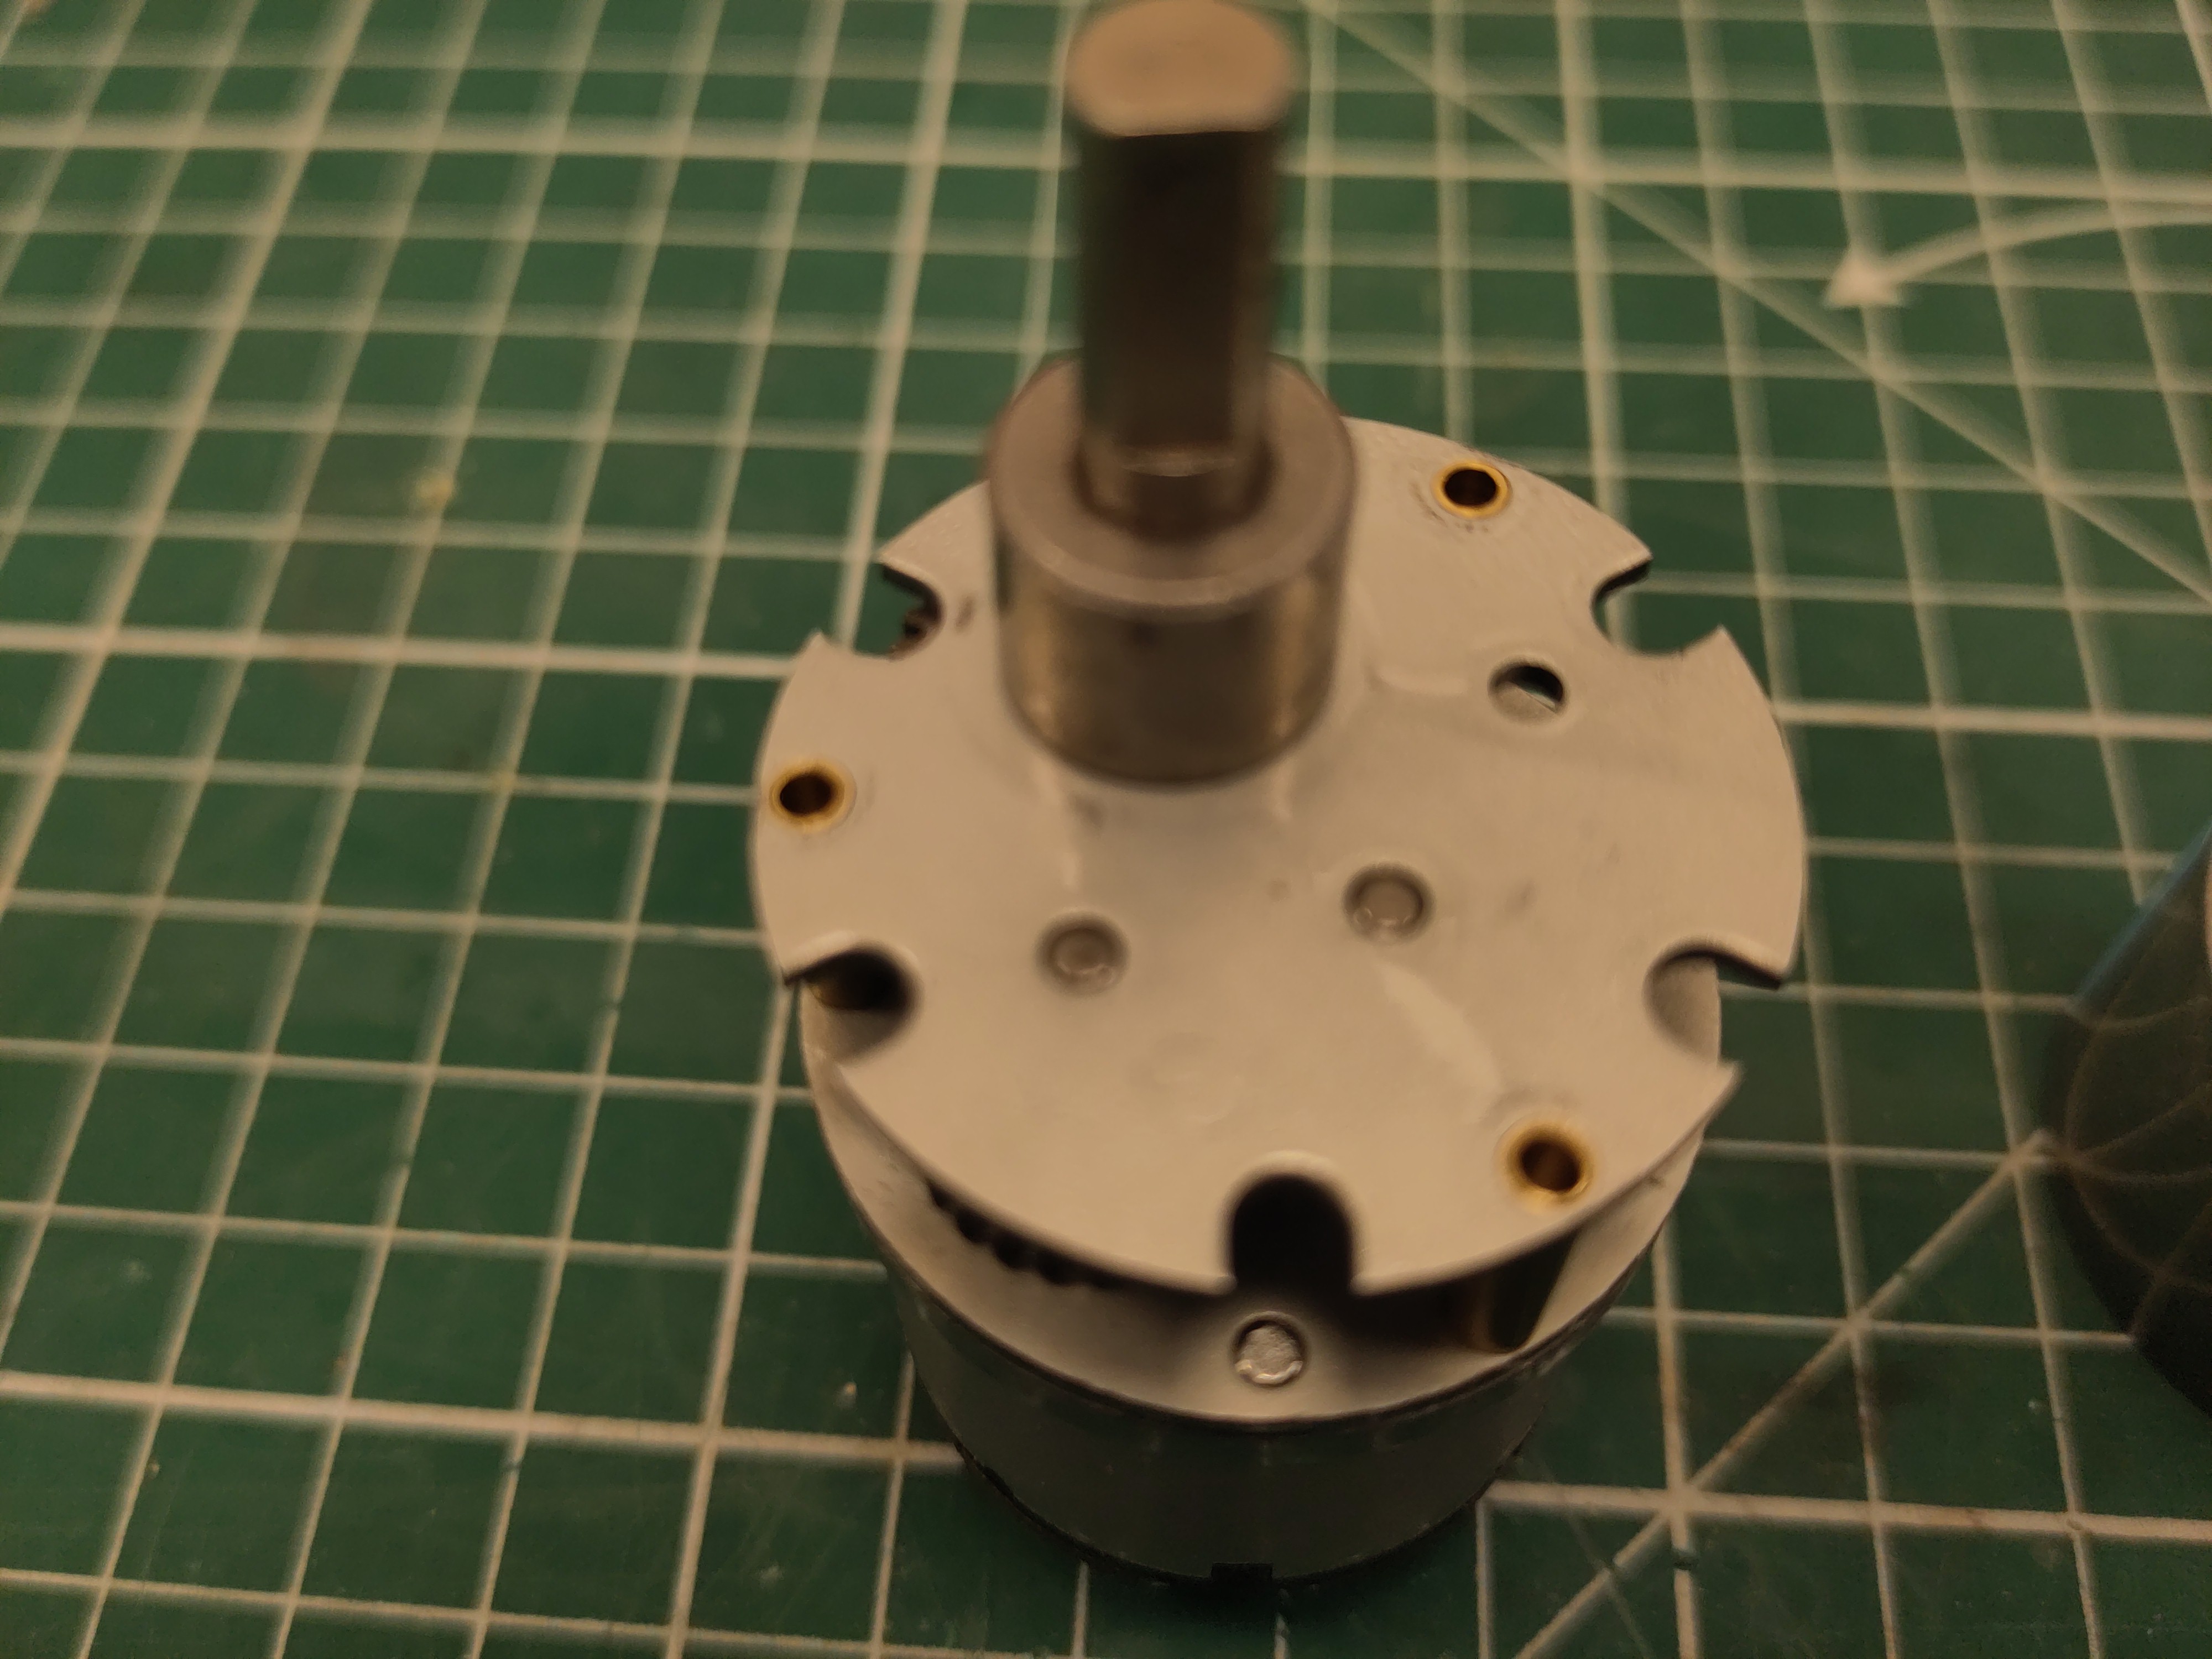
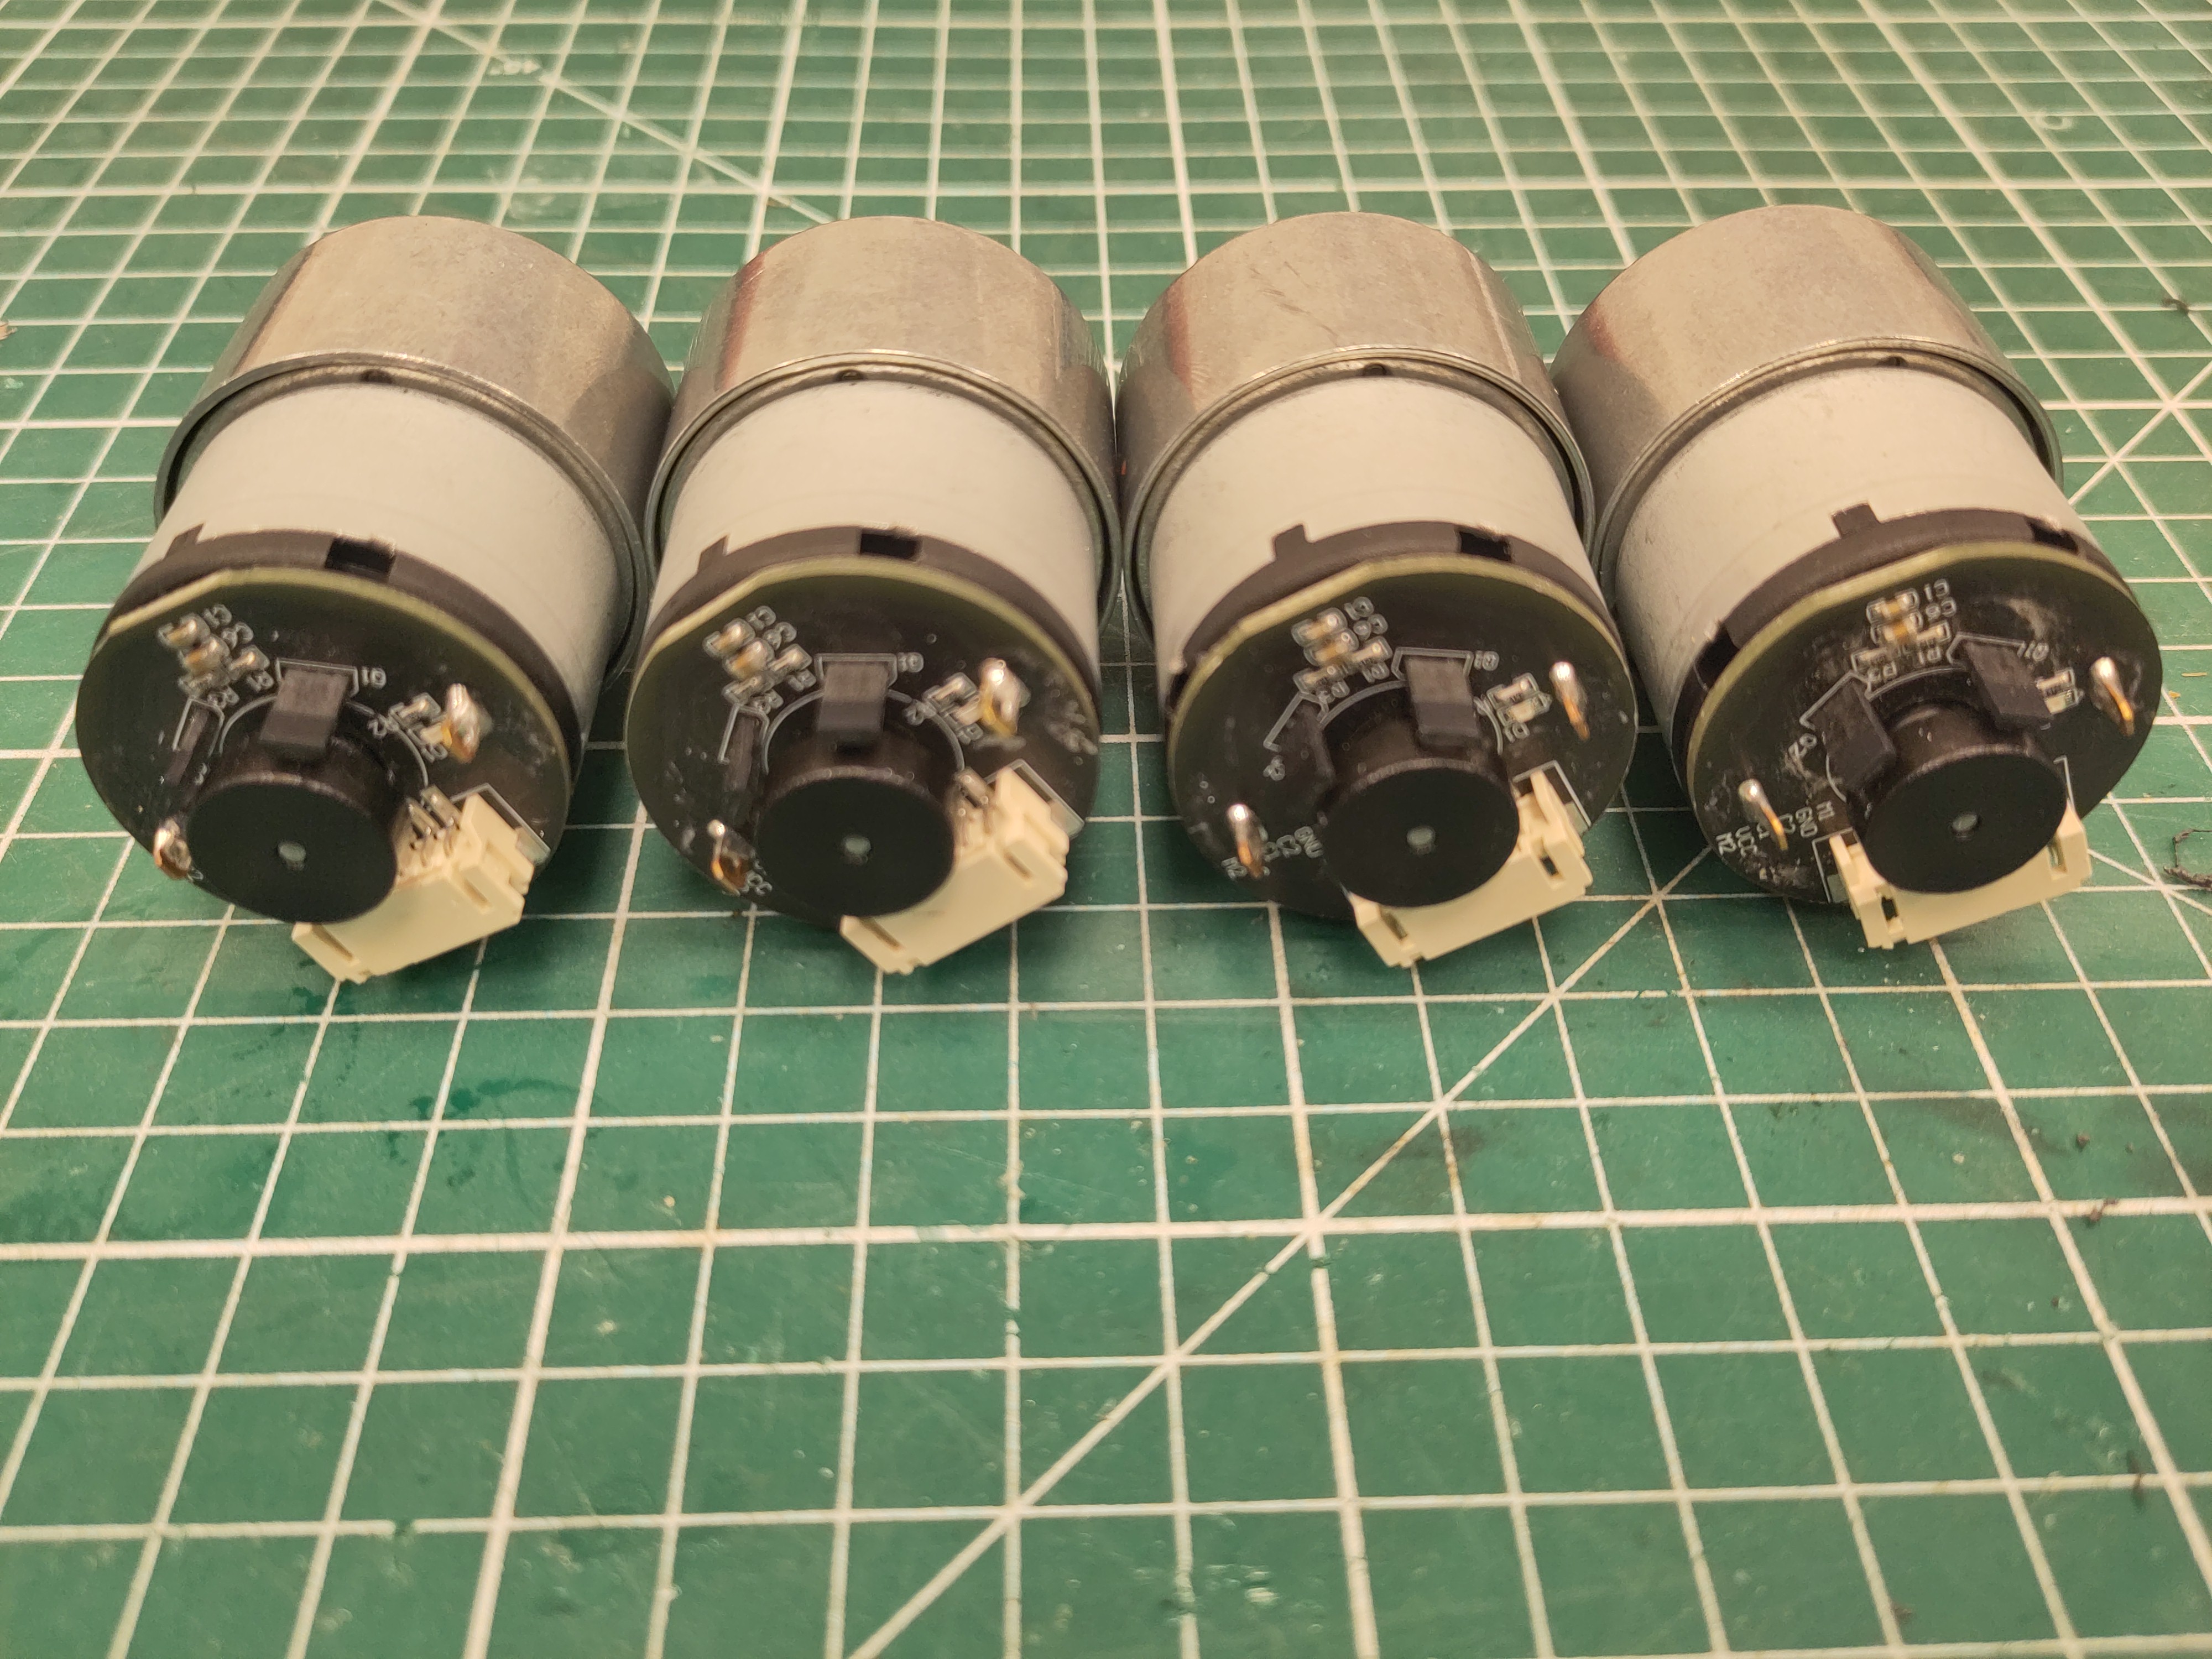
Orient the motors with their shaft down.
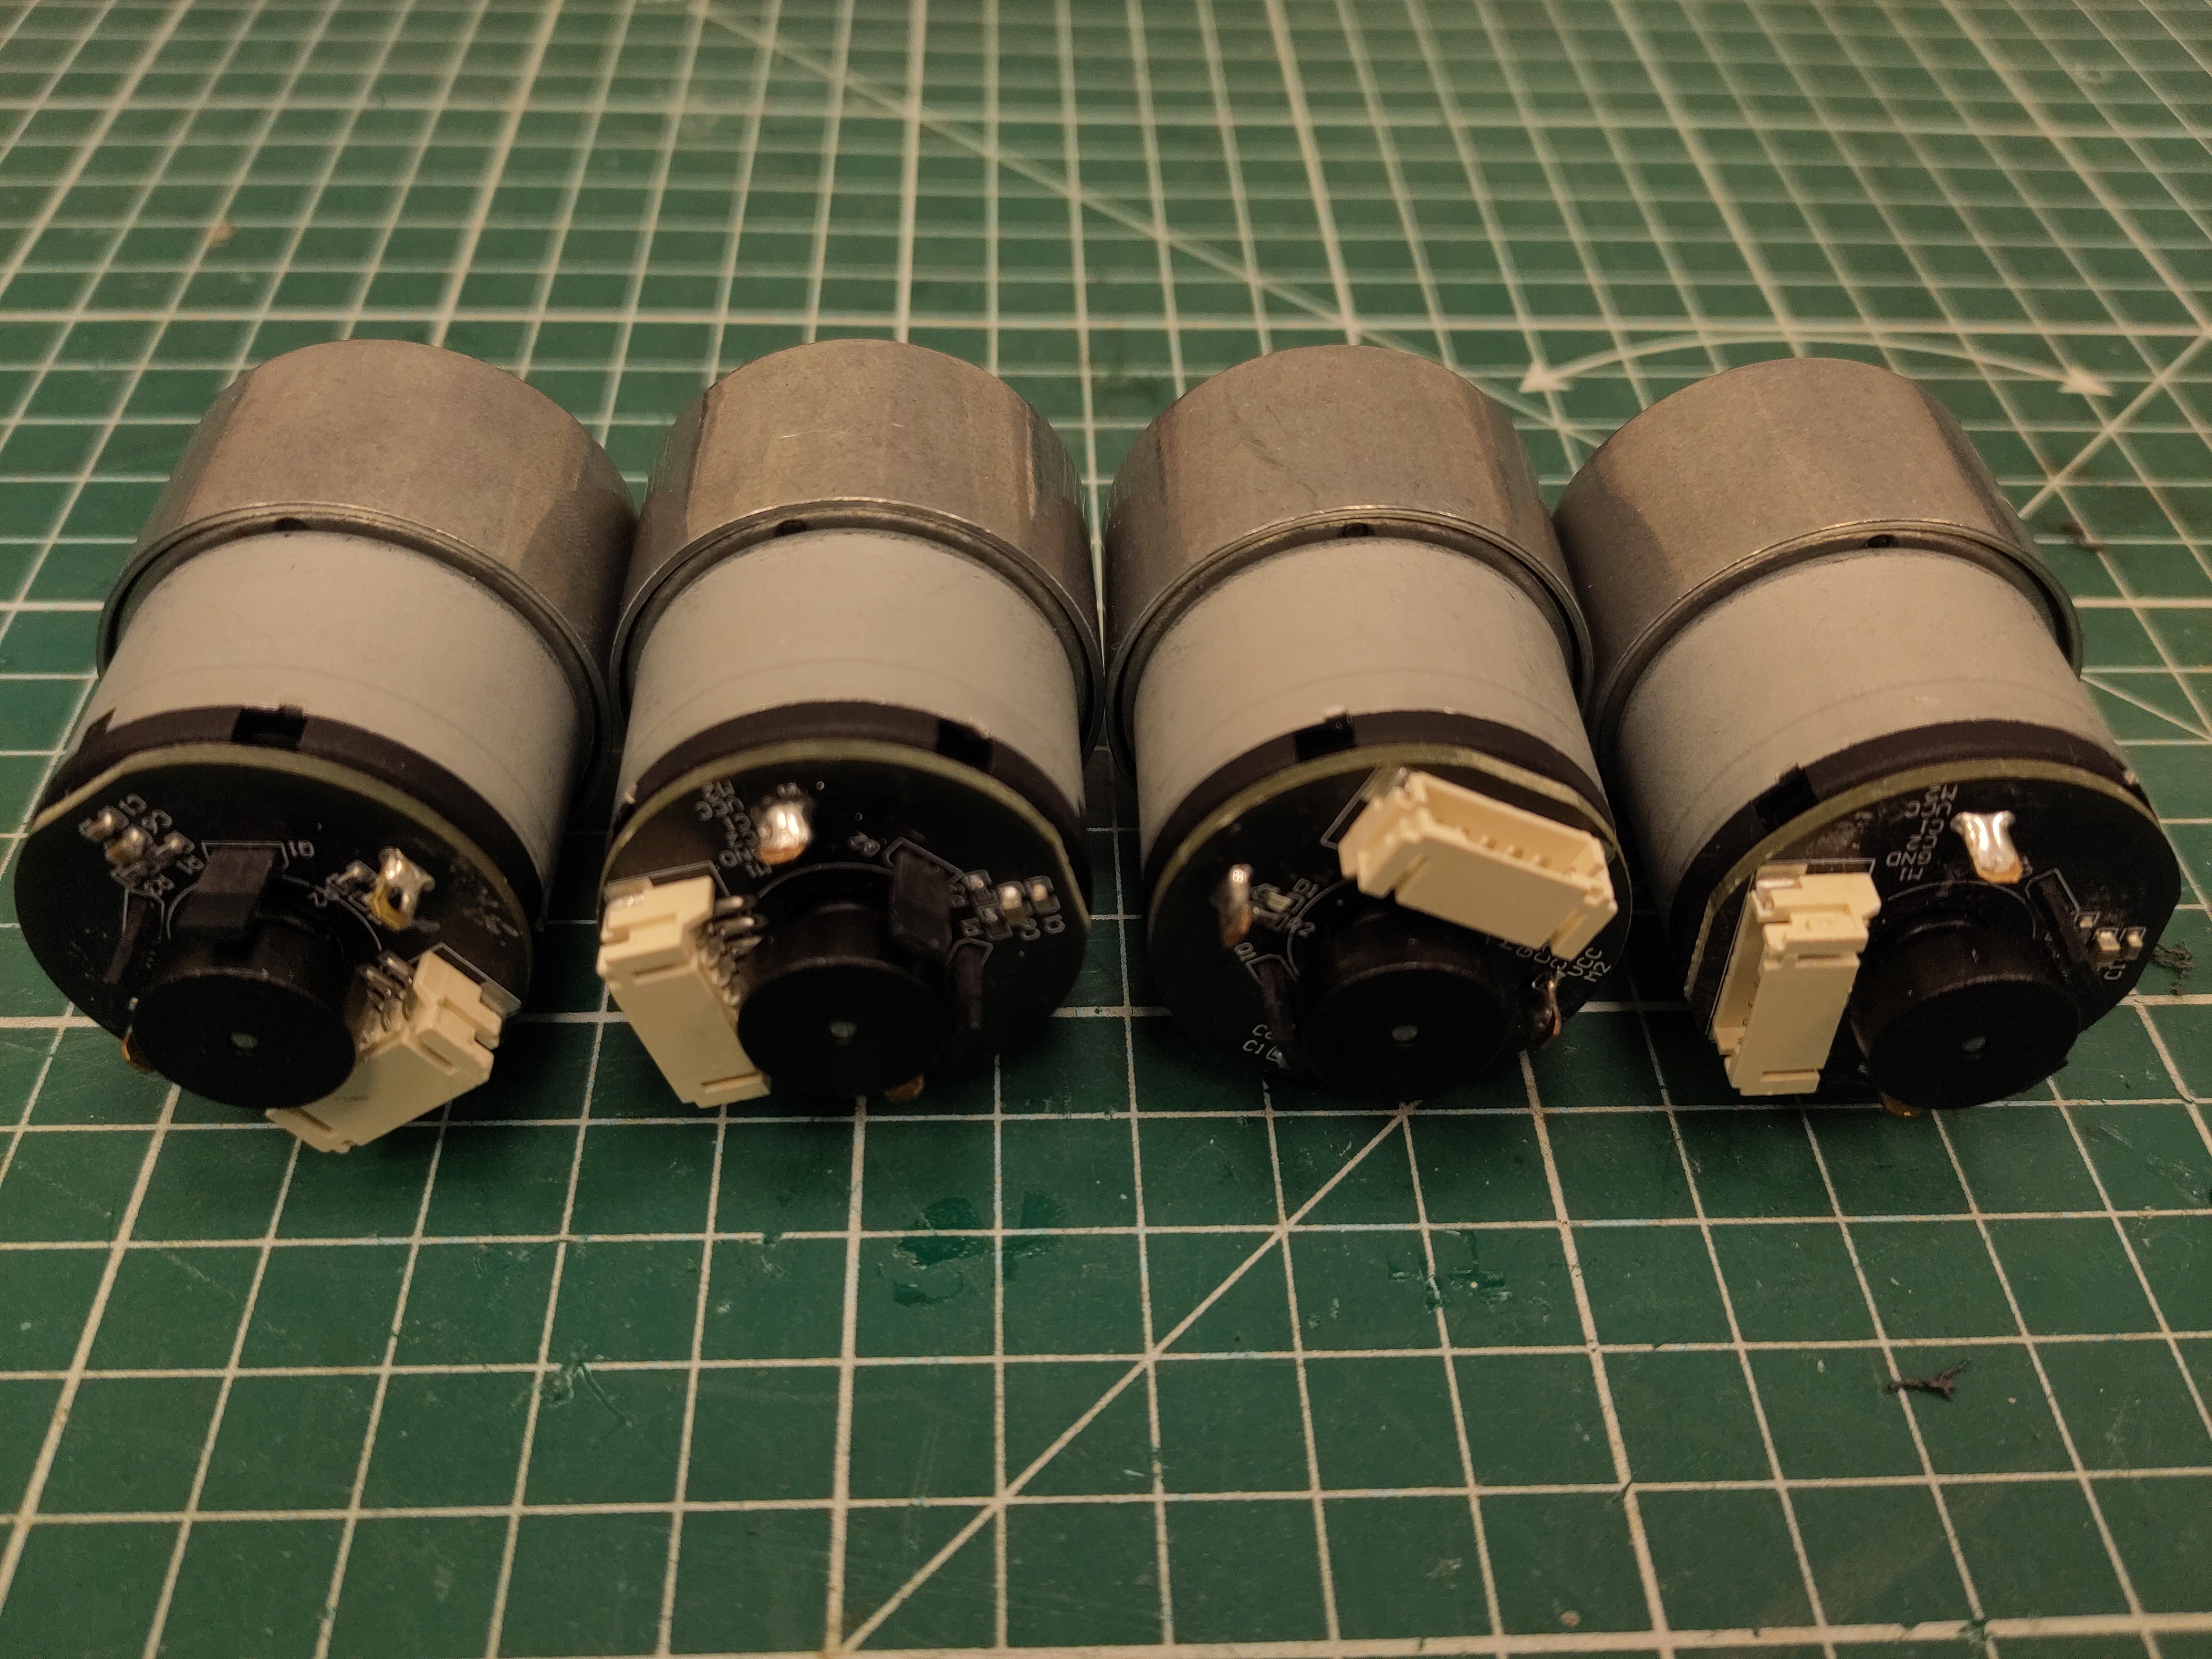
Depending on your motors, you need to reorientate the shaft location. In this picture, only the left one is correct. The others need to be changed.
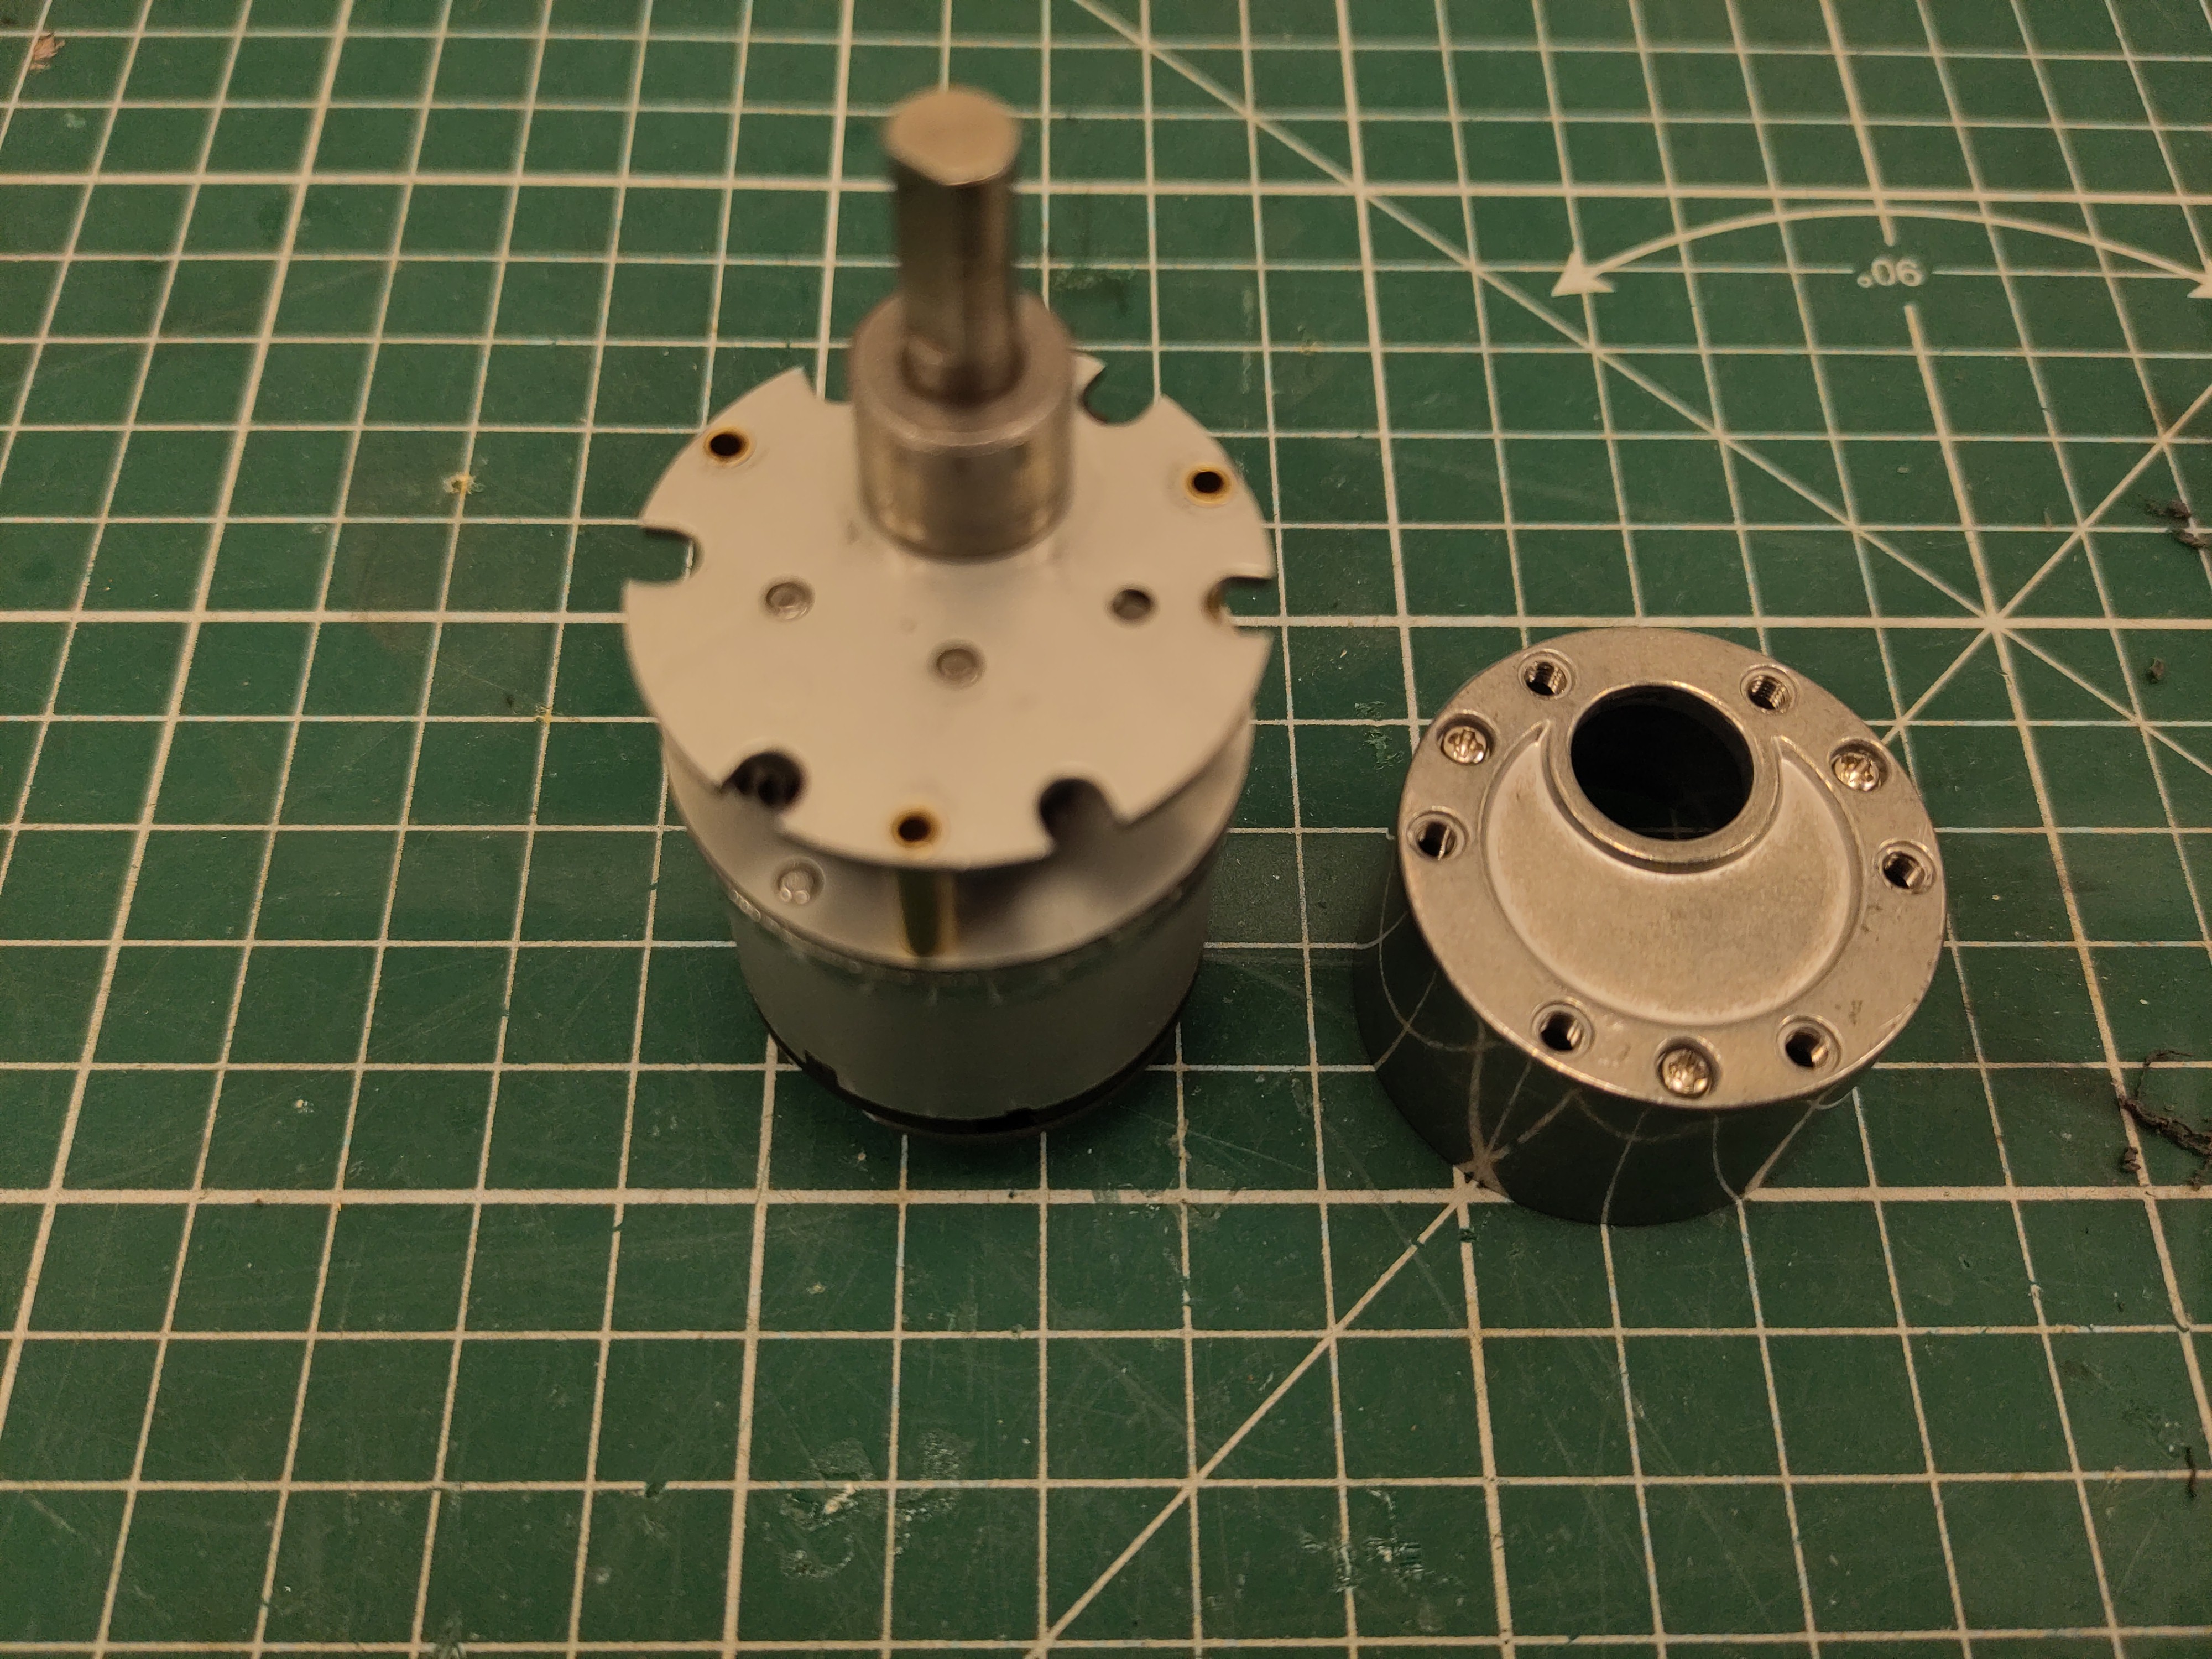
Carefully disasseble the metal cover. The gearbox consists of all loose elements. Make sure to take the cover up as straight as possible.
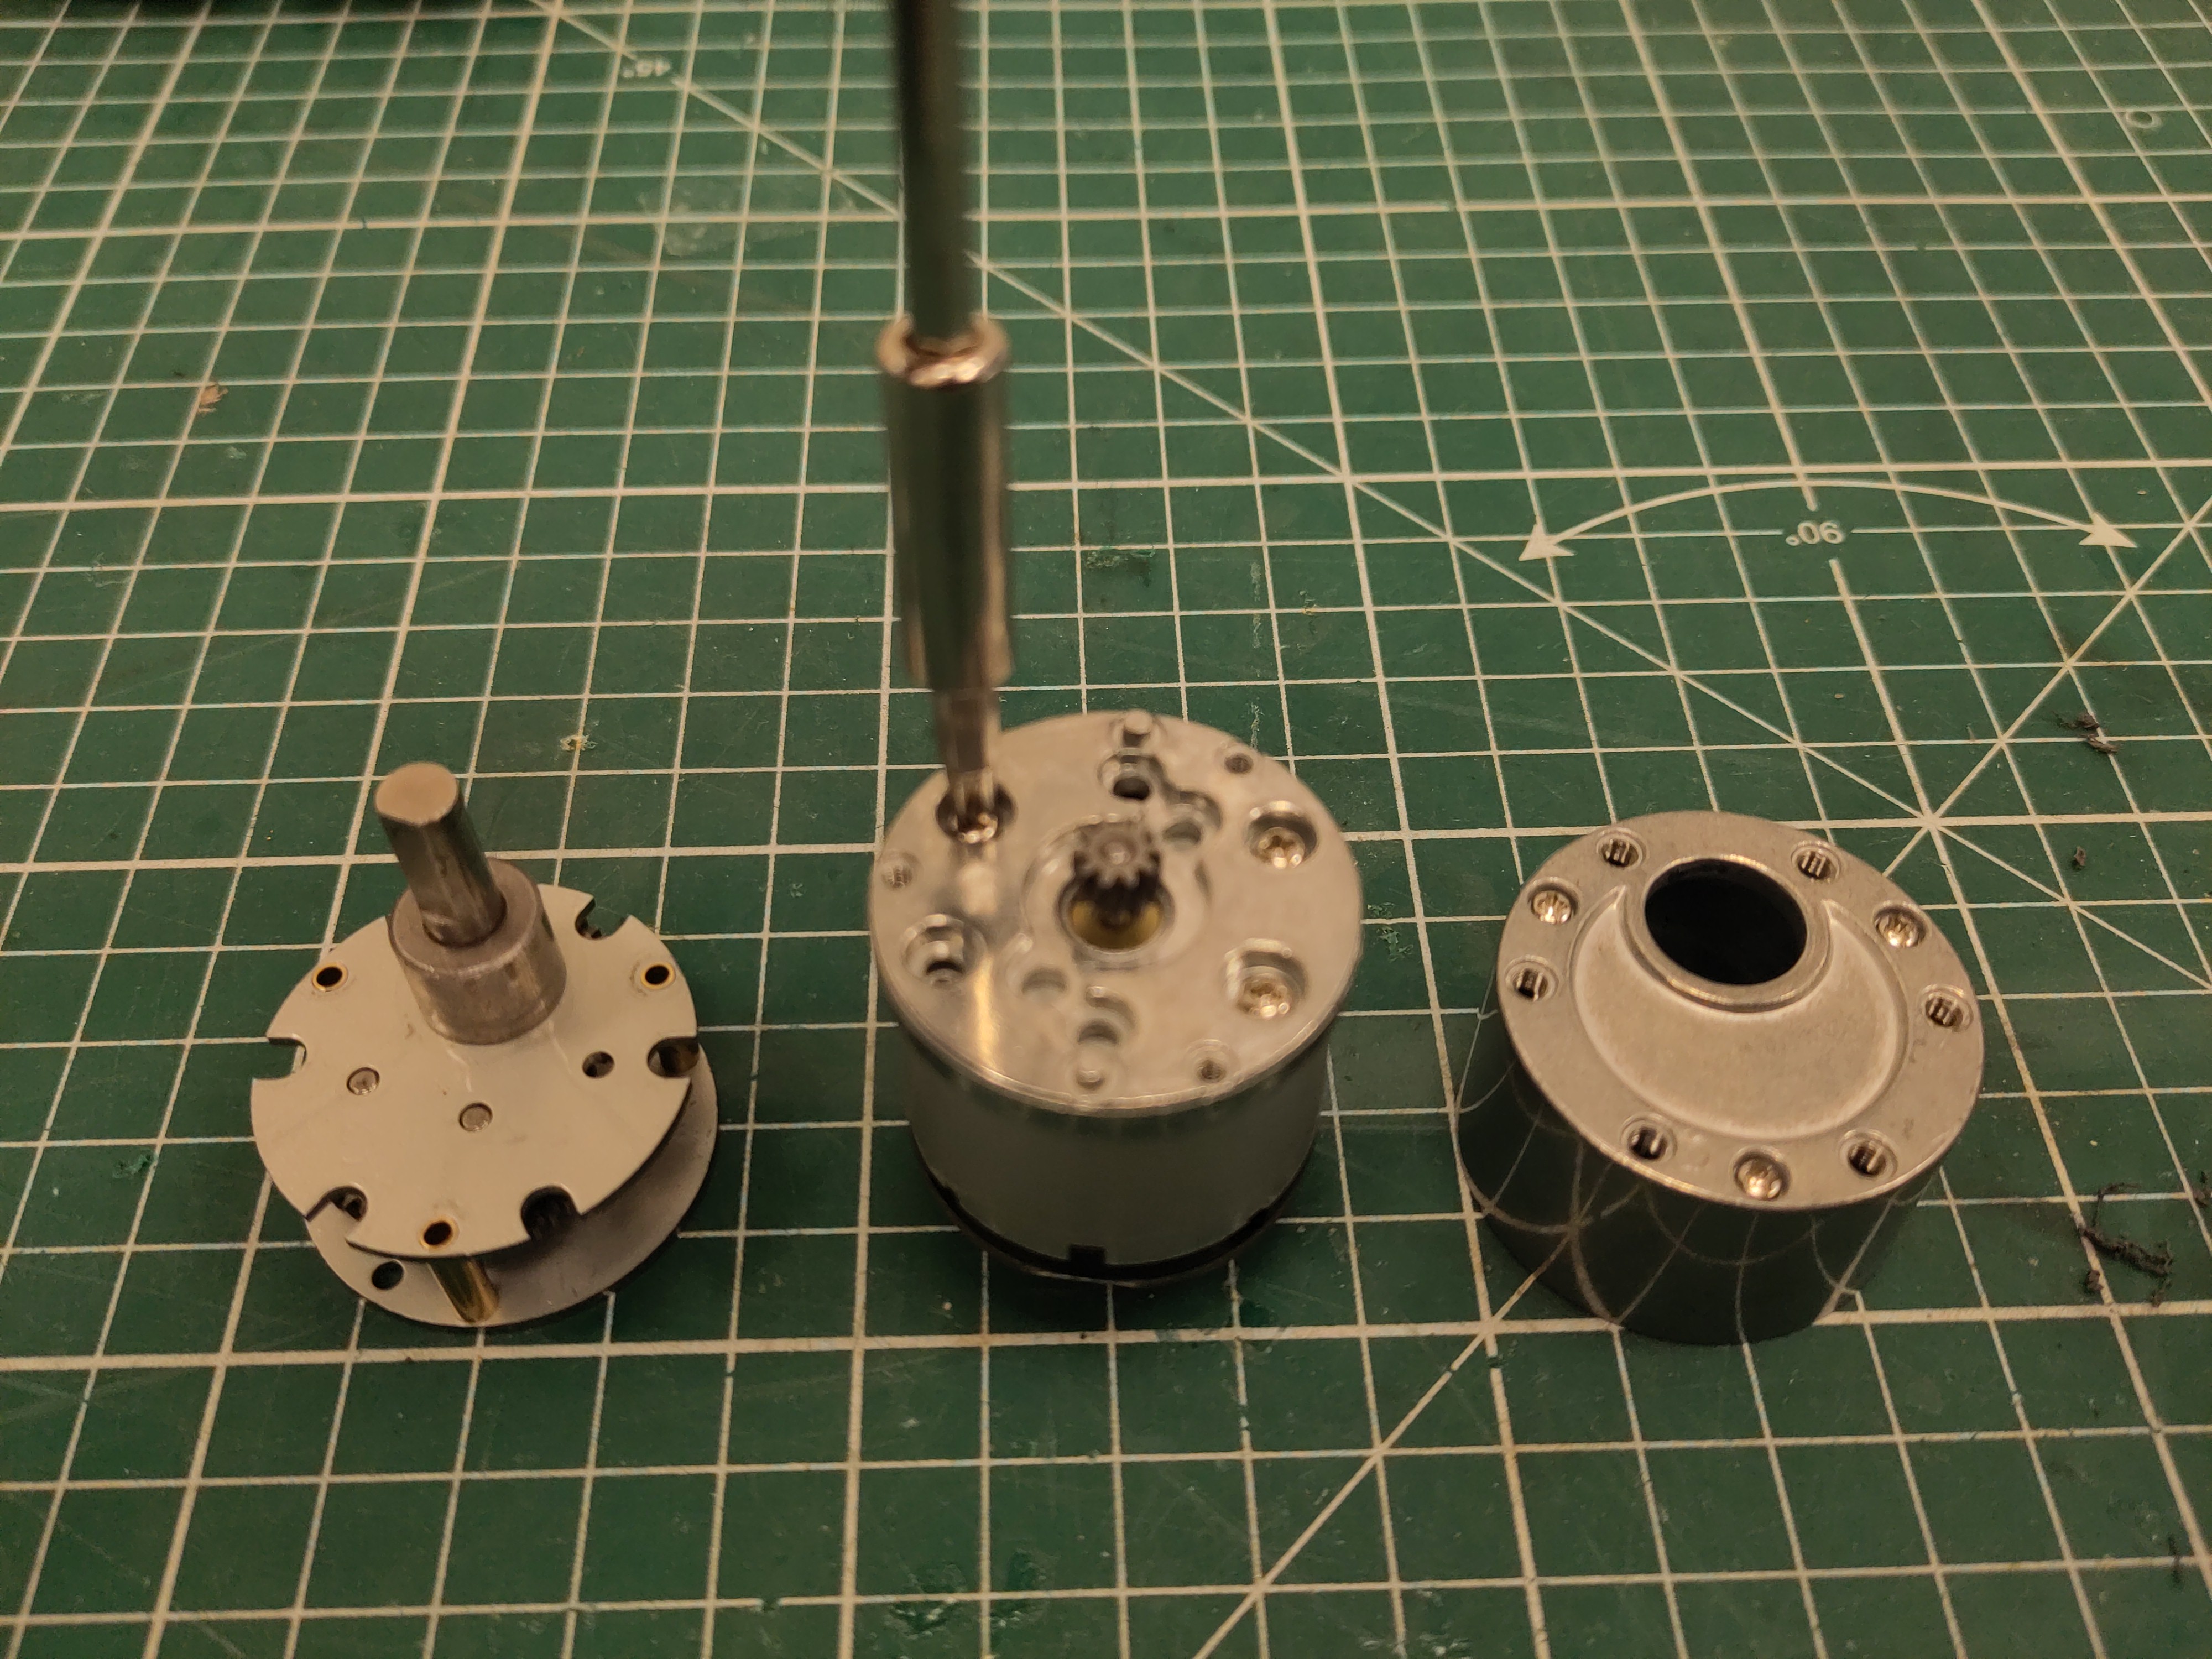
Carefully remove the geabox, and unscrew the last plate.
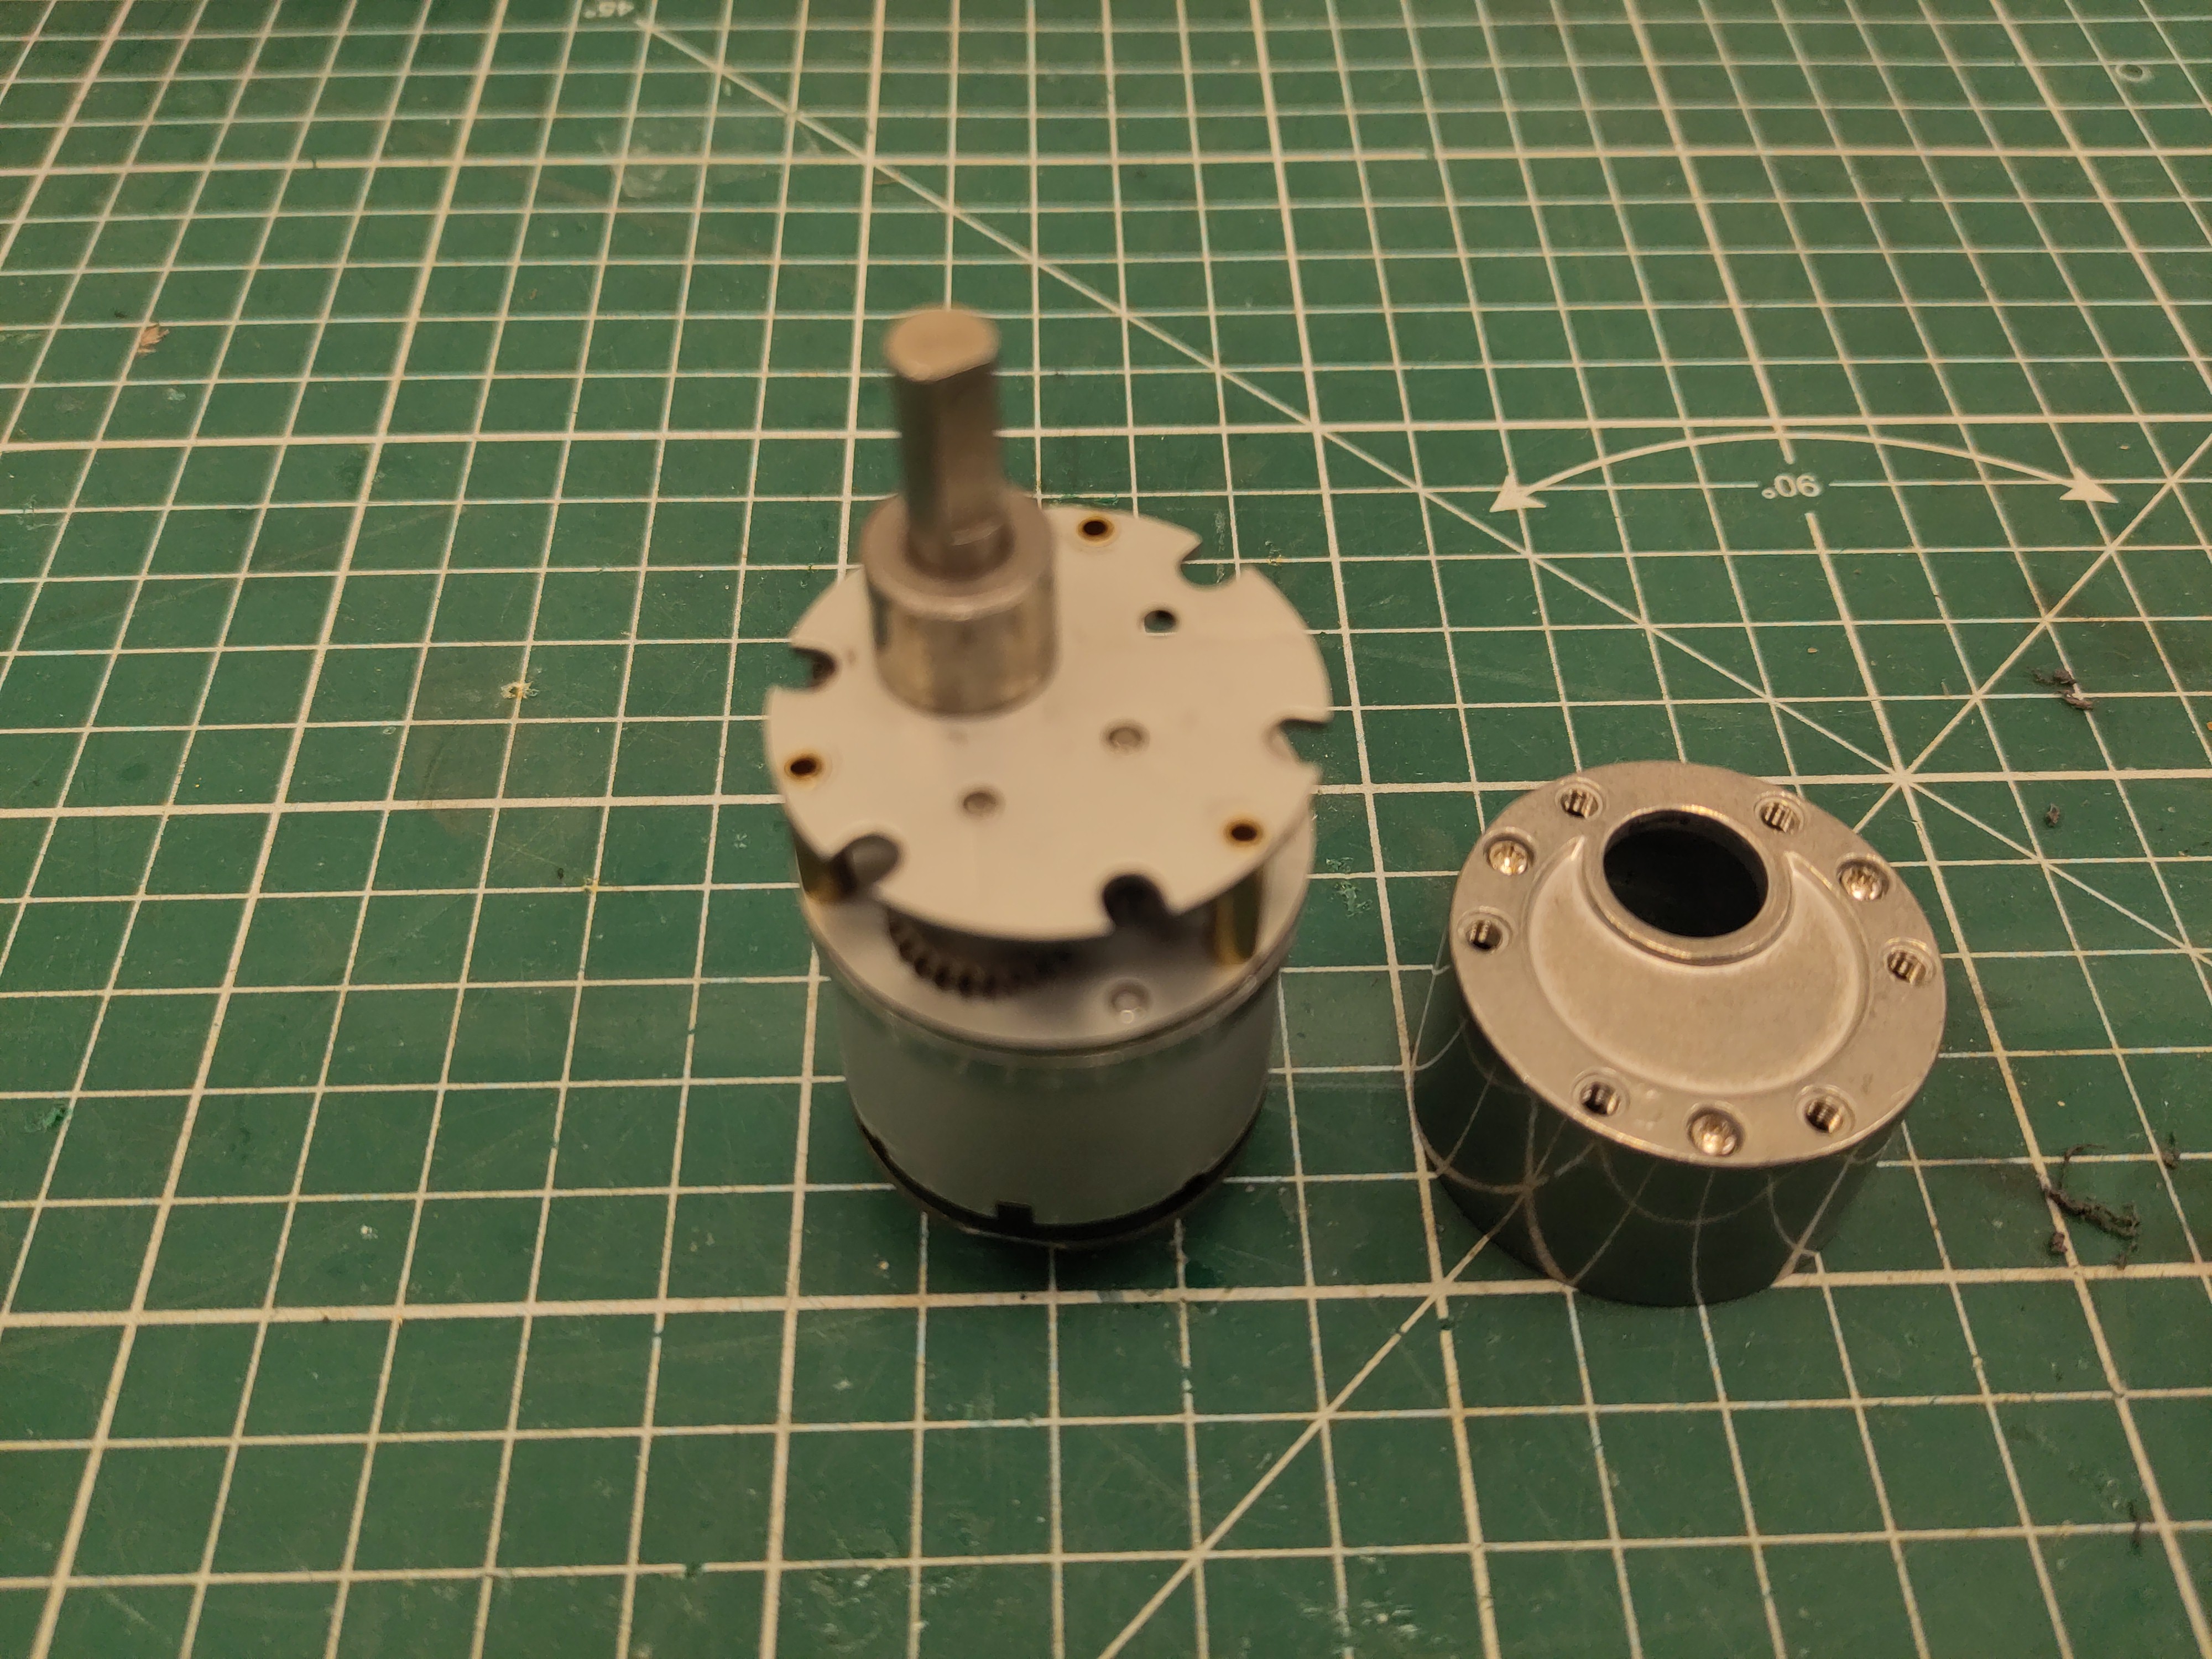
Put the gearbox back on the plate, and try to turn the plate/gearbox combo until it is roughtly in the right direction, and the screws of the plate are aligned with holes.
Fix the plate in the right orientation.
Put back the gearbox. Especially the brass stands might have misaligned a bit while doing so. Make sure to wobble the geabox carefully in order to realign the gearbox.
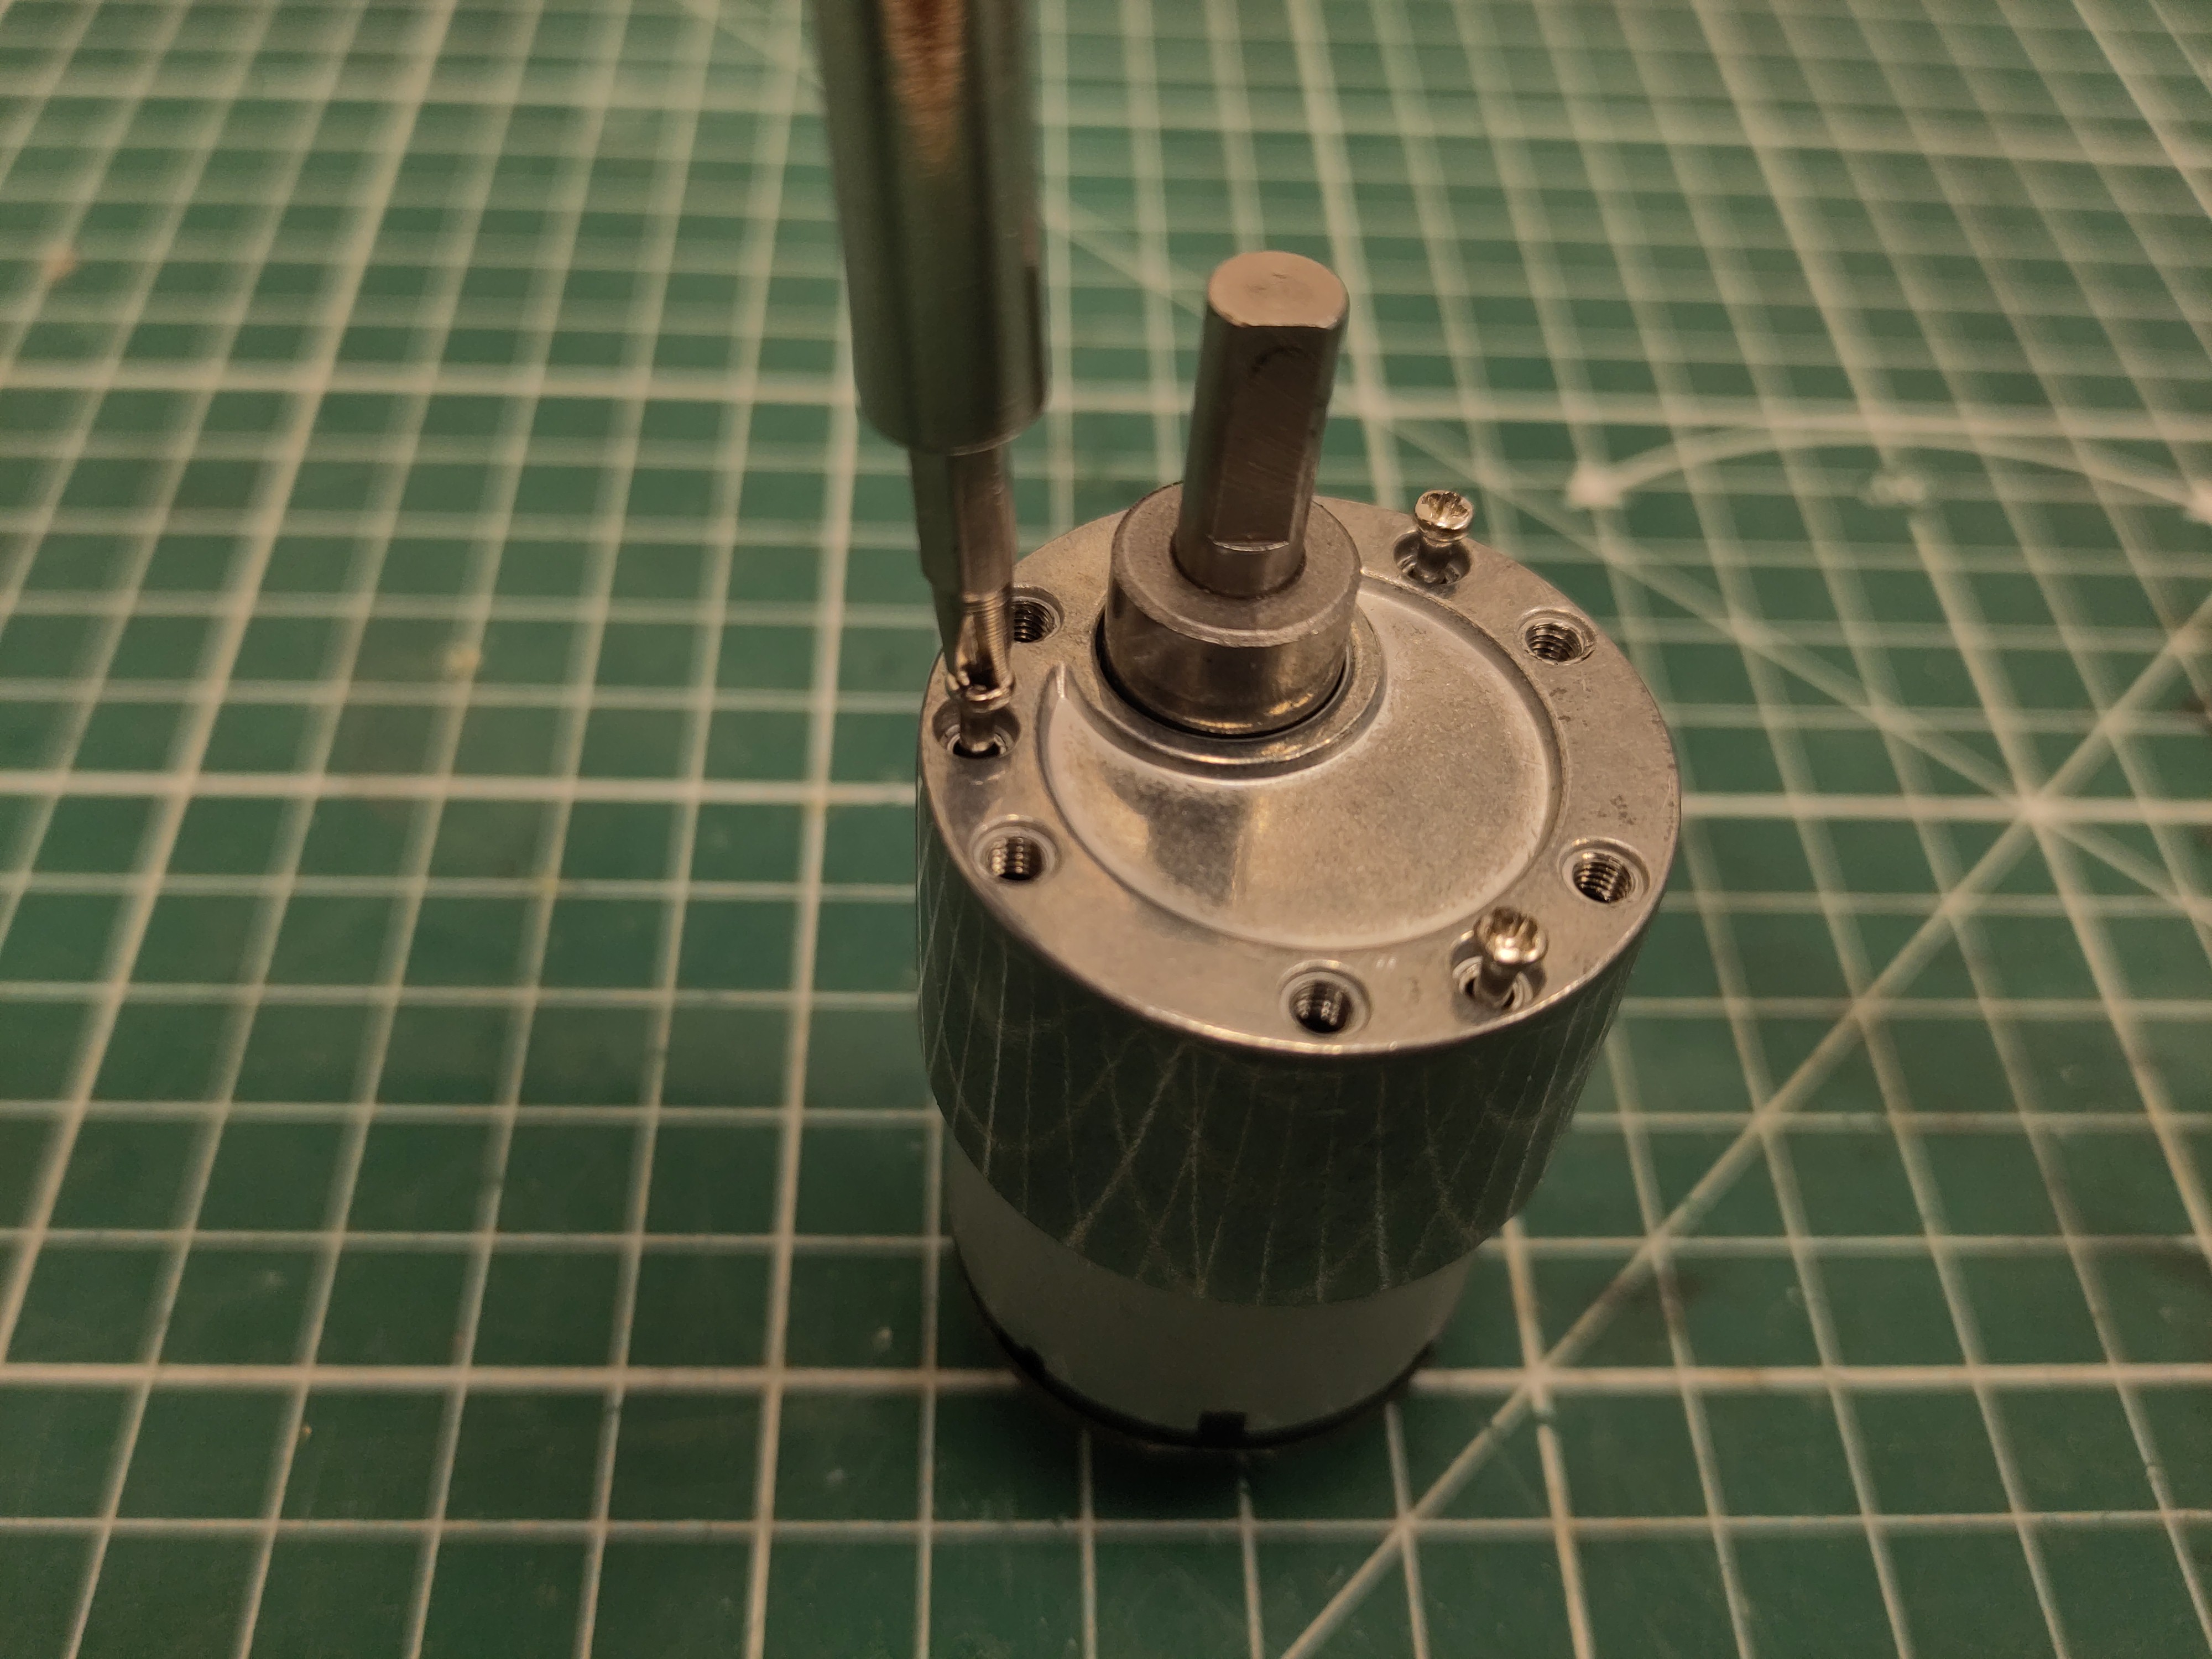
Reattach the cover.
All motors should have their connector roughly on the same side as the shaft.